|
|
Post by dartjeep on Jan 27, 2013 17:12:14 GMT -4
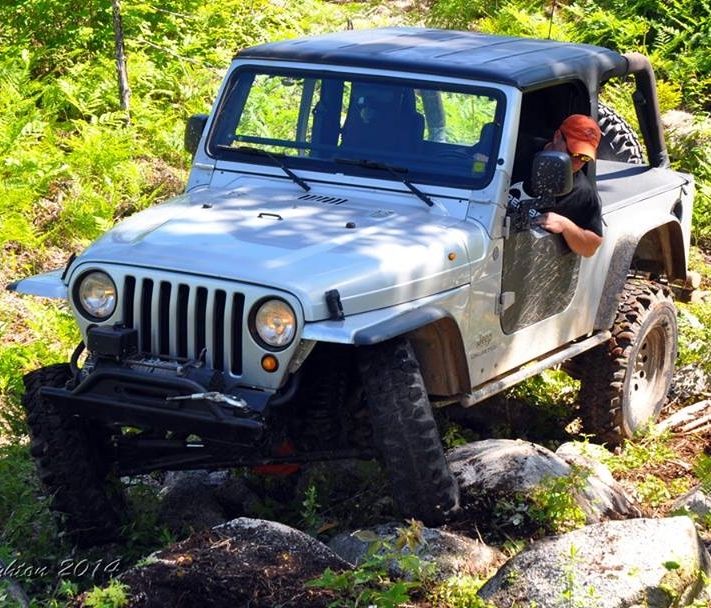
Well it was too nice of a day out to not get stuff done so I tried a little experiment with painting chrome wheels. They have some surface rust on them that comes off easy with some elbow grease but it comes right back... time for a coating. I'm keeping the spare for now when my tires sell so I started with that one. Cleaned up as much as I am willing to go- 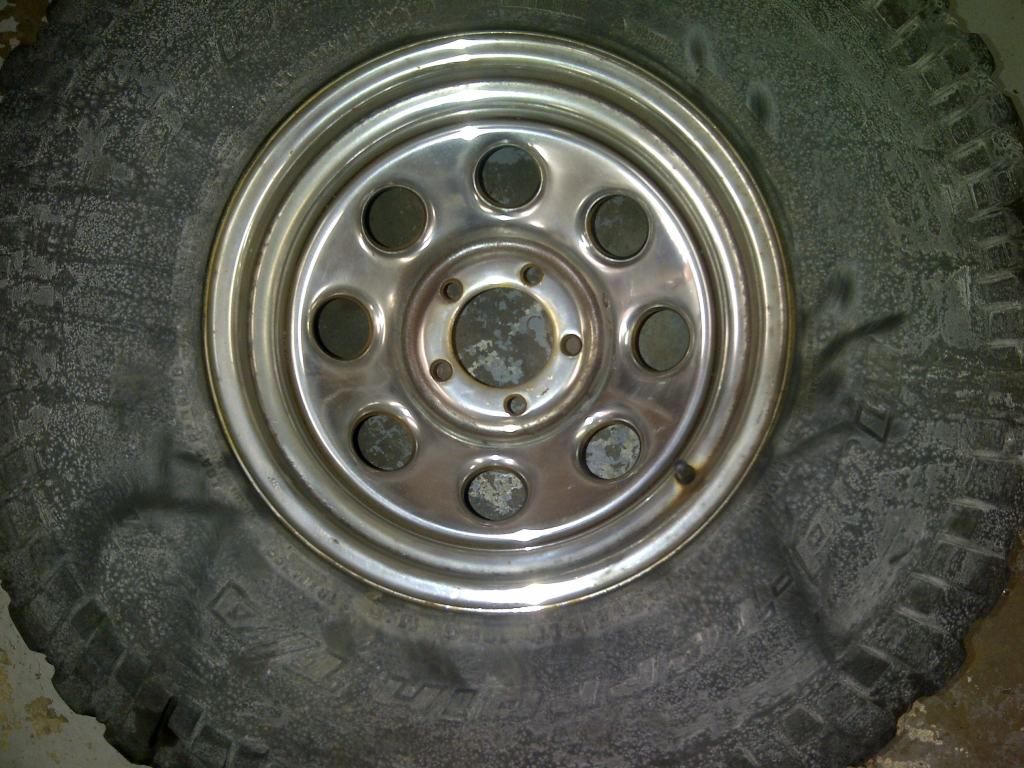 with this guy- 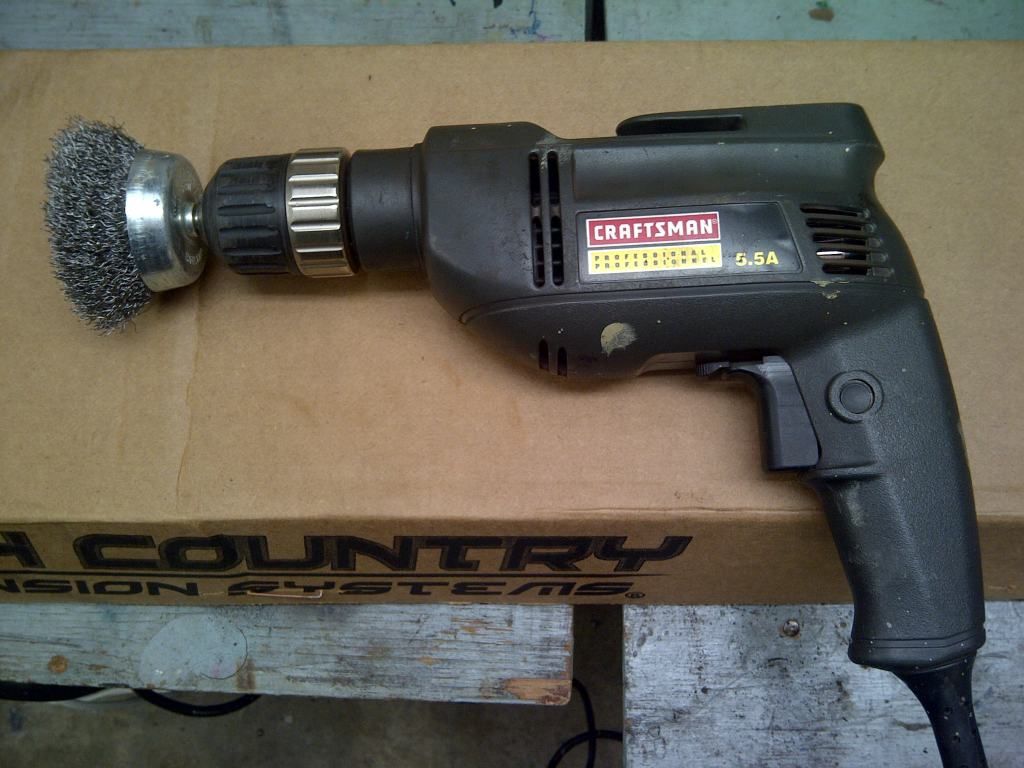 self etching primer. this is your secret weapon when trying to coat something like chrome that paint won't normally stick to. make sure your wheel is dry and free of any grease/oil/road crap- 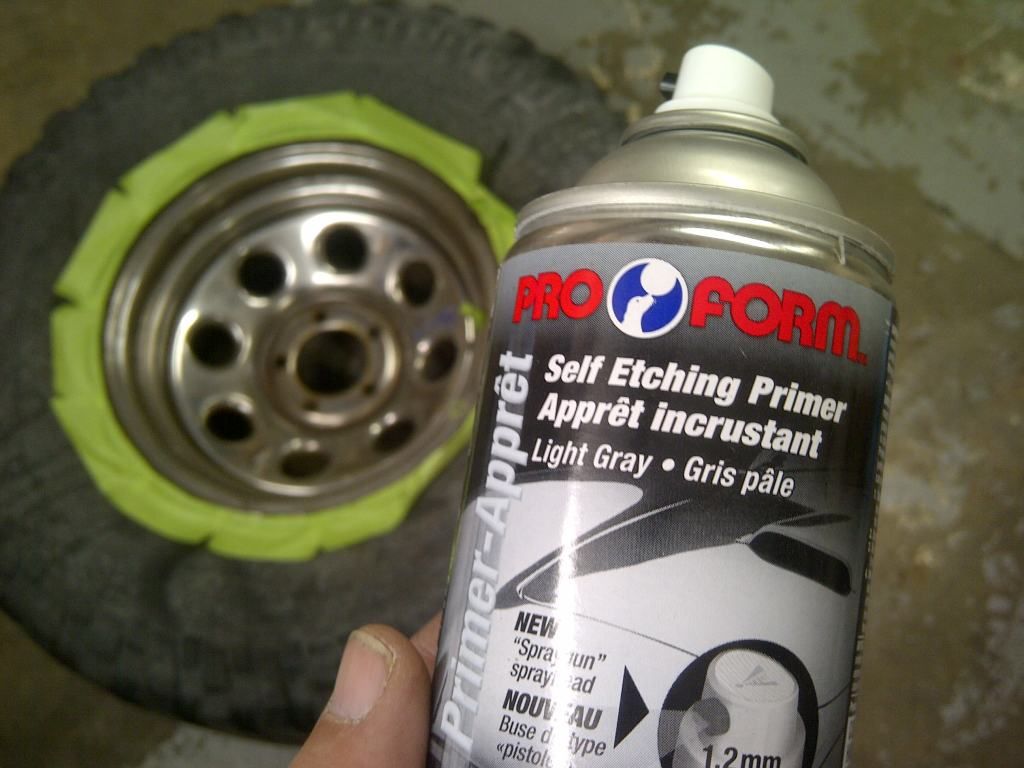 wet primer- 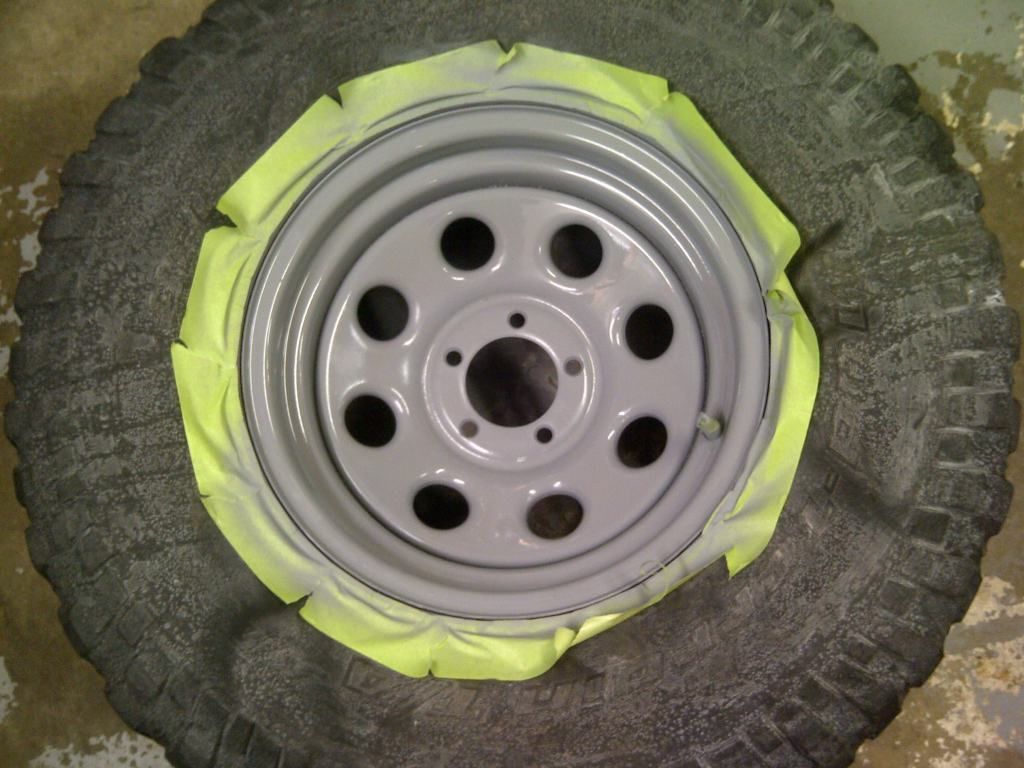 flat black, drying. I helped it along with a heat gun because I am impatient and I'm not painting something expensive- 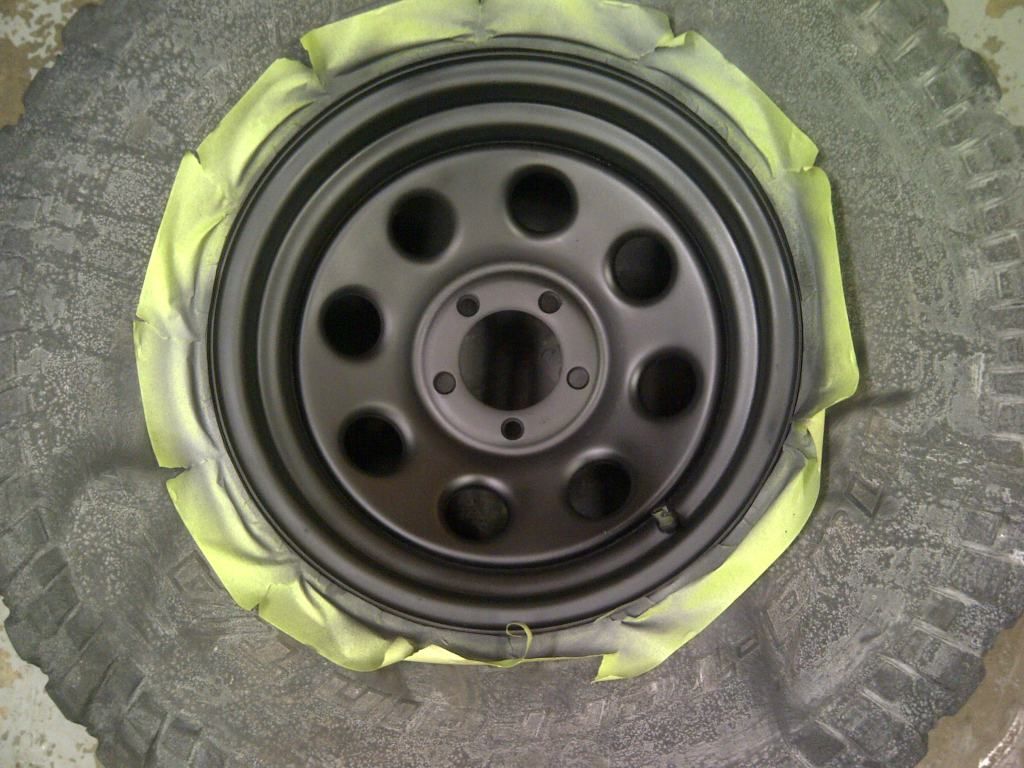 done. have a beer and admire your work! haha 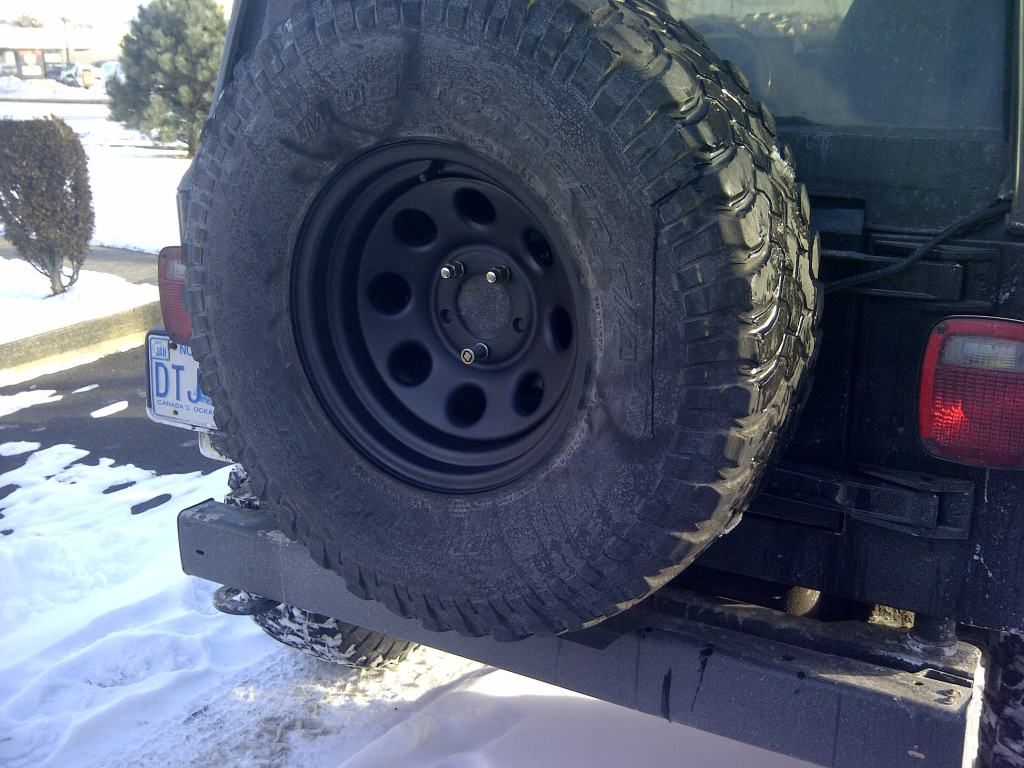 |
|
|
|
Post by backwoodsLJ on Jan 27, 2013 17:25:32 GMT -4
Looks good,got the same wheel on my XJ, black of coarse!Much better black than chrome! Two thumbs up from me!
|
|
|
|
Post by dartjeep on Feb 1, 2013 22:13:14 GMT -4
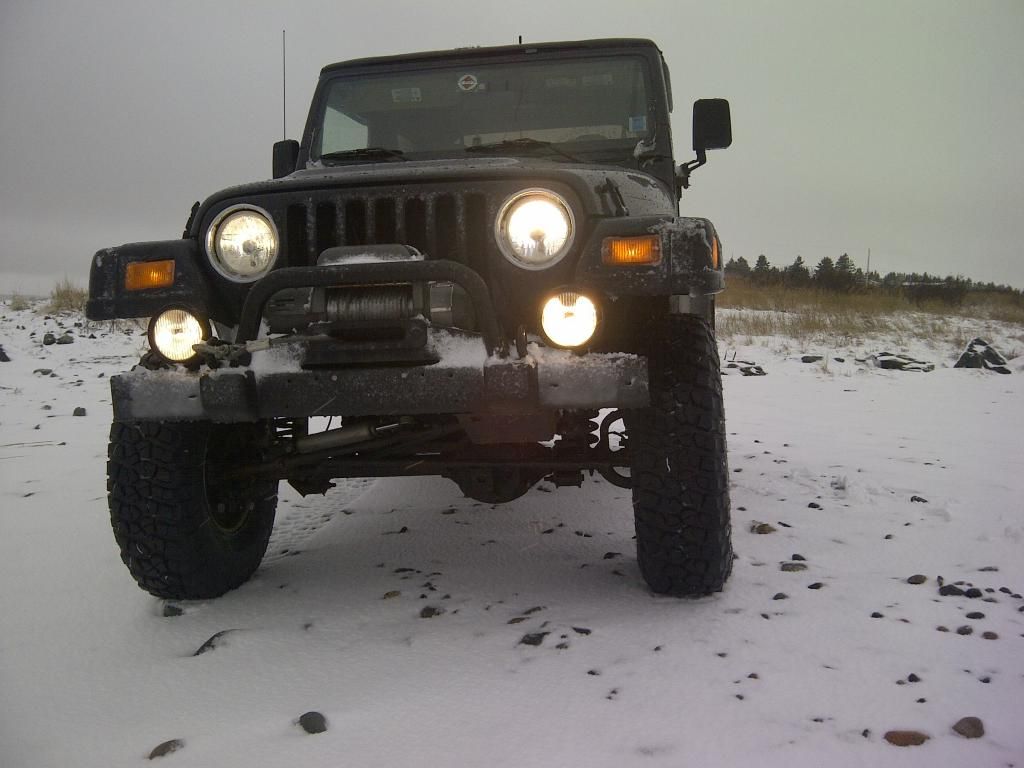
all 4 in the Elantra. on rims. If I had hair, and it was long, it still wouldn't hide my red neck.  33x10.5x15 on 15x7 old (oem?) rims. They are on the Jeep now. Old ones are sold. Ride quality is back the way it was, near stock, no surprises. These rims are hub-centric. Had to remove a small bit of material from the center of the two on front dana30 because they wouldn't fit over the hubs by a hair... The back were fine on the dana44. These clear the frame-side rear coil bucket by a country mile...lots of room. I will have to go back and clean up the two front hub holes tomorrow. I ran out of light in the driveway and was way too cold for messing around. Was the old 90's dana 30, smaller in the hub dept?  very happy with this change/downgrade, specifically the ride quality, steering is straight on any surface and lots less brake to whoa it up. Now to put the 3" coils in the front instead of the 4" and mod the fenders. |
|
|
|
Post by dartjeep on Feb 2, 2013 13:42:25 GMT -4
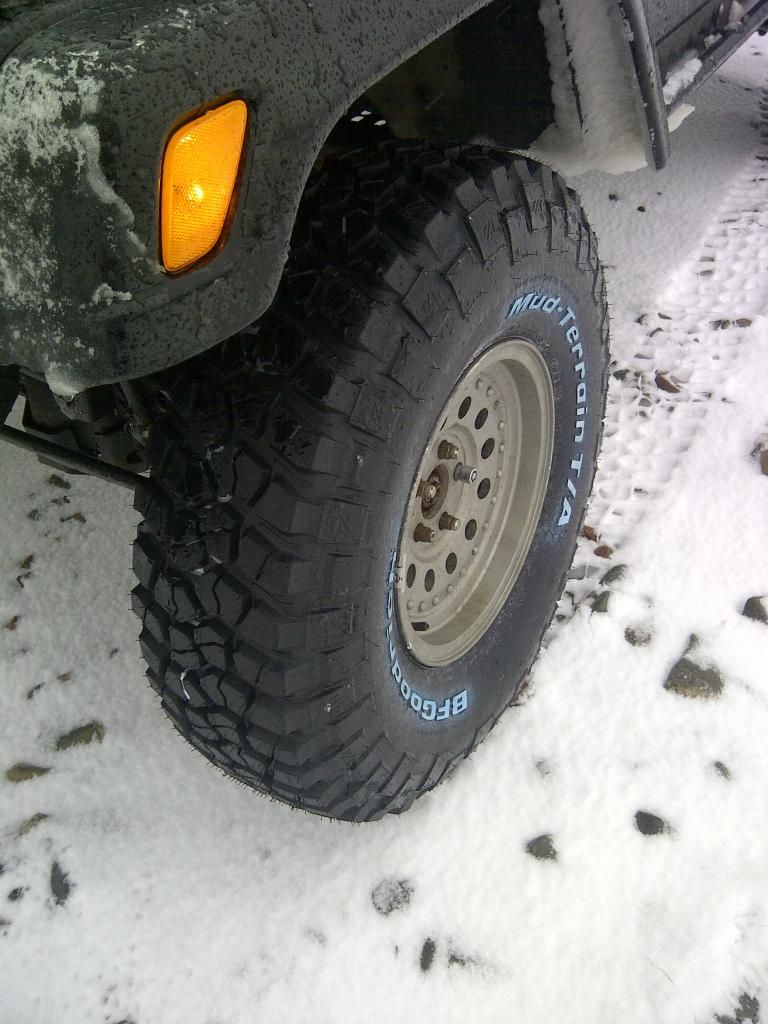
haha... doing some reading: those are Ford Ranger 89-92 rims. The lip inside the center you can see in the above pic has caused other people grief as well. The fix is what I did and remove a bit of that lip until it fits. I have retro Jeep center caps for them, I'll install them next time the wheels are off.
|
|
|
|
Post by 2004sahara on Feb 2, 2013 22:23:30 GMT -4
Love my 33x10.5s...but I did jam on my old ATs on for winter ! You did a nice job on the old chrome rims. Any plans for the new ones?
|
|
|
|
Post by C Monster on Feb 2, 2013 22:46:27 GMT -4
haha... doing some reading: those are Ford Ranger 89-92 rims. The lip inside the center you can see in the above pic has caused other people grief as well. The fix is what I did and remove a bit of that lip until it fits. I have retro Jeep center caps for them, I'll install them next time the wheels are off. I to i'm running ford ranger rims 10 mins with a die grinder And they fit not problem ;D |
|
|
|
Post by dartjeep on Feb 2, 2013 23:25:23 GMT -4
Love my 33x10.5s...but I did jam on my old ATs on for winter ! You did a nice job on the old chrome rims. Any plans for the new ones? 33x10.5 km2 is my favourite tire for all around use. The 12.5 wide version looks better but in actual function, the only place it's better is offroad in certain conditions. I had to run 26lbs in them to keep from wearing the middle down faster than the sides, which made for sloppy handling. I really didn't like it. (10 inch rim might have solved that but apparently I would have lost beads all the time if aired down) The new to me rims are not bare aluminum. The previous owner coated them with something. I'm going to leave them as is for now but I have a couple cans of black plasti-dip that I will probably use on them later. |
|
dan
Jeeper
 Membership Co-ord - Valley
Posts: 3,397
|
Post by dan on Feb 3, 2013 7:28:54 GMT -4
I had a set of chrome ranger rims I wanted to use for winter tires on the YJ back when it was smaller, and stocker, and DD'er. I had to take a die grinder and make the opening close to 1/8" larger because it wouldn't fit over the front hubs.
|
|
|
|
Post by dartjeep on Feb 3, 2013 19:11:02 GMT -4
   then it went to Scott's and I installed the front 3" springs. plan is to get MCE flat fenders... still to install, have parts: back stainless brake line RC tie rod and alignment currie bushing in front axle and some rear upper CA bushings replacement. |
|
|
|
Post by dartjeep on Feb 6, 2013 22:29:41 GMT -4
Big thanks to Dave Levy of ABC Interiors. The rear soft top window went in for repair and ended up needing a new zipper as well. Awesome work for a great price. Highly recommend. It's basically a new complete window! Big savings. Thanks Dave. 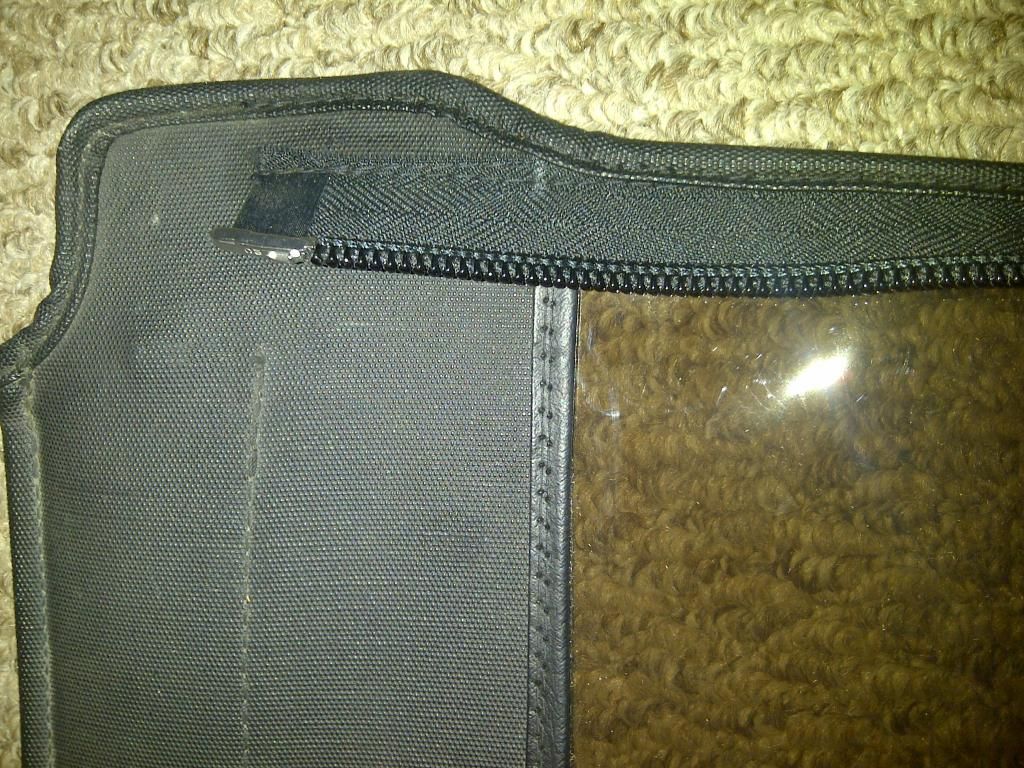 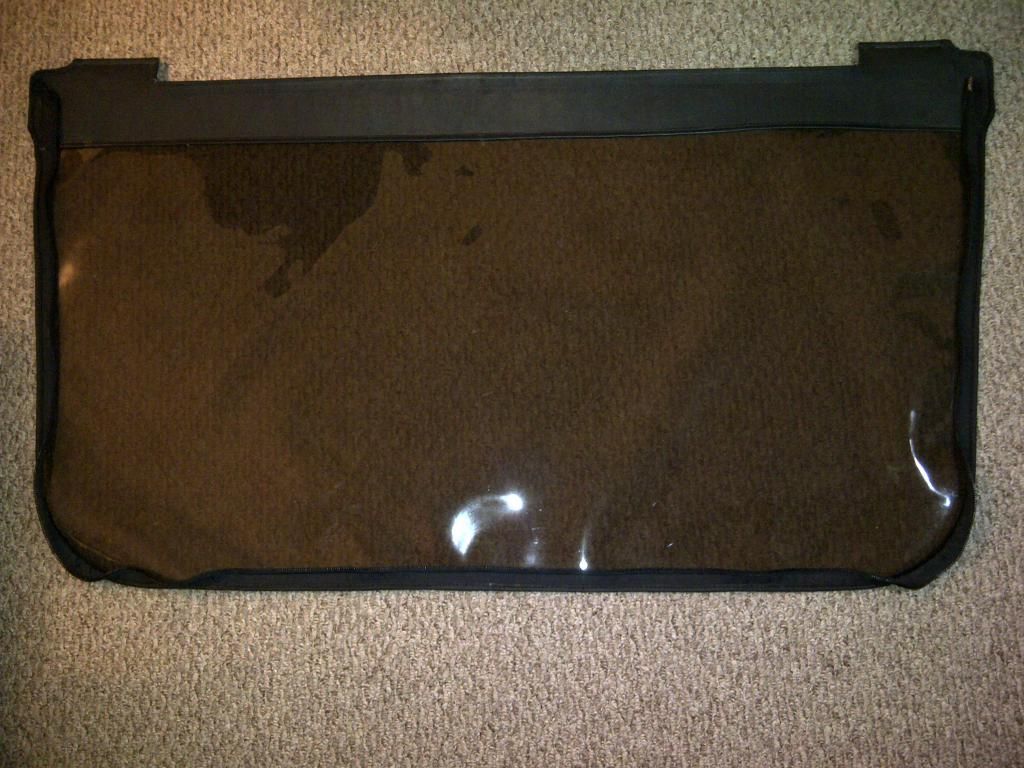 |
|
|
|
Post by crazyfrog on Feb 6, 2013 22:46:56 GMT -4
33 x 10.5 the best all around size for mild wheeler daily driver LOL.
those rim look awesome
|
|
|
|
Post by C Monster on Feb 6, 2013 22:55:29 GMT -4
Loving the tires and rims too
Looks great
|
|
|
|
Post by dartjeep on Feb 14, 2013 17:26:03 GMT -4
The problem with downsizing... Top is with 4" lift springs. Trackbar bracket was nowhere near tierod. Bottom is with about 3" of lift. New RC tierod. Trackbar drop bracket must die! I bought the RC adjustable trackbar for 4" lift, never thinking I would removethat lift soon after... hindsight is 20/20. 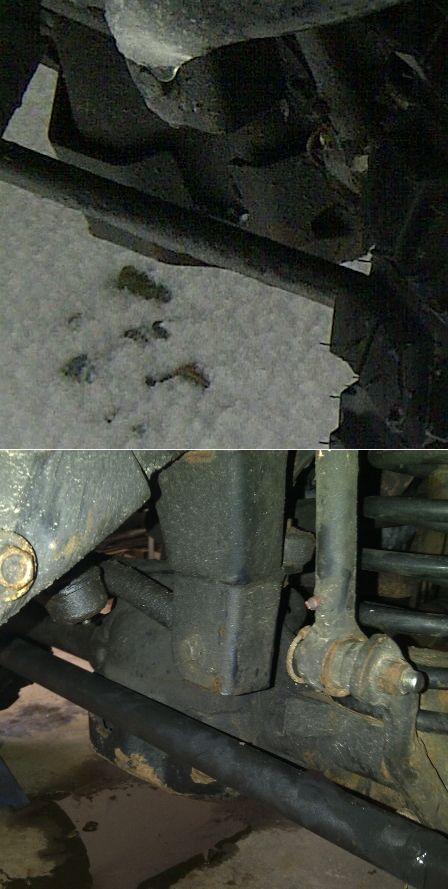 I guess there are some pics coming of a currie bushing install and so on... looking forward to seeing that. Thanks Garagemahal! It's a 3-link plus trackbar front now. You wouldn't know the difference driving it. The passenger front upper CA was contacting the exhaust, so that is now gone. There is a small spacer in the front springs to level the Jeep. (thanks APJs for the spacers) Handling around town and on the highway is about as good as it's ever been. |
|
The Garagemahal
Moderator  Build Thread King
Resident Army Ranger , Navy Seal , Super-Warrior , Ninja !!
Build Thread King
Resident Army Ranger , Navy Seal , Super-Warrior , Ninja !!
Posts: 11,518
|
Post by The Garagemahal on Feb 14, 2013 20:21:59 GMT -4
Stock bushing  Drilled the rubber til i had it all free , then used a small chisel to get the metal surround out 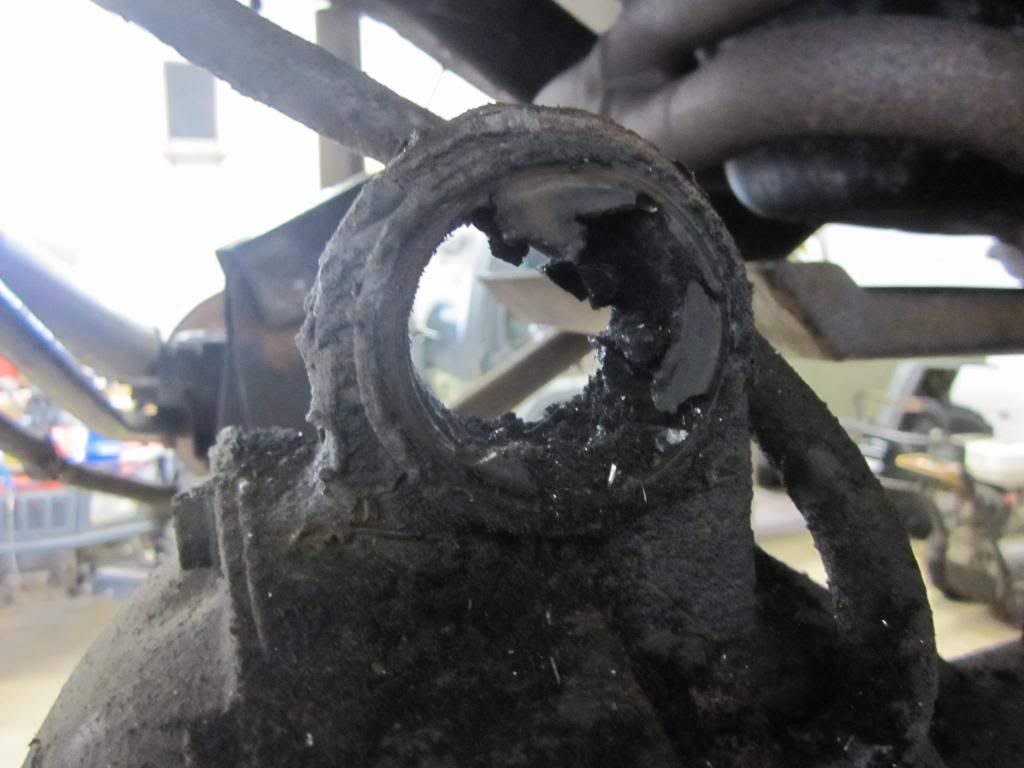 Press in Currie bushing with 1/2 in grease-able bolt 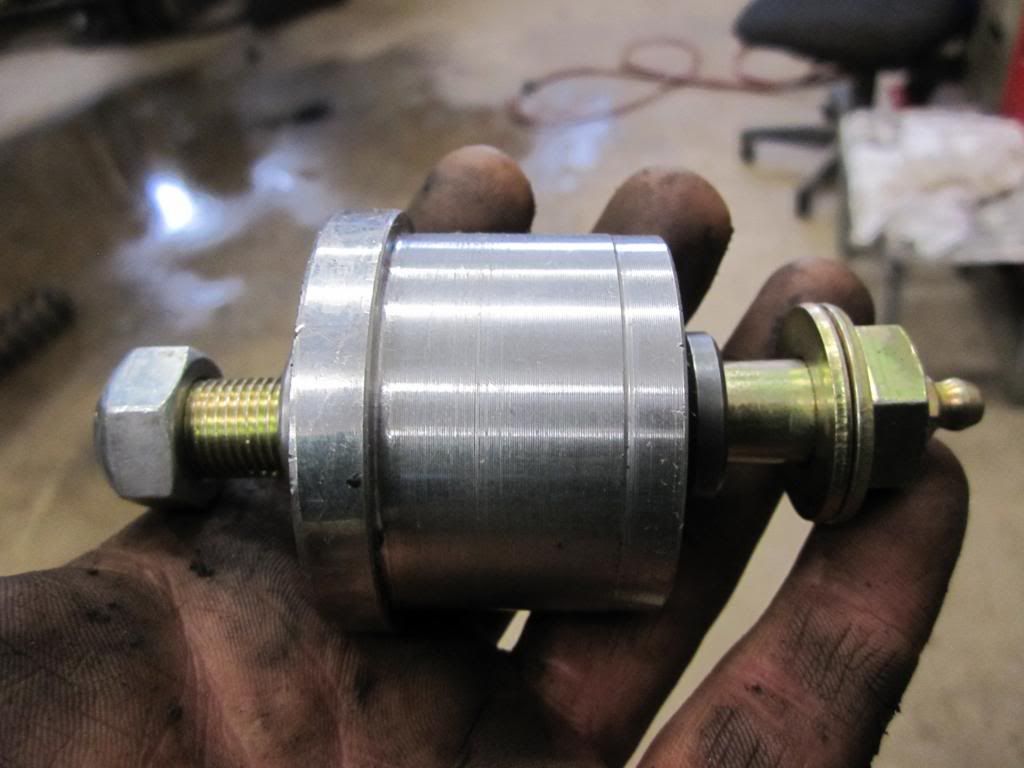 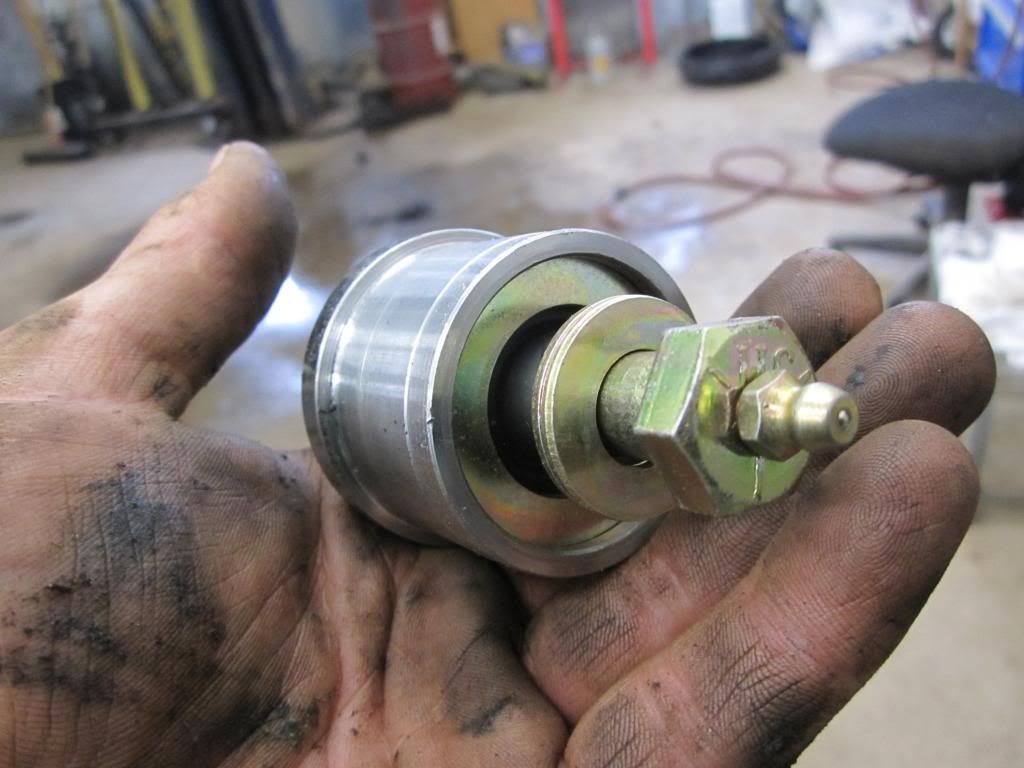 I bolted a socket to it , to help hammer it in 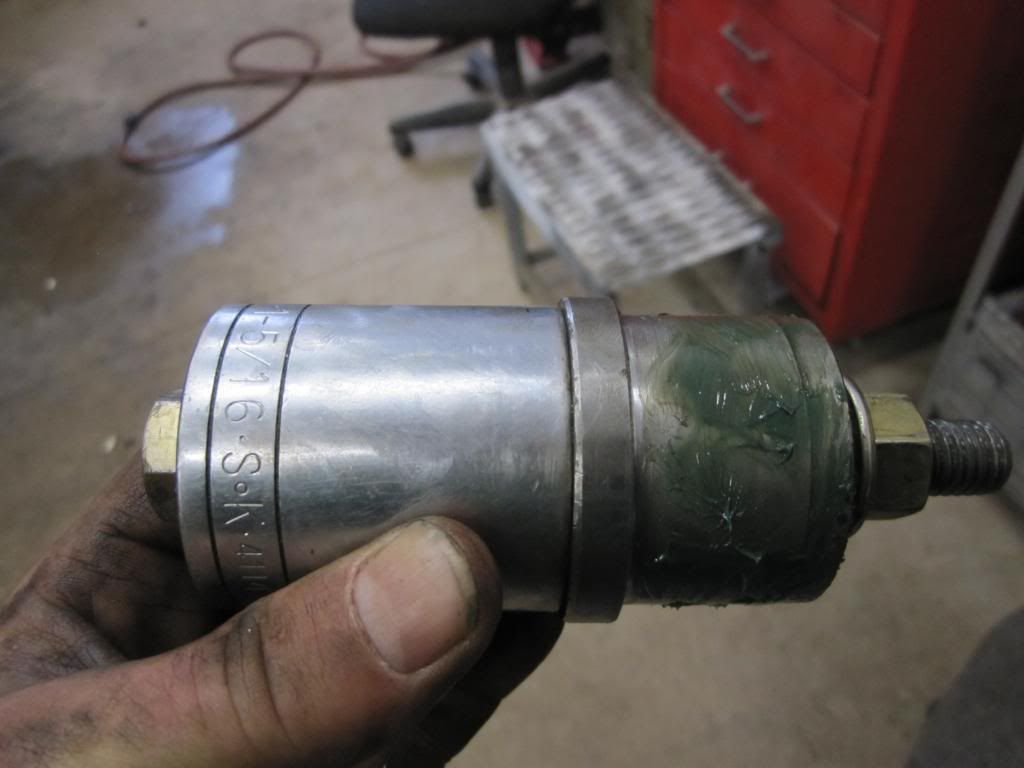 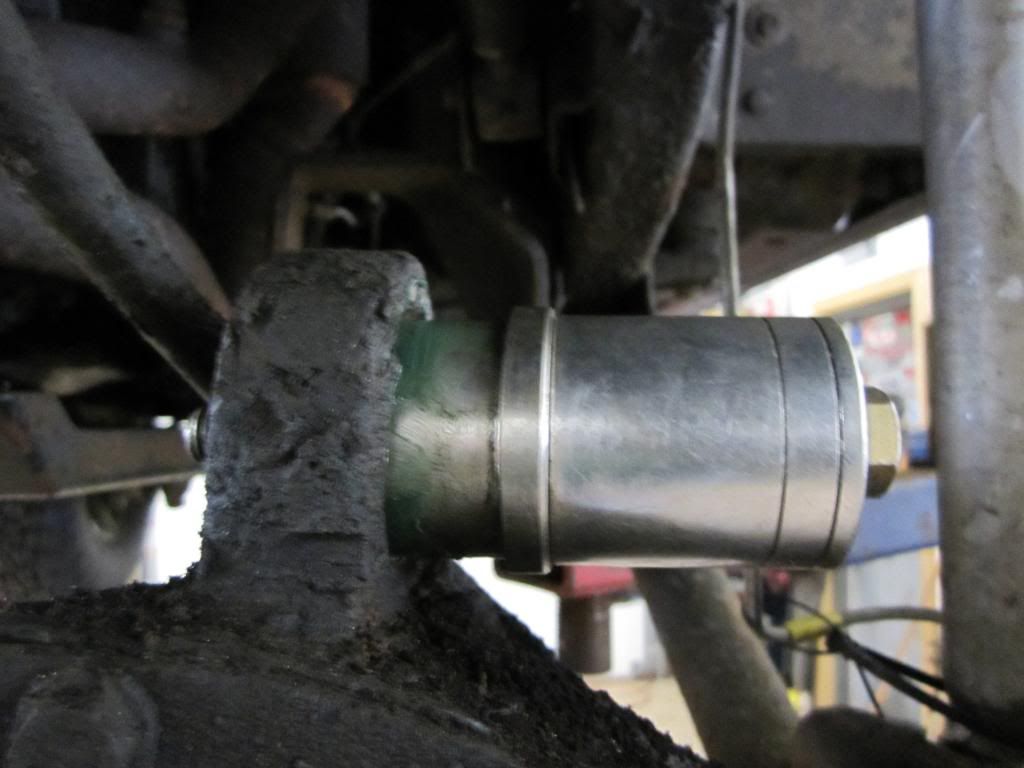 It went in easier then I liked , so I cleaned all the grease off of it and sprayed it all down with brake clean I took it back out , and went to the vise with it , a centre punch and a hammer 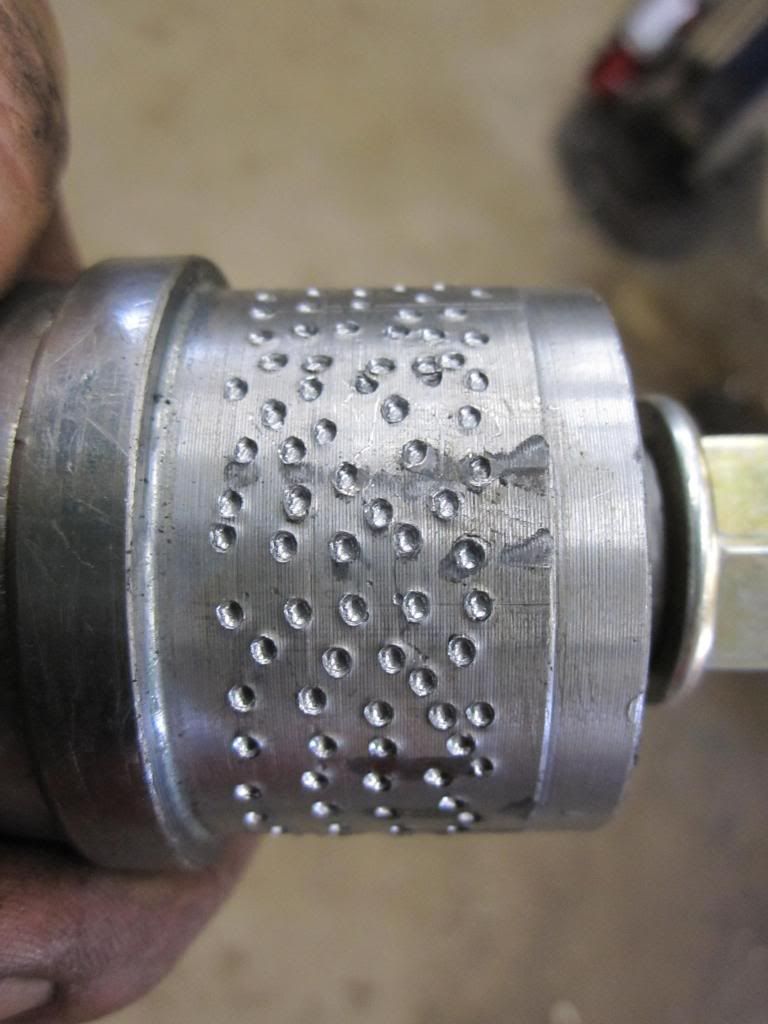  Much better fit ! all installed . I also had to drill the arm out to 1/2 in 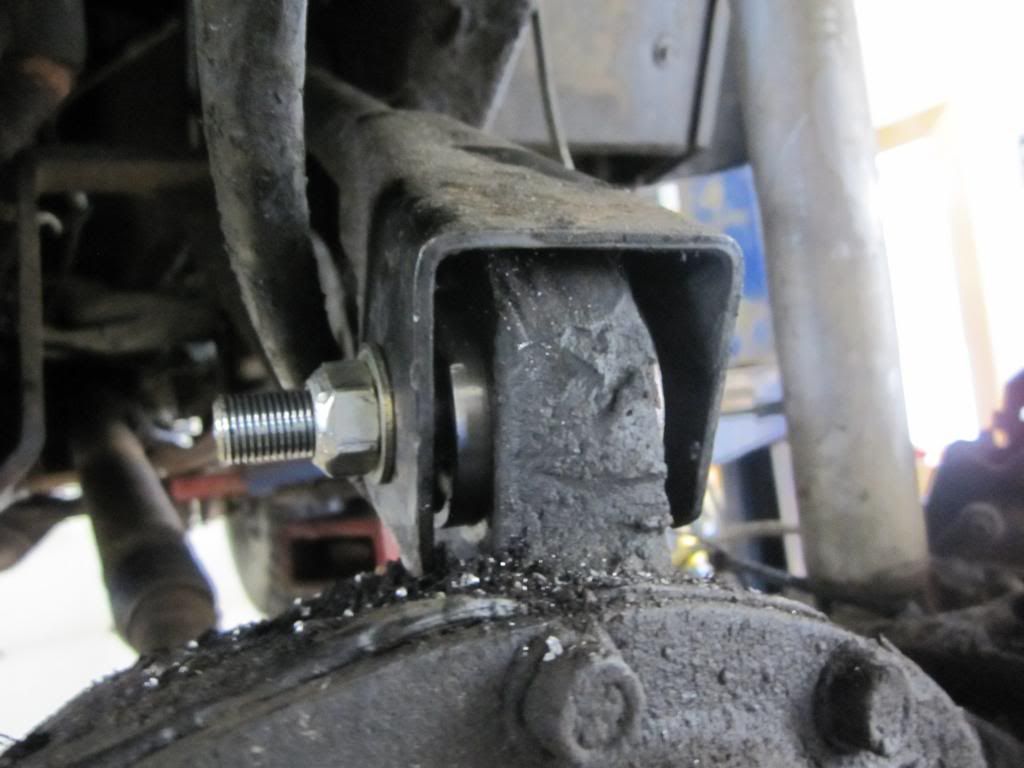 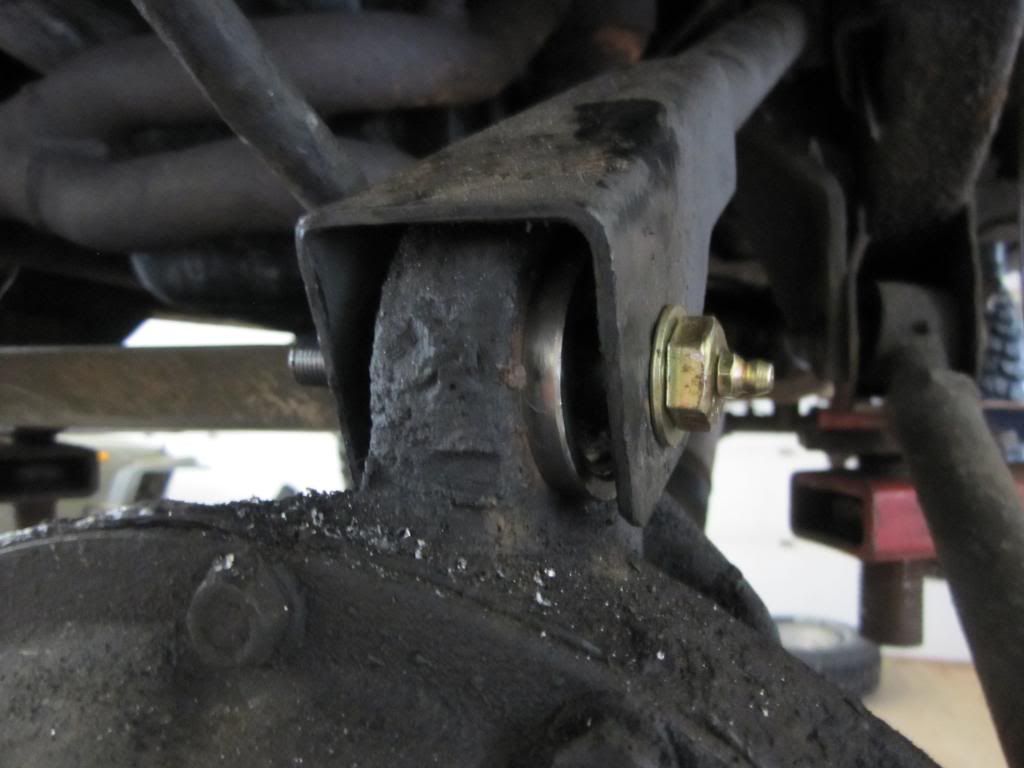 |
|
|
|
Post by dartjeep on Feb 14, 2013 20:46:17 GMT -4
Thanks Scott. Tricky solution! I was wondering how you did that.
ps. last pic, frame side lower CA, keeled over against the bracket. that's what I was talking about. The offset metal cloak ends don't do that. (apparently)
|
|