The Garagemahal
Moderator  Build Thread King
Resident Army Ranger , Navy Seal , Super-Warrior , Ninja !!
Build Thread King
Resident Army Ranger , Navy Seal , Super-Warrior , Ninja !!
Posts: 11,518
|
Post by The Garagemahal on May 29, 2016 7:42:49 GMT -4
Lots of great work going on there !!
Keep up the great work ! . I miss big detailed threads
|
|
chevystroker
Jeeper
 NEVER CONFUSE HAVING A CAREER WITH HAVING A LIFE ! ! ! ! ! !
Posts: 896
|
Post by chevystroker on May 29, 2016 7:48:11 GMT -4
|
|
chevystroker
Jeeper
NEVER CONFUSE HAVING A CAREER WITH HAVING A LIFE ! ! ! ! ! !
Posts: 896
|
Post by chevystroker on May 29, 2016 7:49:57 GMT -4
Lots of great work going on there !! Keep up the great work ! . I miss big detailed threads Thanks. and Need more people posting on here instead of the FB.   |
|
dan
Jeeper
Membership Co-ord - Valley
Posts: 3,397
|
Post by dan on May 29, 2016 9:11:39 GMT -4
Awesome. I have missed the big threads too.
Looks like you have lots of time for reassembly before Jam.
|
|
The Garagemahal
Moderator
Build Thread King
Resident Army Ranger , Navy Seal , Super-Warrior , Ninja !!
Posts: 11,518
|
Post by The Garagemahal on May 29, 2016 15:24:46 GMT -4
An impact driver will pull those out , so you don't need heat
|
|
chevystroker
Jeeper
NEVER CONFUSE HAVING A CAREER WITH HAVING A LIFE ! ! ! ! ! !
Posts: 896
|
Post by chevystroker on May 29, 2016 21:19:48 GMT -4
An impact driver will pull those out , so you don't need heat I don't have any good torx bits. Snapped the end clean off the first one, and the second one was twisting. Just a little heat, and out they came. I have the above info filed away though for next time, when I have a better set of bits. And a windshield frame worth saving. Rust hole in driver's side fender. It will be cut off when I trim fender. 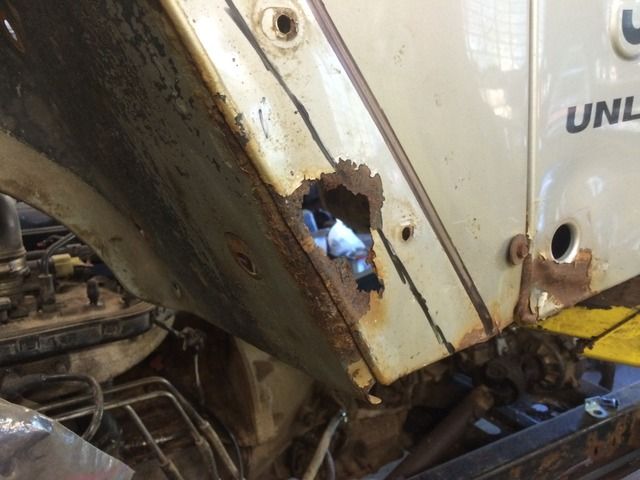 Stock inner fender support before. I am going to notch it so I can pull the inner fender back for tire clearance. 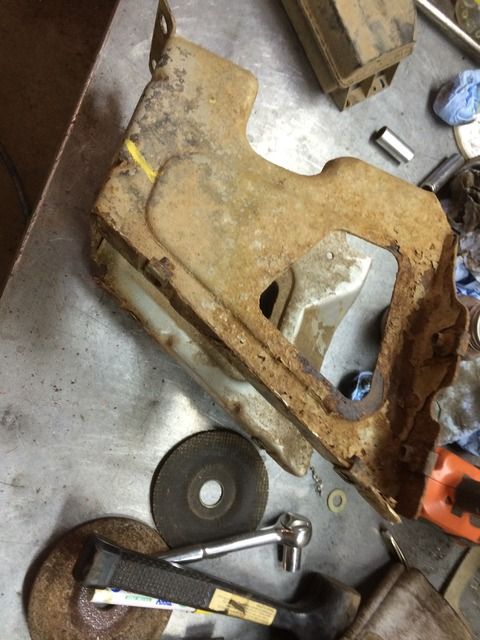  Modified. Moved the bottom back about 1 1/2 inches, and rewelded. 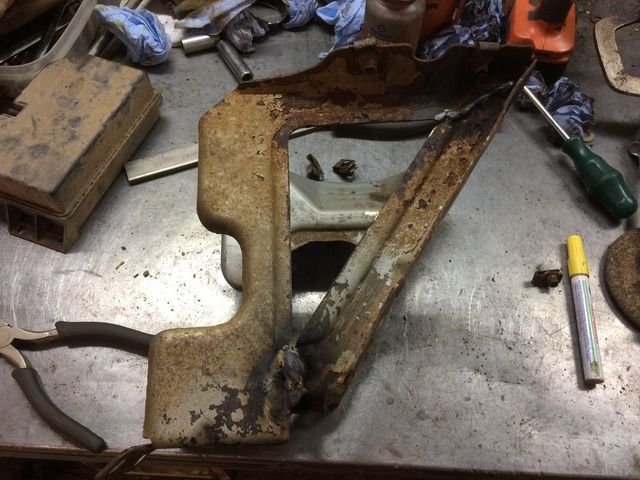 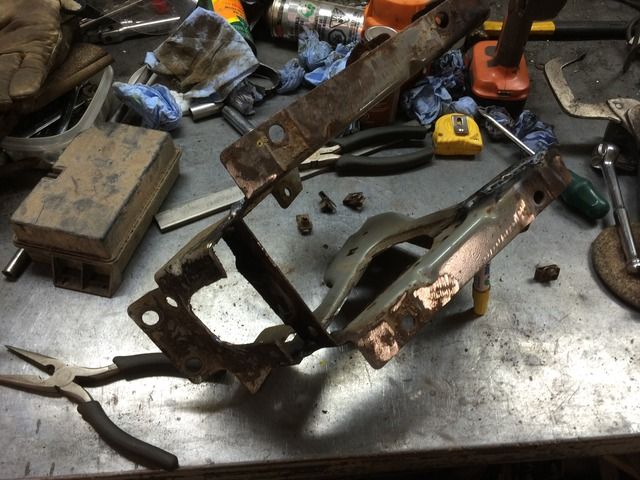 Some scrap metal I had out back. I think they are from a filing cabinet. 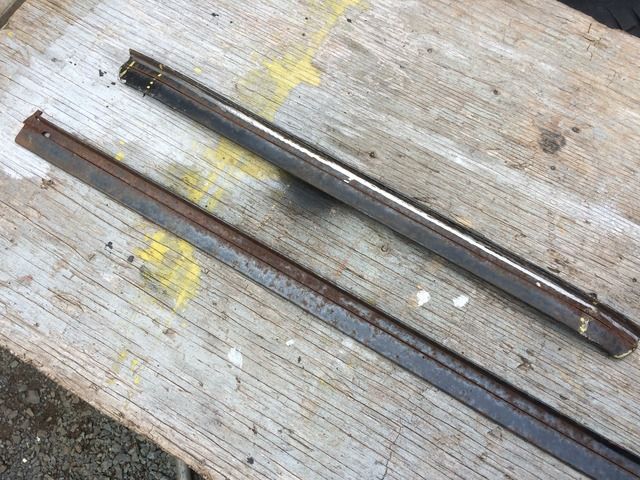 Clamped in place for welding to fenders. Going to be used to support fender flares. Can't have too many clamps/vice grips.  Welded in place. Instructions say one really heavy coat of primer is better than many light coats, right? 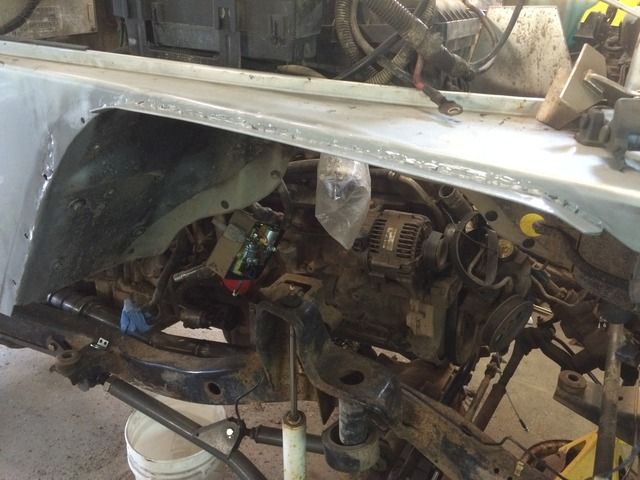 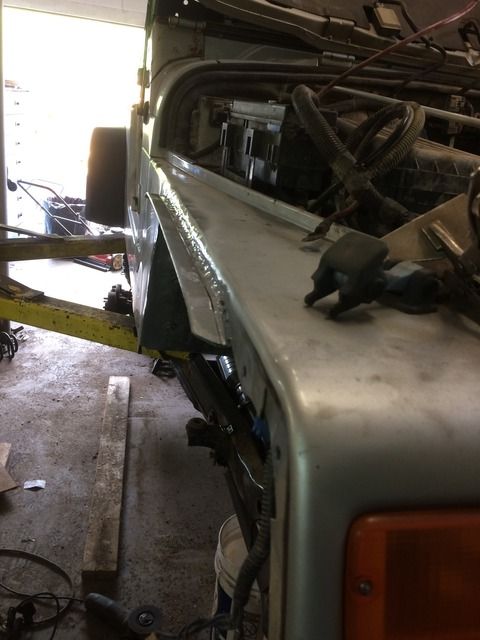 Modified flare versus standard one. The flat top portion will be supported by the piece I welded to the fender. A little double sided tape should hold in in place, keep it from flapping in the wind. If the tire hits now, it will at least rub on flat smooth metal. 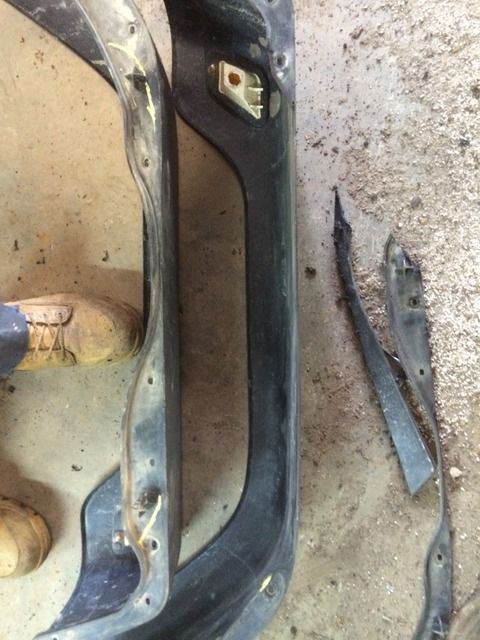 Tub reintroduced to the frame. 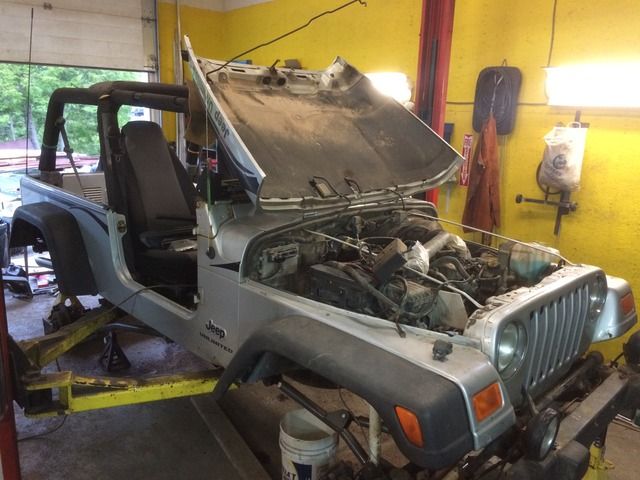 Shot underneath of trimmed fender and flare. 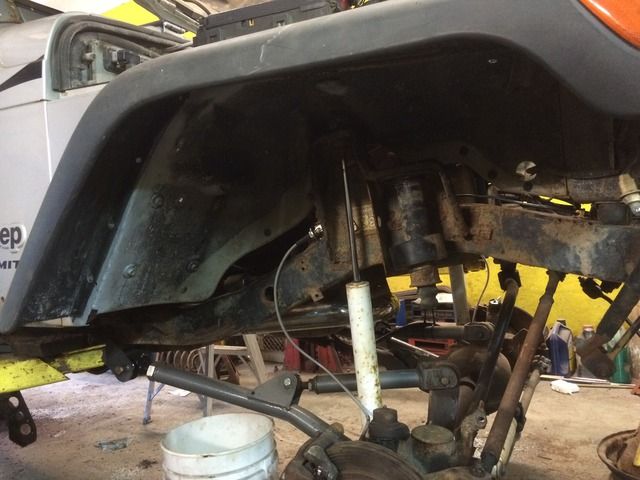 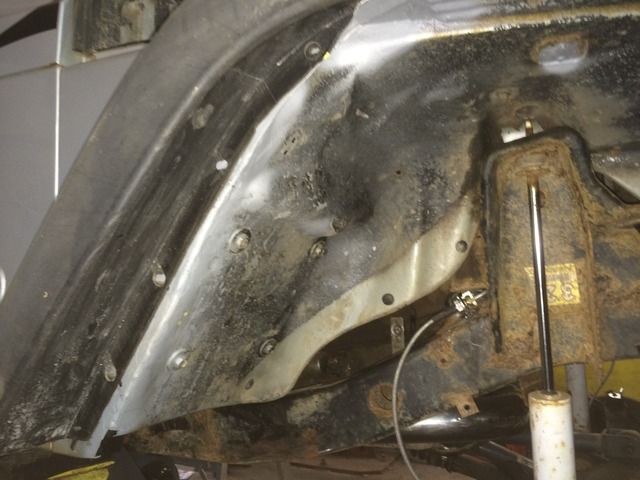 View underneath. 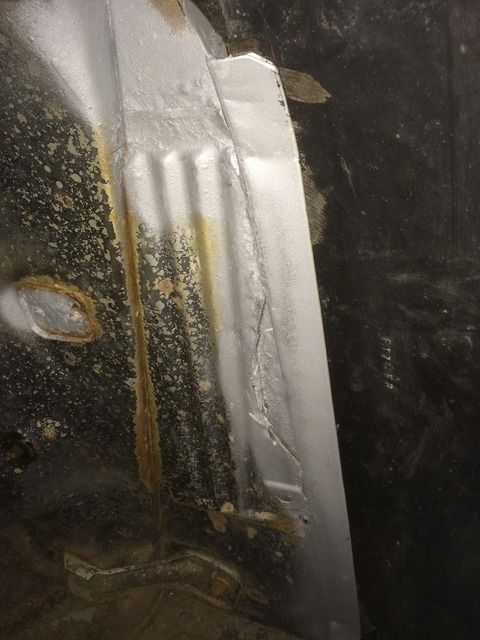 Tomorrow is hooking everything up and getting the heep running again. |
|
justajeep
Moderator
Valley - VP
Bear River, NS
Posts: 7,214
|
Post by justajeep on May 30, 2016 9:25:38 GMT -4
Happy to see a good build thread too, thanks for taking the time to post. When I get back at my build I'll be posting again.
|
|
chevystroker
Jeeper
NEVER CONFUSE HAVING A CAREER WITH HAVING A LIFE ! ! ! ! ! !
Posts: 896
|
Post by chevystroker on Jun 14, 2016 7:03:13 GMT -4
Wow, two weeks since I posted last, can't remember where I left off. Week before Jam was a little too busy to post. I hate it when life gets in the way. My boss actually called me in the middle of the the Crusher to come into work for last week. Hope I don't duplicate anything. Anyway, Double sided tape did not work for the top of the flares. I will have to put a couple of bolts in there, or maybe plastic push pins, something. The shifter assembly would not fit back down into the opening for it in the transmission tunnel, even if I partially disassembled it, so had to cut the strip of metal out between the two openings. Even then, the shifter would not fit on top of the tunnel as it was originally. I had cut off the nut inserts that were holding it down and drilled the holes out for the tab style nuts (forget what they are called) but the oversize holes now just give more adjustment. I drilled out the holes in the shifter assy, added the tab style nuts, and bolted the shifter to the bottom of the tunnel. This makes more sense from a maintenance pont of view anyway, as if someone is going to work under the floor, they will want to remove the main trans shifter cover anyway, so now you don't have to remove the T/C shifter first. 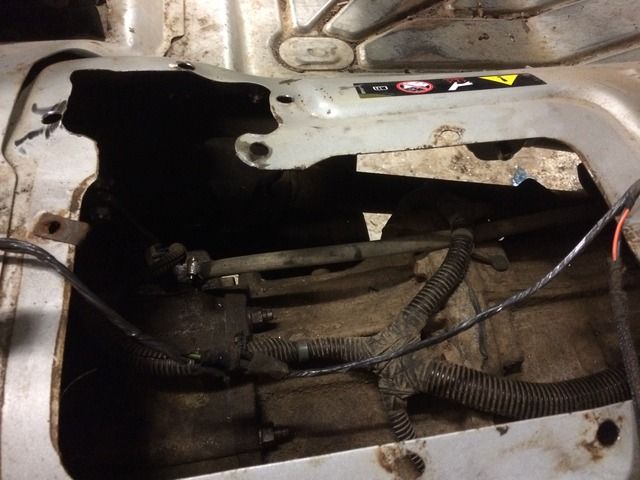 To make sure the left shift arm cleared the slope of the tunnel, I cut and ground the corner of the rod. I now have at least 1/2" of clearance.  To change gears I also picked up a sway bar from a Grand Cherokee. TJ is 1 3/16 diameter and Grand is 1 1/4 diameter, but it is hollow. That will probably save 20 lbs off the front of the jeep. Main reason I got is that the arms are about 2 inches longer than the TJ, and that helps reduce the risk of the links flipping over at full droop. Better angle between the vertical link and the sway bar arm. The bigger diameter will make the bar more effective, but the longer arms probably cancel that out. The TJ bushings and the grand bar were both worn enough to allow the bar to fit in the TJ bushings. The Grand hold down strap has different bolt spacing and would have been a pain to make it fit.  Stock TJ bar 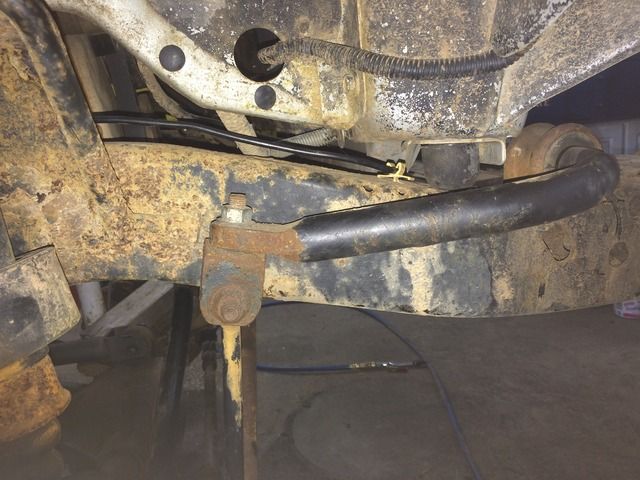 Grand set up. 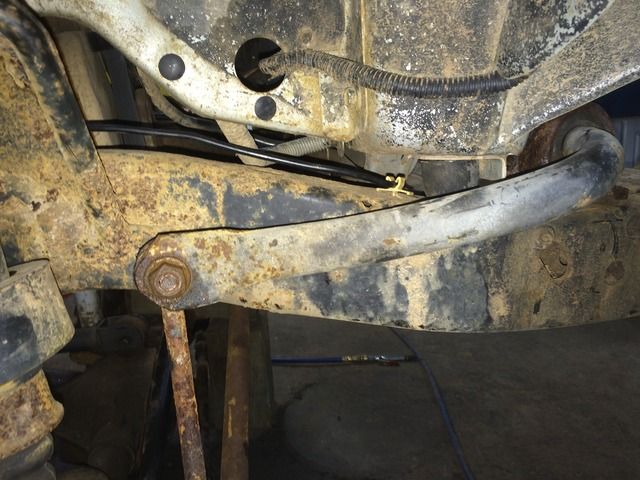 Really close to the coil bucket. I think the Grand bar might be bent. It is much closer on one side than the other. I had to grind the buckets a bit and massage them with a hammer for clearance. 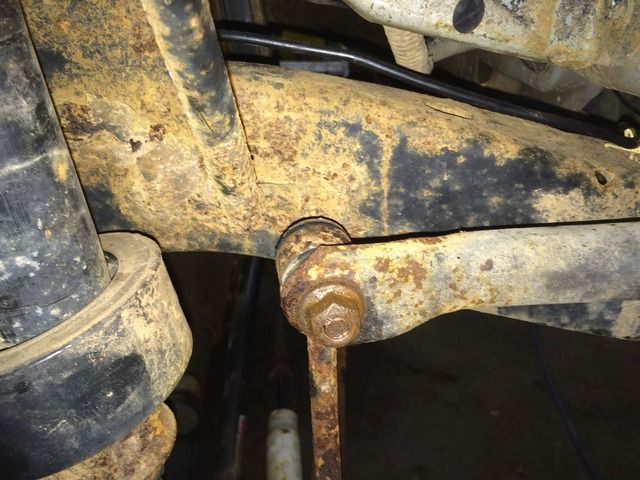 The Grand bar has an offset in it which I had to place this way. 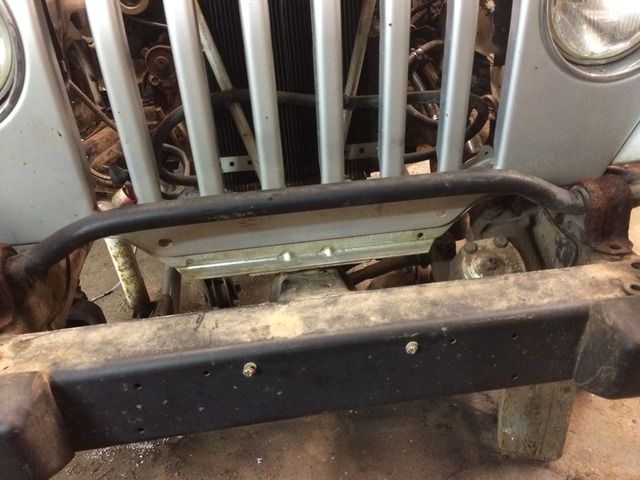 Mounted the other way, using the grand bushings which are taller, it would just clear the steering box, barely. 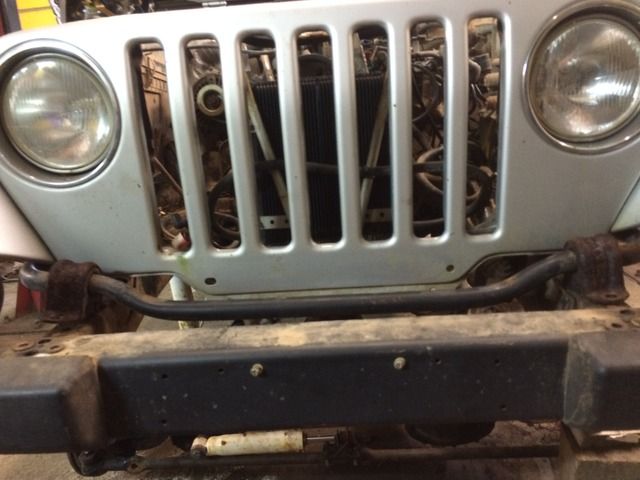 I don't think it would clear at all with the TJ bushings which are shorter. 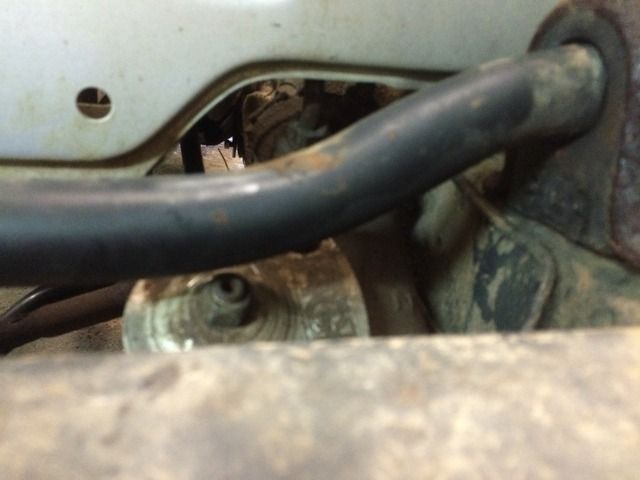 The best thing about a Grand is stealing the better parts for a TJ.  Taking the battery tray out, I dropped the hold down bolts through the holes. So, I ground two small notches in the bottom of the bolt, and put a ziptie on them to keep them from falling down. 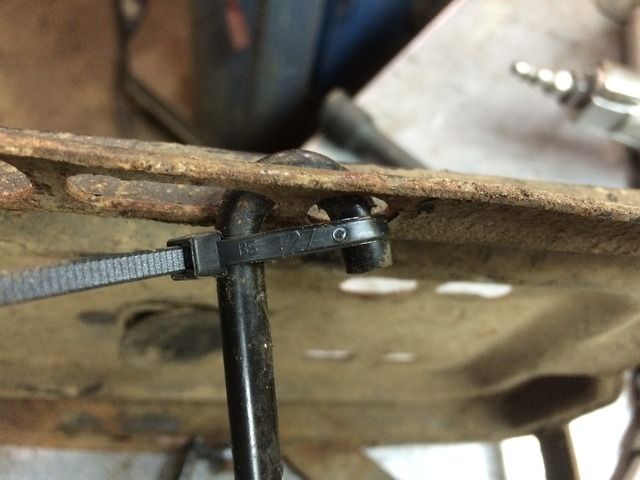 |
|
chevystroker
Jeeper
NEVER CONFUSE HAVING A CAREER WITH HAVING A LIFE ! ! ! ! ! !
Posts: 896
|
Post by chevystroker on Jun 14, 2016 7:20:02 GMT -4
Shifter assembly bolted in place. The piece I cut out isn't really structural, so should not be a problem. The Trans shifter cover will now bolt down on top of the T/C shifter. 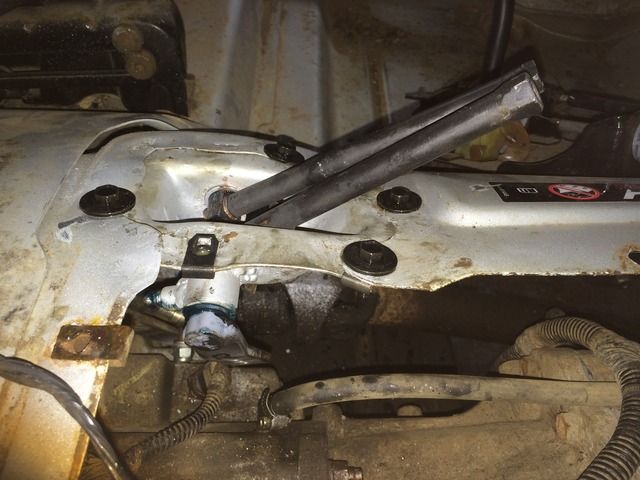 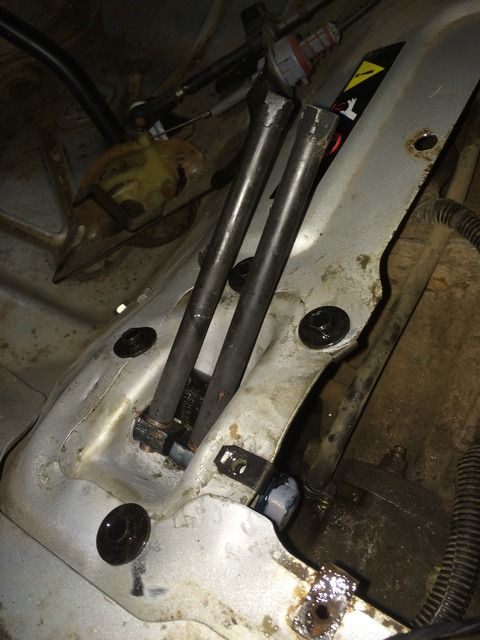 View of shifter and T/C. Lever in background is the Range lever. 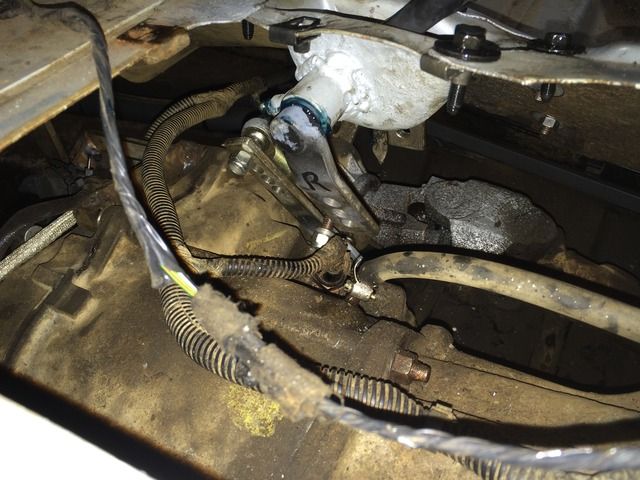 Had to extend the left shift lever on an angle, for the range, to get more travel in it and a better angle for the shift rod. I am using an old wood working table as a weld bench. Works great. 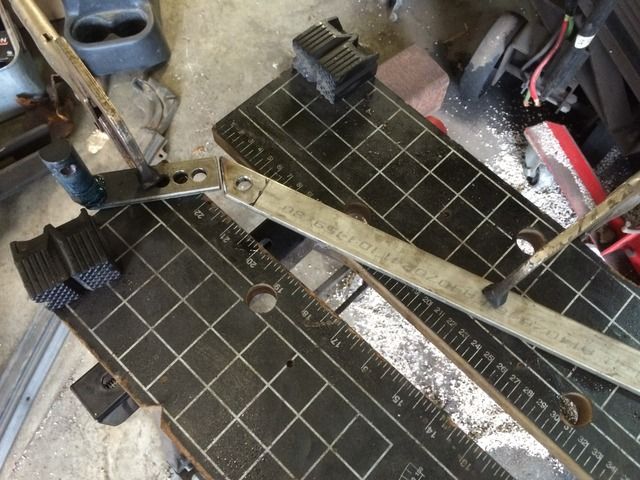 Reworked shifter with the two shift rods. 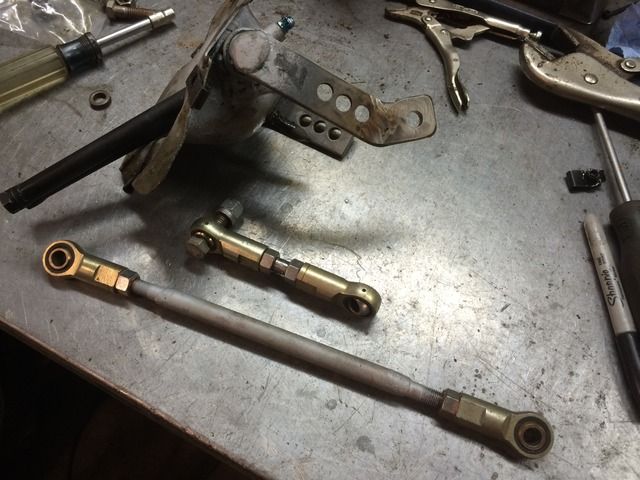 View underneath of it installed. Looking forward from behind T/C 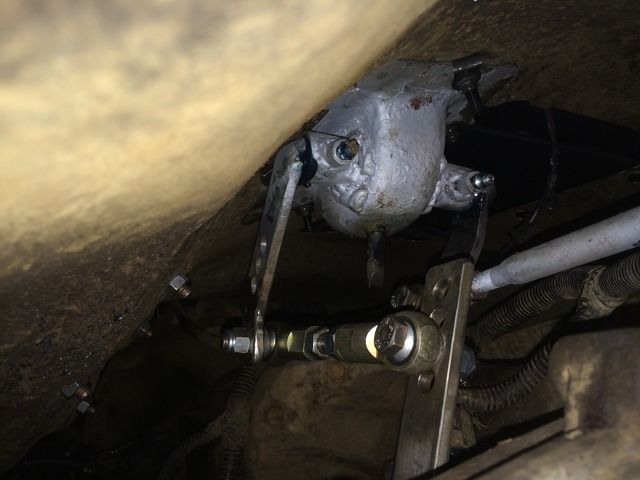 Back of T/C. (I am going to have to completely redo this lever assembly on back of T/C. I want to do a belly tuck, and this setup will not clear the floor. I think I have it figured out though. ) 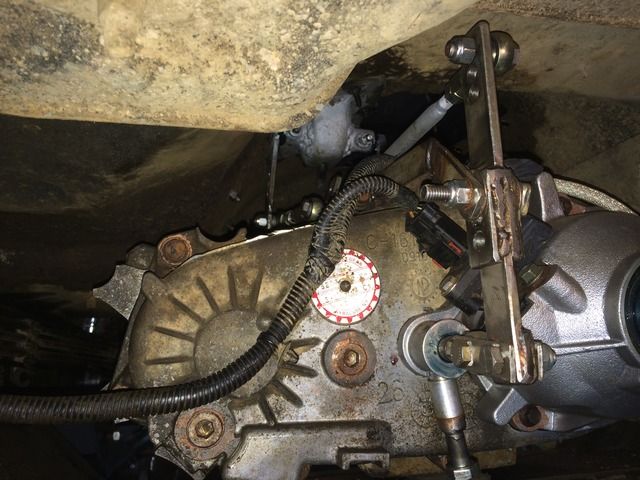 View looking back from front driveshaft. On the left is one of the T/C mounting studs where I indexed the case. This was the only bolt that was really close to the case. The bolts and nuts on the right are how I plugged the holes in the tunnel from the original T/C shifter pivot assembly. 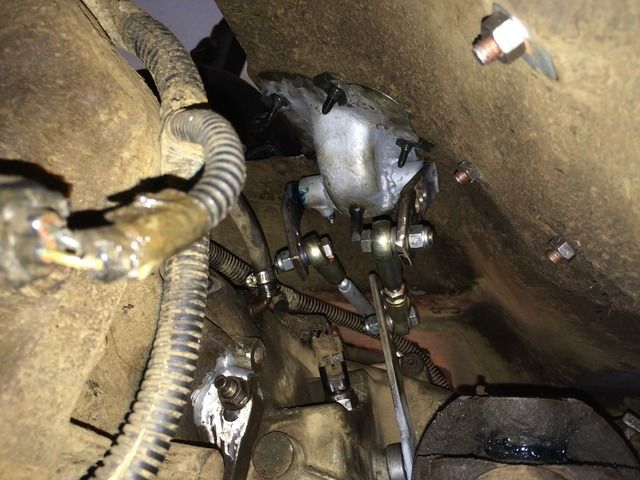 Left lever in Low Range, Right lever in 4WD. Very short throw on right lever. And yes, right lever pushed forward will give LOW Range 2WD. 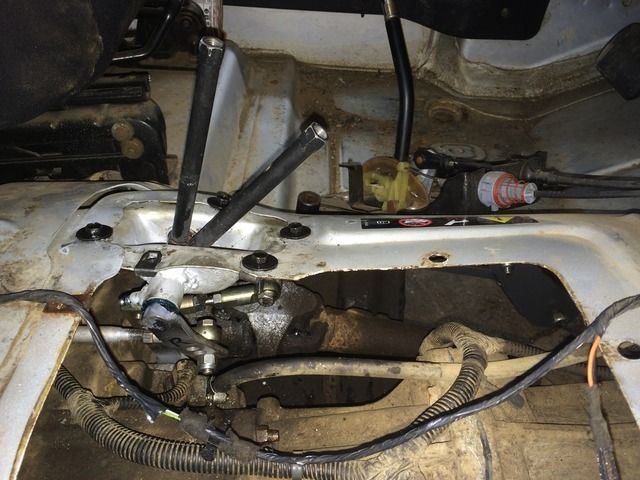 |
|
chevystroker
Jeeper
NEVER CONFUSE HAVING A CAREER WITH HAVING A LIFE ! ! ! ! ! !
Posts: 896
|
Post by chevystroker on Jun 14, 2016 7:40:42 GMT -4
BOM Bill Of Material stamped into my rear axle. This number will let a person order parts directly from Dana-Spicer. 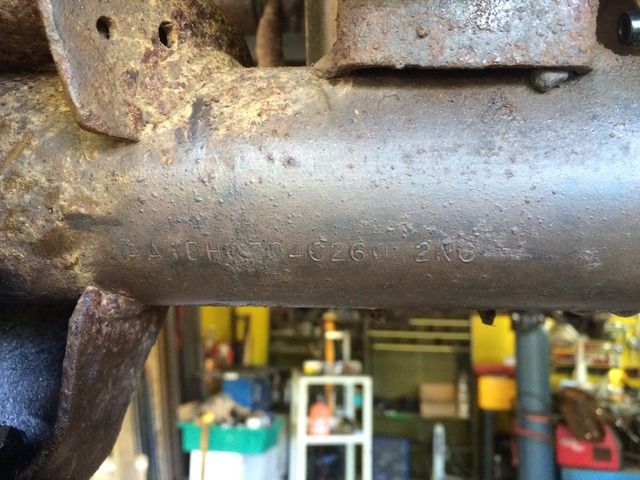 A year or so ago, I had to replace my front brake hoses, could not get stock front TJ hoses right away, so used rear JK hoses. They are a little longer than the front TJ hoses, and work great on the front. I took them off this time to replace them with longer 30" Teraflex braided lines, which are also listed on the Teraflex site as rear JK hoses. They will fit front of TJ's, or front and rear of JK's Anyway, rear hoses on my TJ are part of, and crimped on, the steel lines running across the rear axle to the T-fitting. One of my steel lines rusted through. The stock rear JK hoses, with a little tweaking of the steel line parts, worked perfectly on my rear axle. 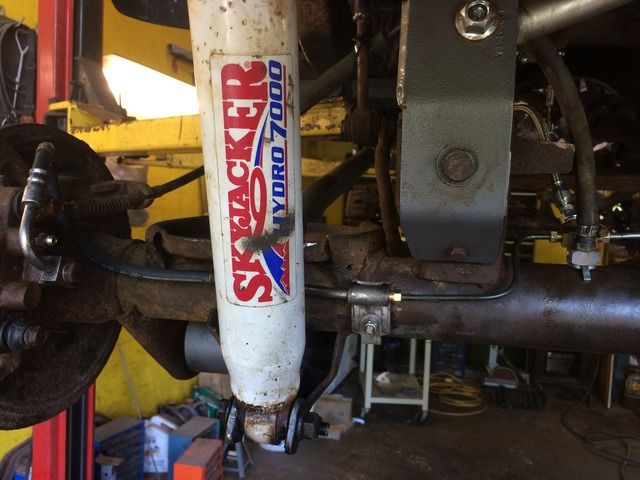 Welded a 1/4" bolt to axle tube to hold tab. 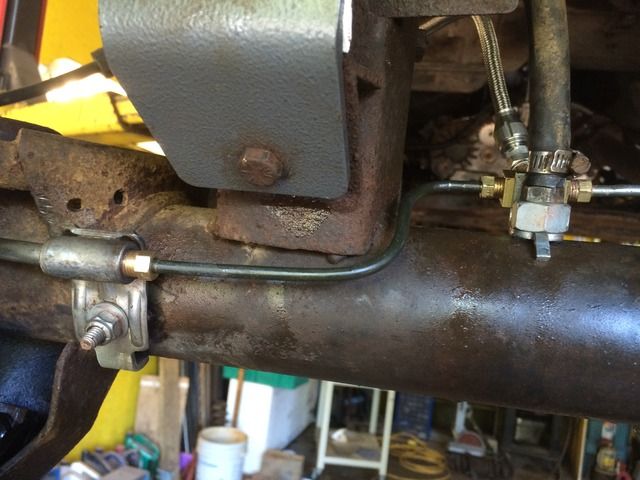 Side note: In the above picture, you can see some brass nuts for the steel line. These are not a good idea. Steel nuts are about 25 cents each and the brass ones are about 75 cents each. Not too bad a price if you are only buying a few, and I thought they would keep the nuts from seizing up, which I hate. But it seems that the brass is so soft, it is compressing instead of the steel inverted flare. I had several connections leak, and I am sure I did the flares correctly. One I did get tight, but two others I had to cut out and redo the flare with a steel nut. Also, I think the end of the brass nut is swelling up from trying to tighten it, which pushes the threads out, and it is difficult if not impossible to get the brass nut back into the connection. From now on, I will just keep using antiseize on the brake fittings. Several views of lines. I can't remember which line is used on which side, left or right. 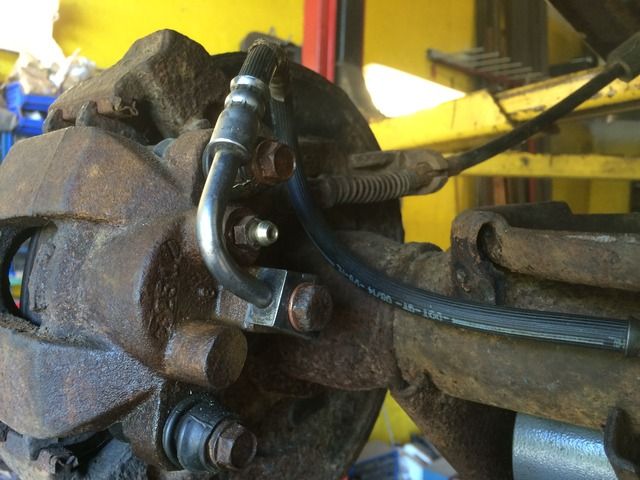 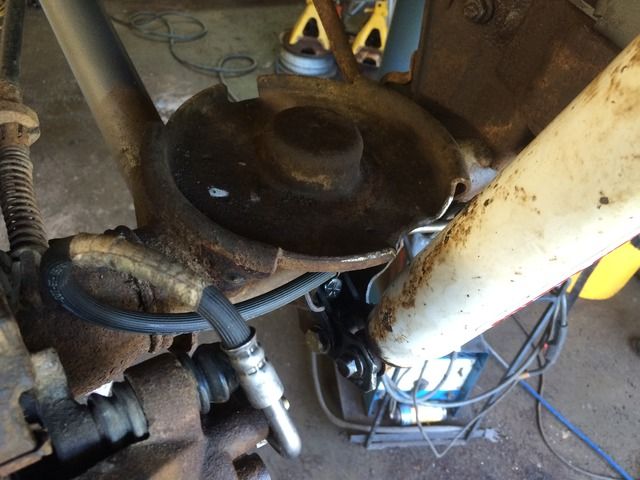 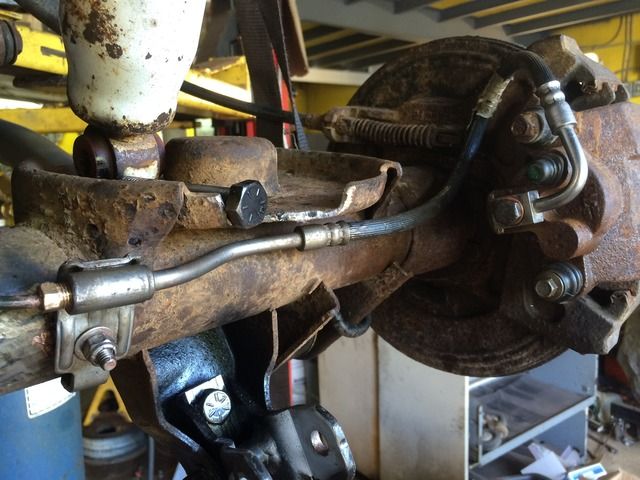 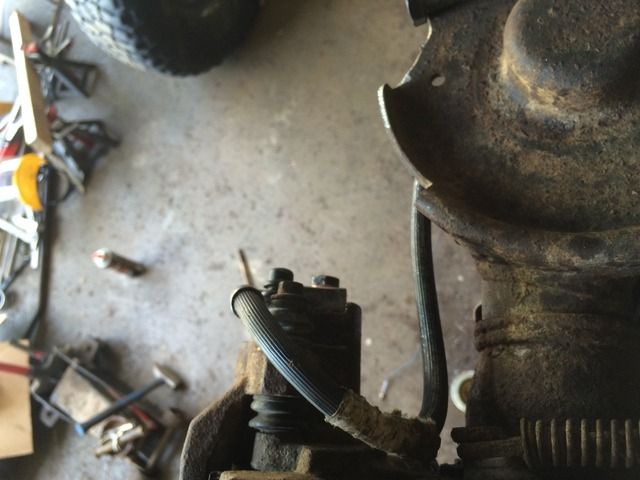 View through the rear part of the frame where I cut off the factory control arm brackets. This would be a weak spot in the frame, especially with a bit of rust in there. I realized that the bracket I cut off bridged across the inside hole and would add a bit of strength to the frame. So, I am going to plate this part of the frame inside and out. I will weld around the hole on the first plate installed and use plenty of plug welds on both inside and outside plates. 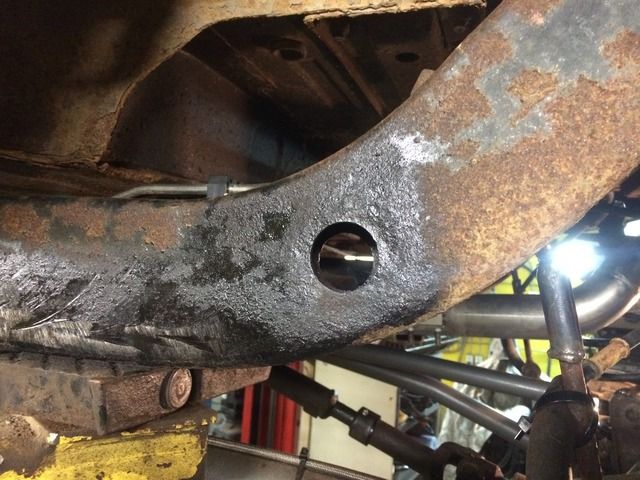 Small rust hole in driver's floor. Piece I cut out of lower fender bracket fits perfectly as a patch. 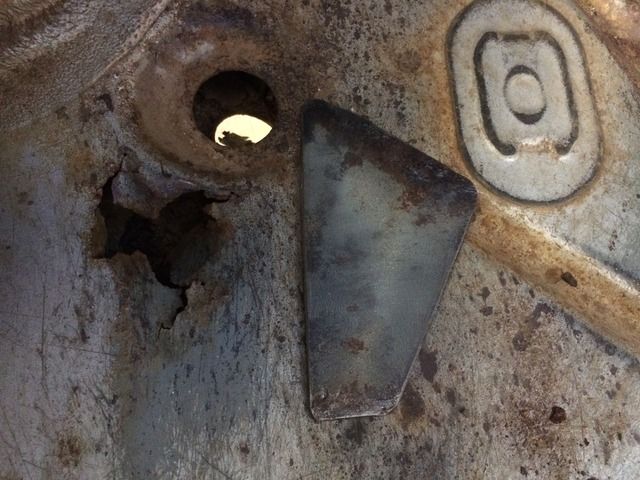 Some ugly welds, burnt through a few times. 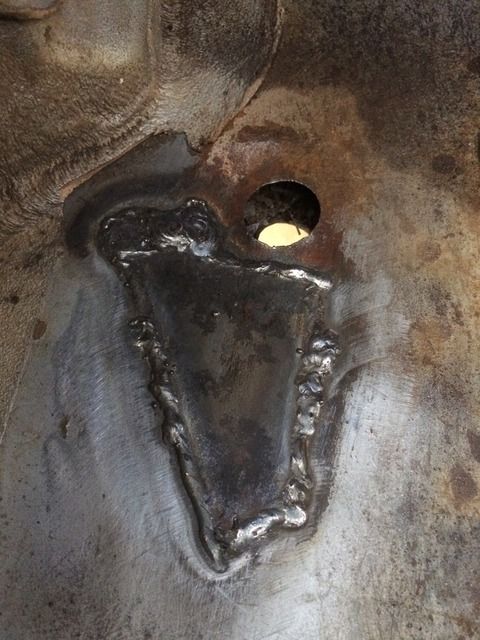 High zinc primer 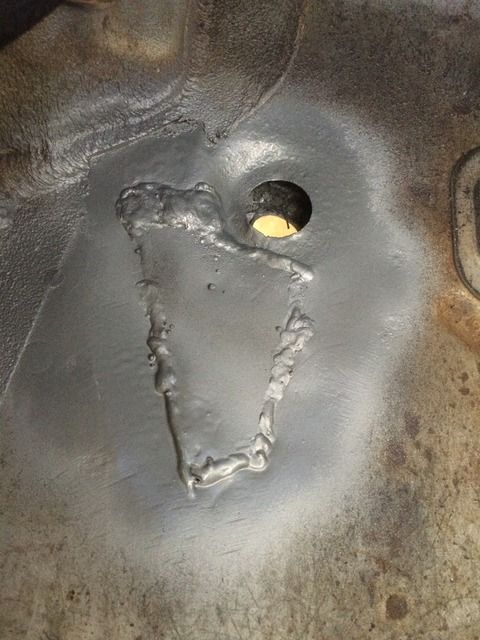 Then off for inspection. No problems. |
|
chevystroker
Jeeper
NEVER CONFUSE HAVING A CAREER WITH HAVING A LIFE ! ! ! ! ! !
Posts: 896
|
Post by chevystroker on Jun 14, 2016 8:00:19 GMT -4
Started to run out of time during the last week before Jamboree, so did not take too many pictures. This bumper was welded to the front of a frame that was attached to a pair of axles I bought. Same width as stock TJ front bumper. 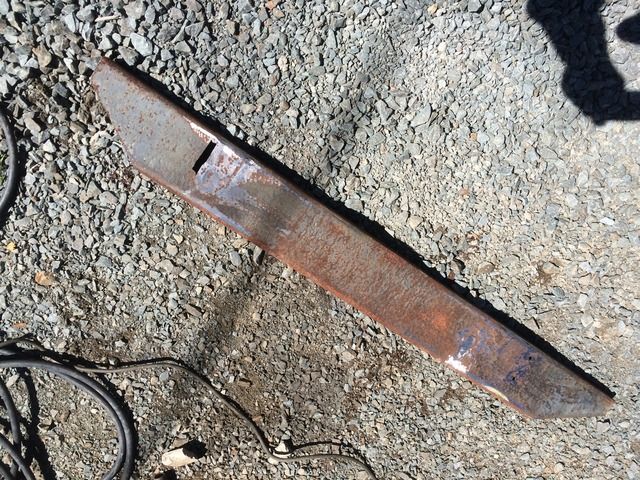 Turned it into this. Sorry I don't have pics in between. Welded in a few holes in the bumper. Moved the winch plate forward, and welded it solid to the bumper. I will extend and cap the ends later. 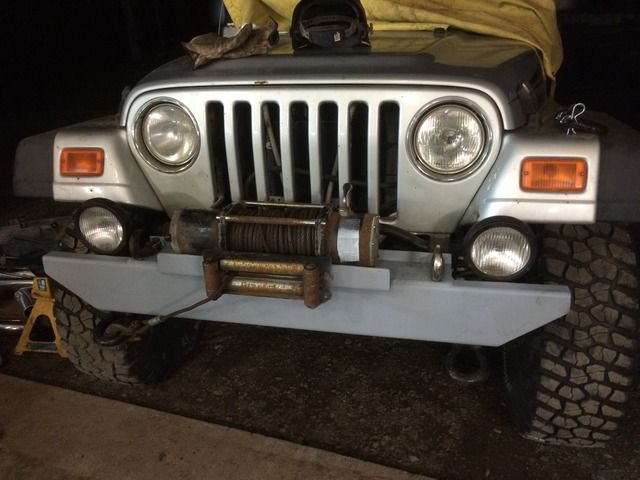 Welded tabs on to mount Ford Superduty tow hooks (The only good part on a ford. There are no moving parts involved. ) 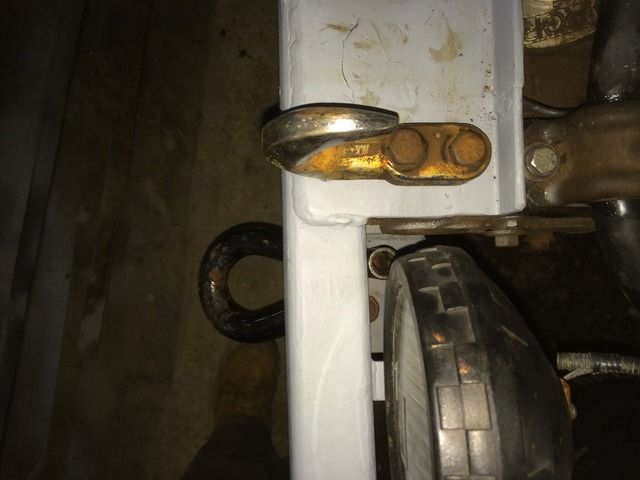 This style tow hook hang down too far though, and I smashed one into a rock on Crusher and bent the mount a bit. I will have to rework the bumper to install the other style that turn up instead of down. View of the Grand swaybar at full droop. Much better angle with the link. 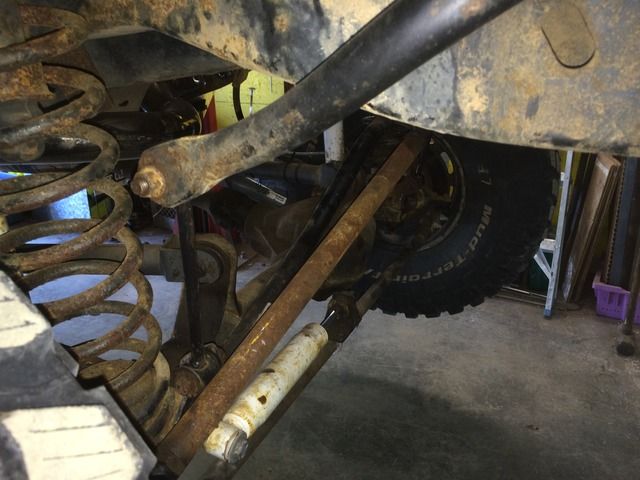 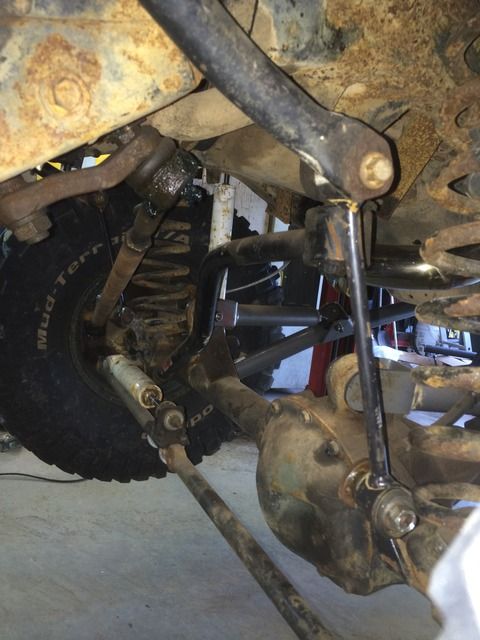 Narrowed up my front skid plate and removed the middle supports I had in there. Realized I don't really need the middle ones since aftermarket skids don't have them with 3/16 plate, and my skid is 5/16" (Funny story with the skid. Digging holes for fence posts in Solange's back yard, we found this piece of 5/16 thick plate buried in the ground. Rusty as an anchor, but it was just the right size for a skid plate for my TJ. Seemed meant to be, so a few notches, cuts and bends, mounted it on jeep. ) 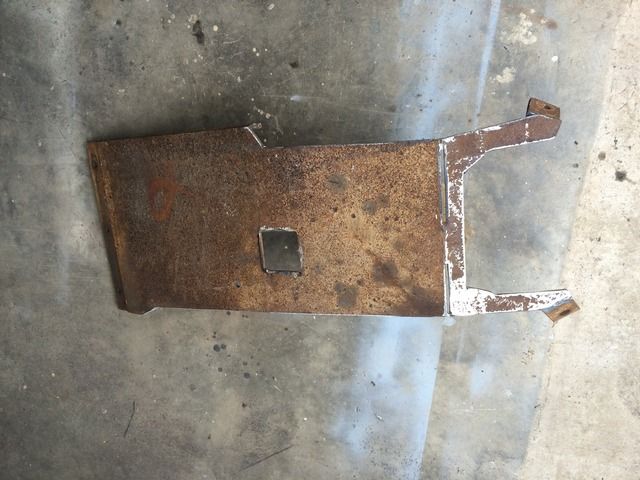 One of the forward mounting tabs was really close to hitting the new exhaust, so bent up a new tab to weld on, using the vise and a BFH.  Set in place. I tacked it in place first to keep the alignment with the mounting tab, cut out the old piece, then welded it fully. It fit fine. 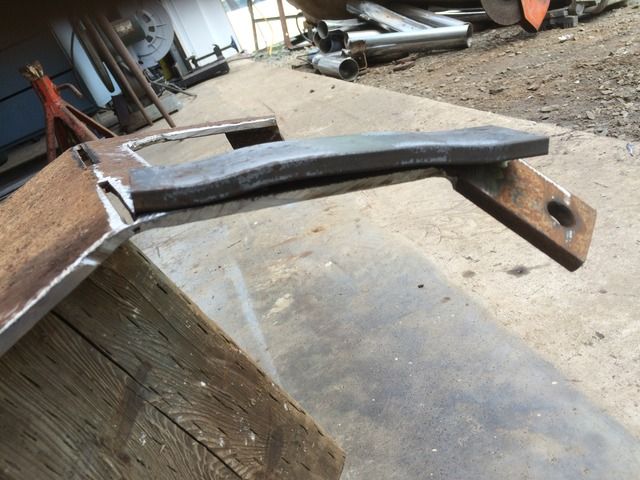 On a funny note. I stuck this on the tailgate of a buddy of mine. If you have to have the picture rotated correctly, then you have ADD. 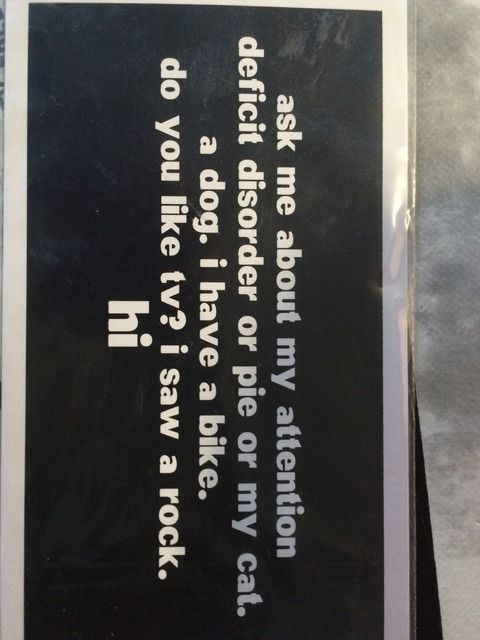 |
|
chevystroker
Jeeper
NEVER CONFUSE HAVING A CAREER WITH HAVING A LIFE ! ! ! ! ! !
Posts: 896
|
Post by chevystroker on Jun 14, 2016 8:24:55 GMT -4
These are the bolts, nuts and washers I took off my intake/exhaust manifolds. Two of the washers were missing, and as you can see, two were broken in two. No wonder I had leaks. 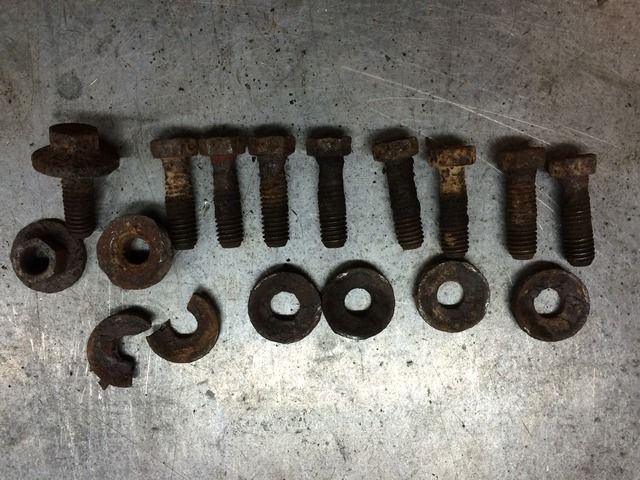 So, little background on the exhaust system I built. The Magnaflow muffler was a HUGE mistake. Jeep sounded like a Honda Civic with a fart can on it.  Droned really bad. I also had the tail pipe back in line with the back end of the rear bumper, which was also a mistake, it was really vulnerable there. During Crusher, I kept flattening the tailpipe between rocks and the rear bumper. BUT, the jeep sounded better. It was quieter with the tailpipe crimped off. One of the North Nova guys, Cooter, had a battery operated recip saw and offered to cut off the tip. Since it was quieter, I thought I would leave it. Third mistake. Going up the rock face on Crusher, I did not make it on the first try, backed down, tailpipe dug in the ground, and I ripped the pipe off and ran over it. 3 times. So, had to remove it on the trail. Ordered a new Flowmaster 50 series stainless muffler from CVO, and reworked exhaust this past week. Stainless turns a really nice golden colour when you heat it up. Original front pipe. 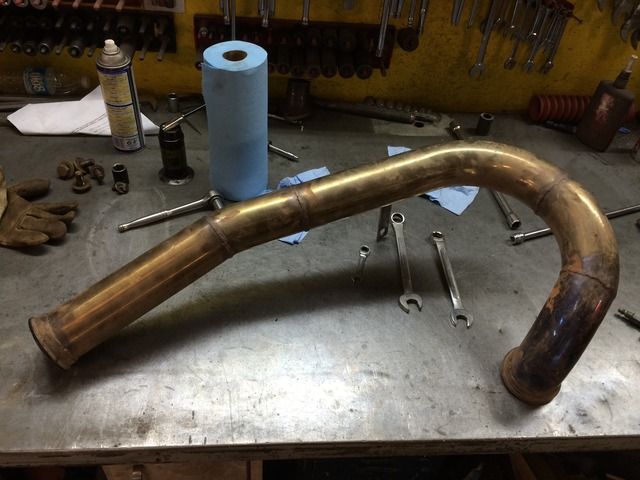 View up inside collector. Primaries are fairly clean but collector is sooty. hmmmm. 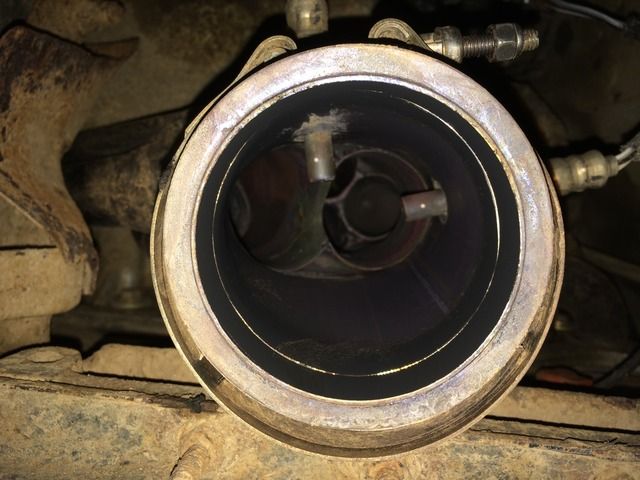 New version, with repaired old tailpipe. I moved catalytic converter forward so I would not have to cut harness and extend wires for the downstream O2 sensors. The cat should be more efficient here as well as it should run hotter, I am totally making an assumption here. Tailpipe is flattened a bit where I ran over it and folded it over the rear axle. Actually gives me more clearance for the shock, and I don't think I am losing much flow. 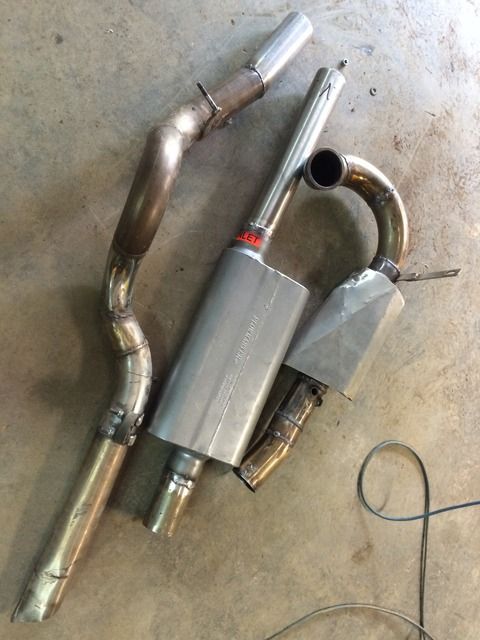 I added a 2nd heat shield to converter as it sits right next to the starter. I still have about 1/2 inch to 3/4 inch clearance to starter. If I find the starter is starting to drag when jeep is hot, then I may have to add some more protection. The heat shield was originally a decorative stainless cover off a BBQ. Already had a bend in it to clear the starter. 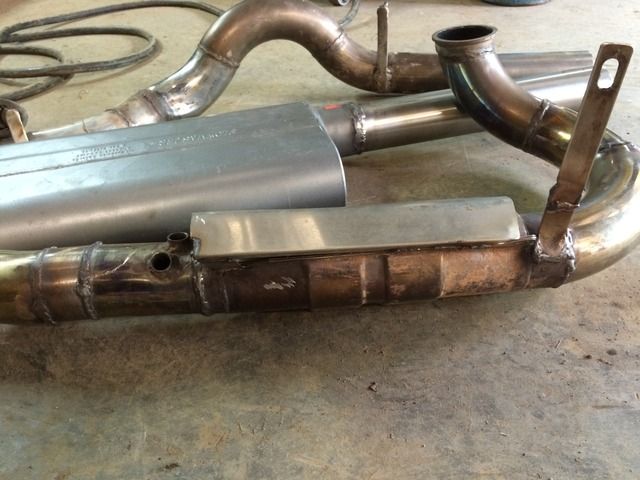 Hard to see clearance next to starter. Really close to oil pan as well. But clears front control arm fine. 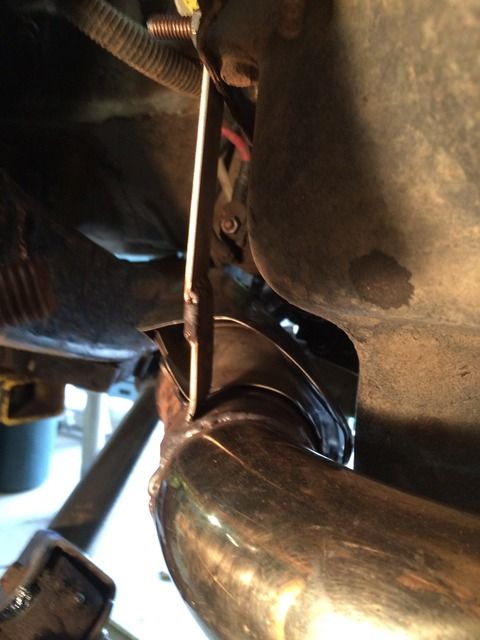 Shortened tailpipe. Curve on the bottom is from rocks on Crusher. Looks kind of funky. 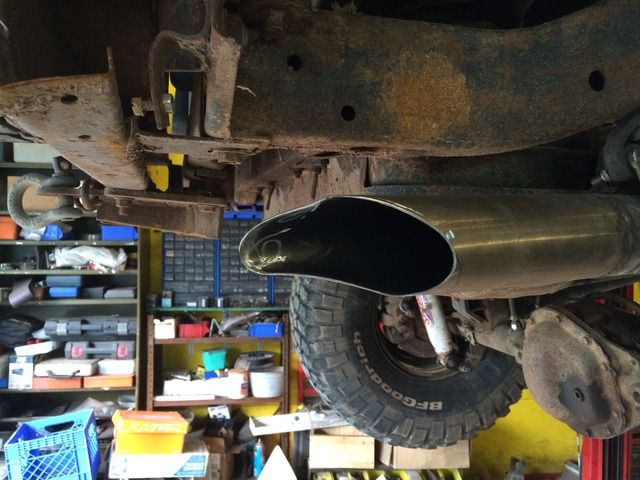 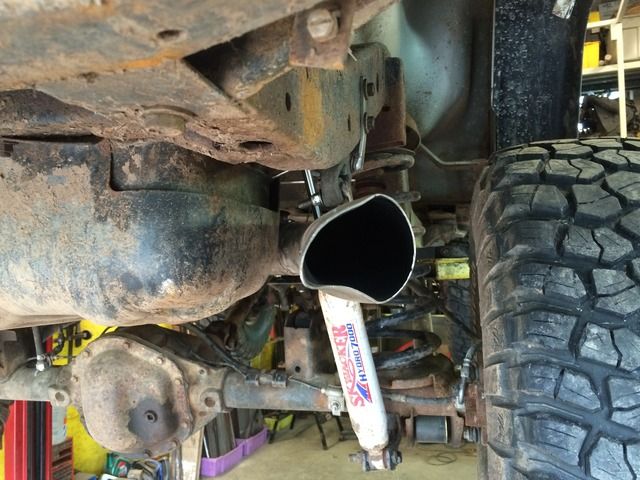 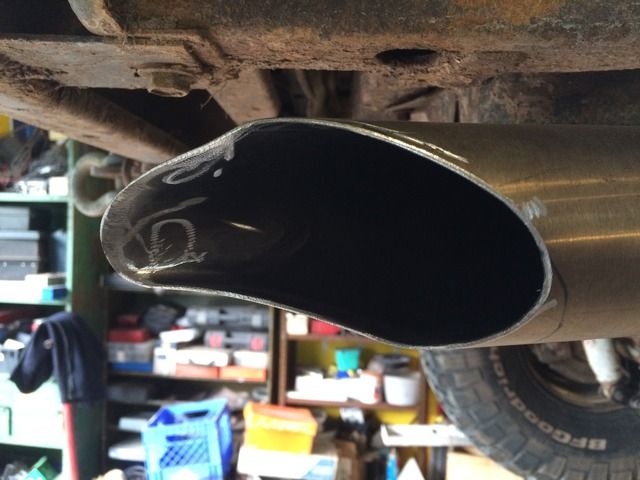 New muffler sounds SO MUCH BETTER. No drone, nice rumble, no more civics following me around.  T/C shifter works great. No issues. I think it shifts easier and smoother than the stock shifter. Going to be busy with work for most of the summer, so no more upgrades till fall. |
|
chevystroker
Jeeper
NEVER CONFUSE HAVING A CAREER WITH HAVING A LIFE ! ! ! ! ! !
Posts: 896
|
Post by chevystroker on Jun 14, 2016 8:44:44 GMT -4
|
|
chevystroker
Jeeper
NEVER CONFUSE HAVING A CAREER WITH HAVING A LIFE ! ! ! ! ! !
Posts: 896
|
Post by chevystroker on Jun 14, 2016 9:01:02 GMT -4
Just realized that I had no pics of the shifters in the cab installed. Had to widen and lengthen the opening in the console. 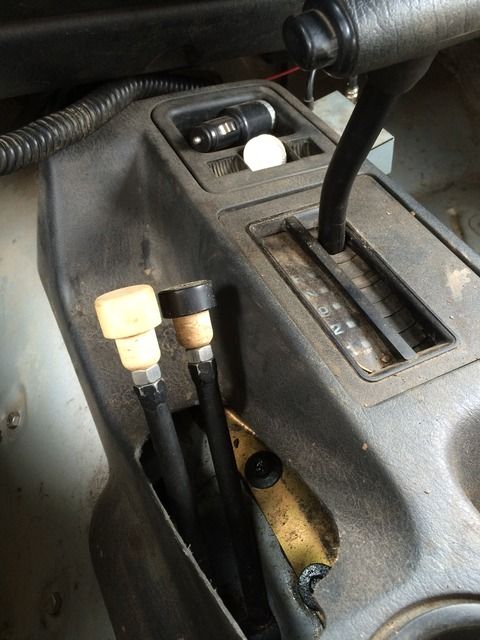 Shifter knobs are plastic corks from rum bottles. Captain Morgan is on the passenger side, he is not allowed to drive. 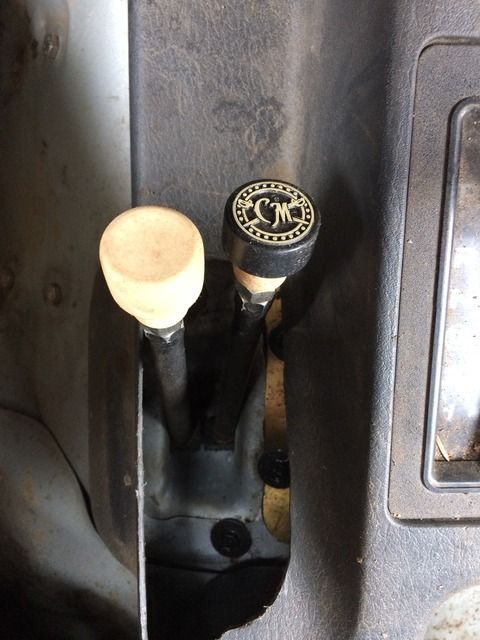 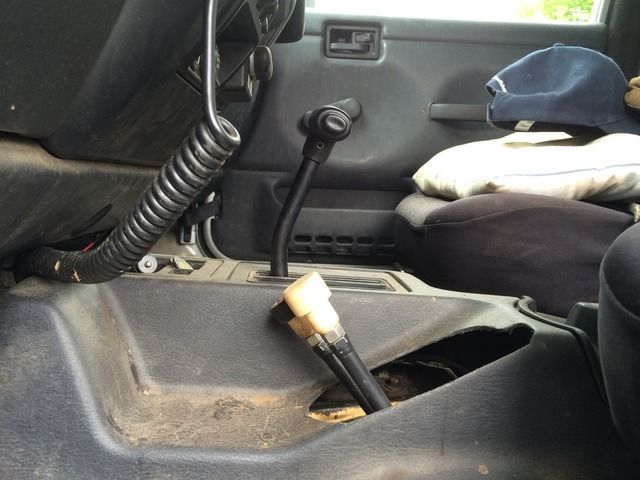 Positions: HI RANGE 2WD 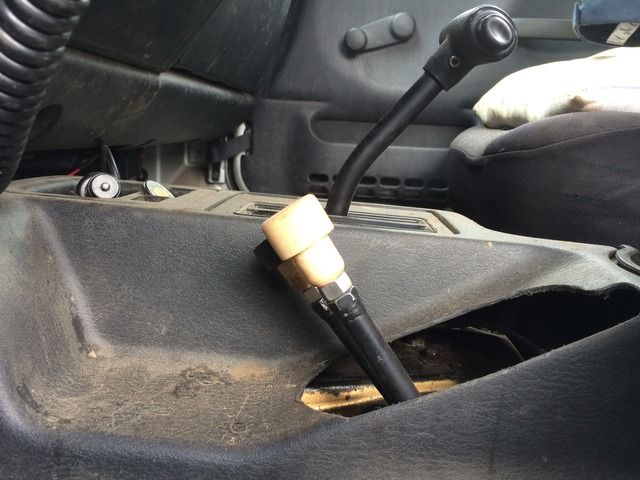 NEUTRAL, with 2WD, can also do Neutral in 4WD 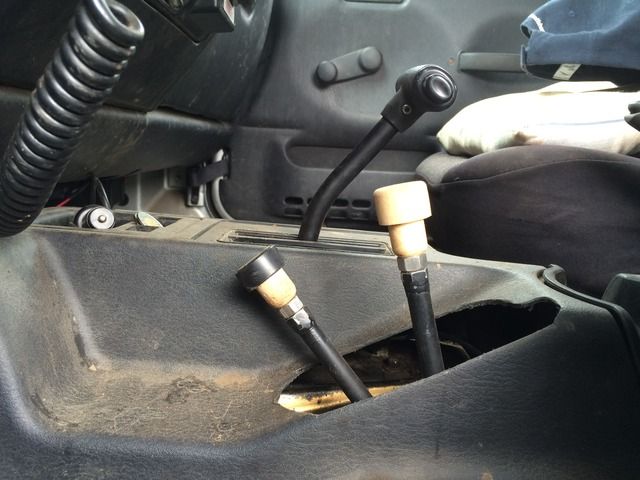 LOW RANGE 2WD (This is the big one. ) 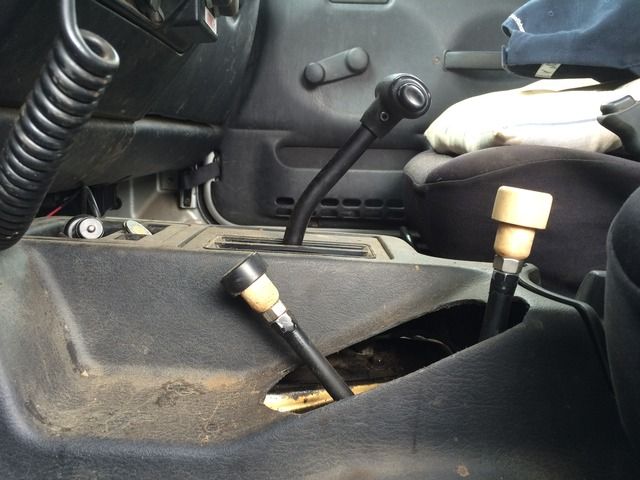 LOW RANGE 4WD 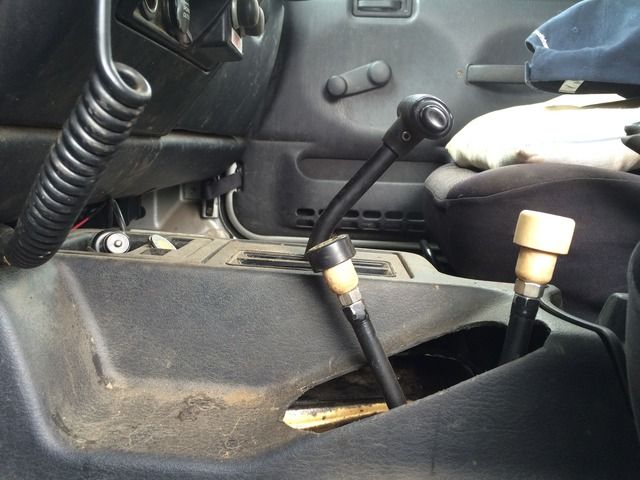 HI RANGE 4WD 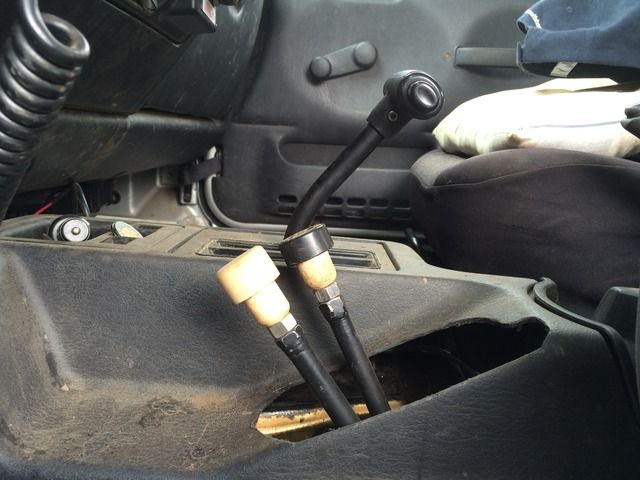 Trying to remember now, but I think the older style T/C, like YJ's, were in 4WD when the shifter was in Neutral, but in my TJ, the T/C was in 2WD when the shifter was in Neutral. I think the difference is in how the cam profile is to lift the 4WD shift fork. There is a different profile on the TJ cam versus the YJ. There is a valley or notch in the TJ that is not in the YJ, so the T/C goes back down into 2WD in Neutral. I think that is how they were arranged in the stock T/C's. That might help out with the 2WD low range though, have to look at that more later. I think I figured out a way to modify the older style steel range shift fork so that I don't have to grind the 4WD shift fork, or machine the shift collar. Sometime this fall, I will try the 2WD Low Range modification on another T/C to see if I can simplify things. I want to try doing a SYE with the stock shaft and tailhousing too. So many projects, so little time. |
|


 Droned really bad. I also had the tail pipe back in line with the back end of the rear bumper, which was also a mistake, it was really vulnerable there. During Crusher, I kept flattening the tailpipe between rocks and the rear bumper. BUT, the jeep sounded better.


