The Garagemahal
Moderator  Build Thread King
Resident Army Ranger , Navy Seal , Super-Warrior , Ninja !!
Build Thread King
Resident Army Ranger , Navy Seal , Super-Warrior , Ninja !!
Posts: 11,518
|
Post by The Garagemahal on Jan 15, 2014 17:00:33 GMT -4
rocker cut-outs are good looking. Should be easy to work with the remainder. too bad you can't cut those rear fenders off at the body line. Makes for a nicer back bumper setup that way too. I'd consider cutting the flares. I agree , nice and clean , no knockin the corners in the woods |
|
|
|
Post by backwoodsLJ on Jan 15, 2014 19:32:15 GMT -4
I like the rear quarters chopped like I did on stepsons XJ and mine are done the same.Billy's were in great shape too but we hacked them off.Its ties in nice with the rear floor and looks factory underneath when done.Weld it up seamseal the seams and paint does a nice job?Just my 2 cents its looking good though and look forward to the flairs on!  |
|
|
|
Post by Inchbomb on Jan 15, 2014 19:38:10 GMT -4
The only issue that I've found online is that the tubes at the edge of the flares are hollow and they curve in towards the body at the ends. It would be the only place they didn't do that so may look a little odd.
I'm no plastic expert, but maybe there's a way to mod the flares to curve in and not look ghetto. This would be my preferred way to go. Anybody know how to do this or can link a writeup by someone that's done it?
I did pick up the outside body panels for the quarters so until I get out to Scott's to have a look and decide to cut my new $500 flares, I'm thinking right now to chop the quarters like you guys are talking about, then weld the sheet metal on the outside to mount the flare. If that makes any sense.
|
|
|
|
Post by backwoodsLJ on Jan 15, 2014 19:42:47 GMT -4
The only issue that I've found online is that the tubes at the edge of the flares are hollow and they curve in towards the body at the ends. It would be the only place they didn't do that so may look a little odd. I'm no plastic expert, but maybe there's a way to mod the flares to curve in and not look ghetto. This would be my preferred way to go. Anybody know how to do this or can link a writeup by someone that's done it? I did pick up the outside body panels for the quarters so until I get out to Scott's to have a look and decide to cut my new $500 flares, I'm thinking right now to chop the quarters like you guys are talking about, then weld the sheet metal on the outside to mount the flare. If that makes any sense. Ah see your point on flairs yeah tough call? You guys will sort it out looking forward to the outcome! |
|
Creepy
Administrator  Dartmouth
Posts: 18,718
|
Post by Creepy on Jan 16, 2014 8:31:59 GMT -4
Its easy to say 'chop' when you aren't paying for the parts. lol
|
|
The Garagemahal
Moderator
Build Thread King
Resident Army Ranger , Navy Seal , Super-Warrior , Ninja !!
Posts: 11,518
|
Post by The Garagemahal on Jan 16, 2014 21:56:36 GMT -4
|
|
|
|
Post by SocialWheeler on Jan 17, 2014 5:09:32 GMT -4
I like the hole through to the wheel. Needs a Creepy window.
|
|
Creepy
Administrator
Dartmouth
Posts: 18,718
|
Post by Creepy on Jan 17, 2014 17:43:39 GMT -4
haha, yeah!
|
|
The Garagemahal
Moderator
Build Thread King
Resident Army Ranger , Navy Seal , Super-Warrior , Ninja !!
Posts: 11,518
|
Post by The Garagemahal on Jan 28, 2014 9:56:20 GMT -4
I am pretty far behind here in the build thread , so lets catch up Building the rockers , I split a piece of 1.5 pipe     That gets welded on the 2X4 sq tubing and afterwards get grinded down to look like one piece  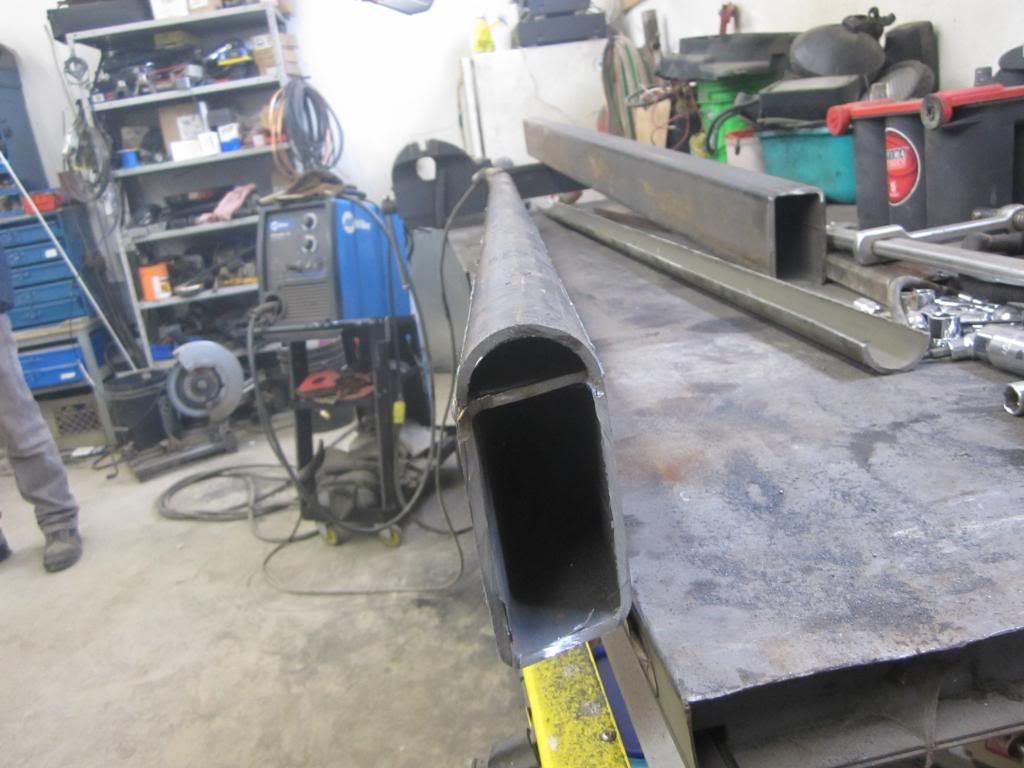 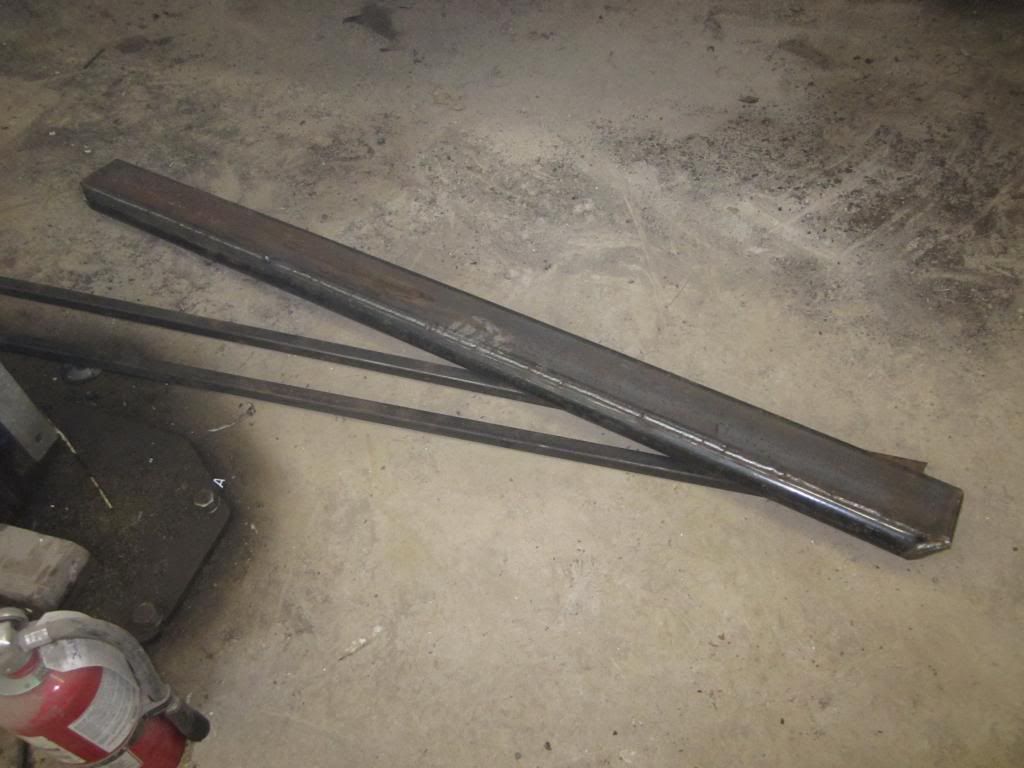 Then a 1x1 sq tubing gets welded to the back of that   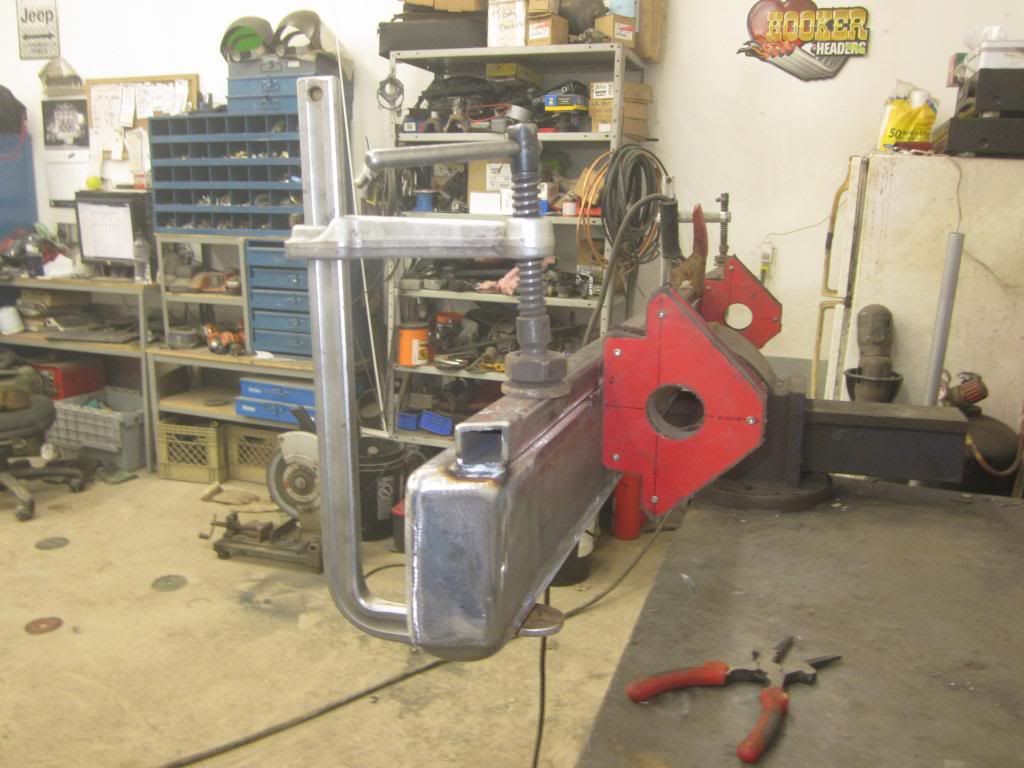 A couple of bottle jacks hold them in place and then they get welded in 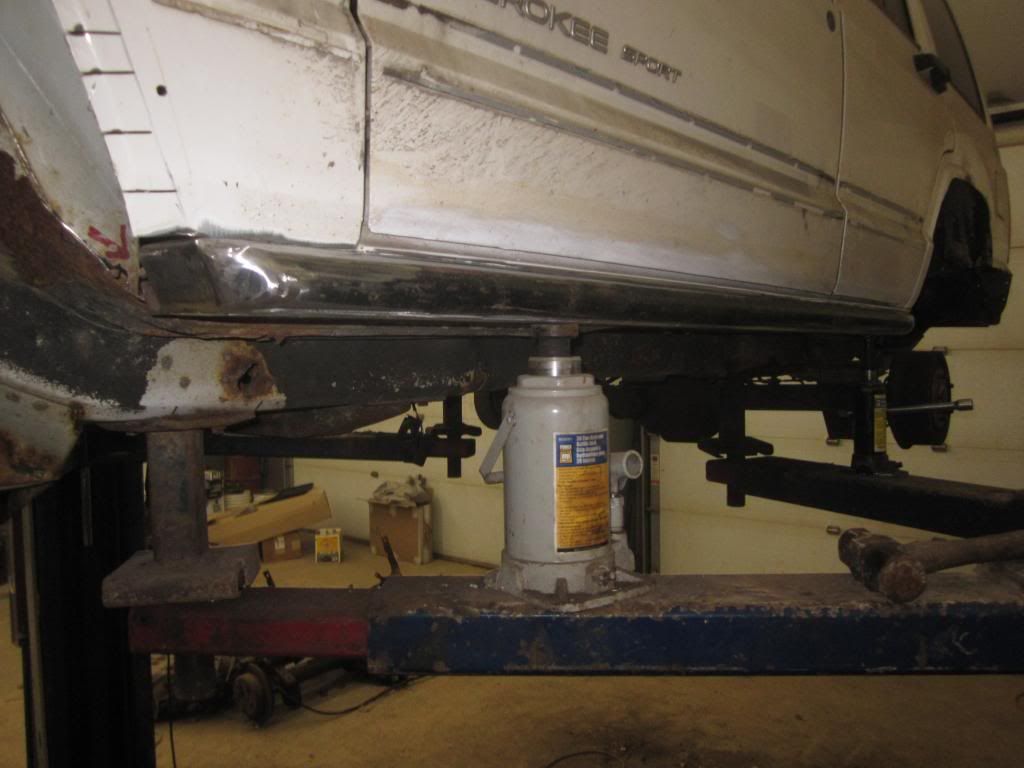  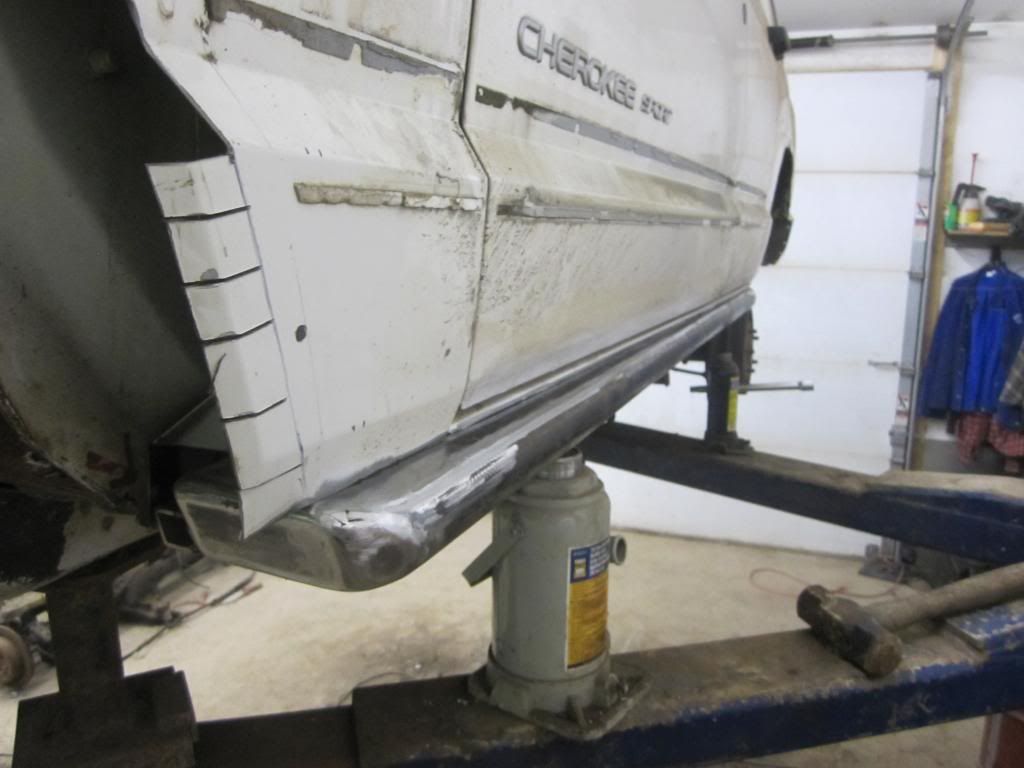 A little bit of rust was cut out too 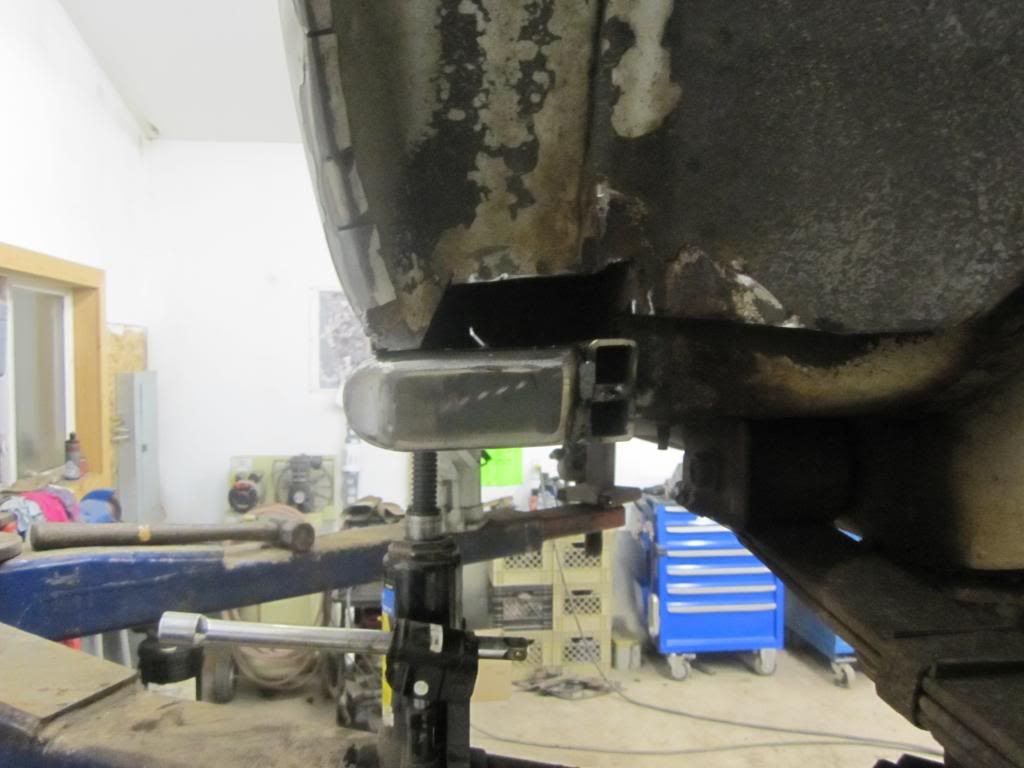 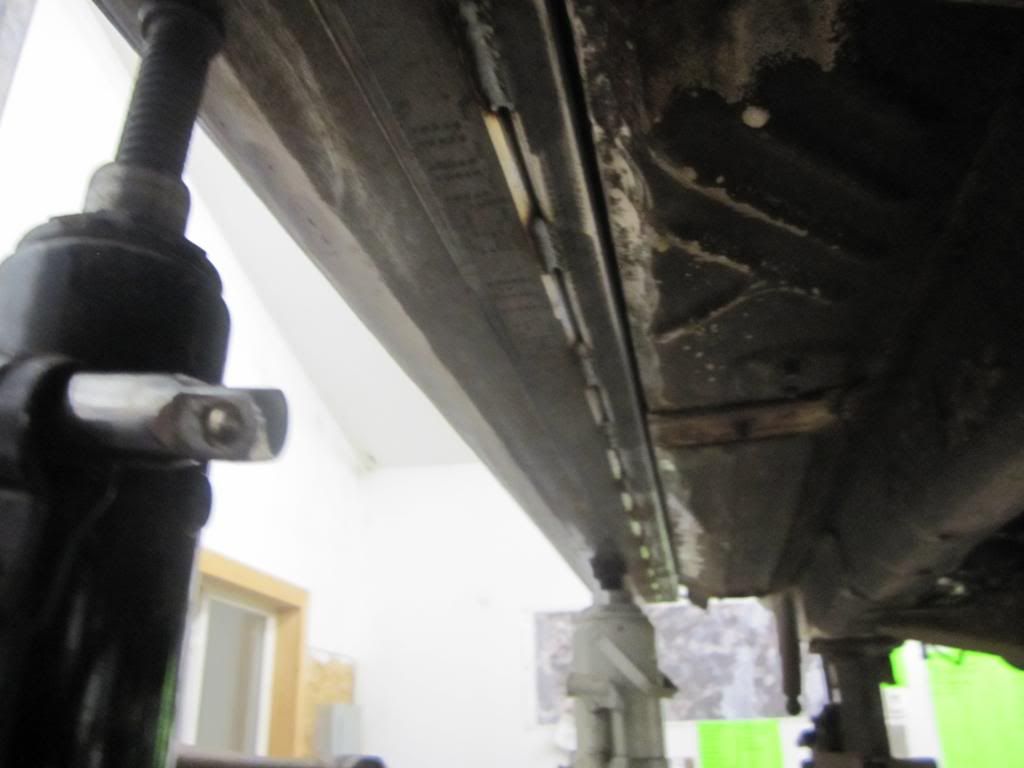 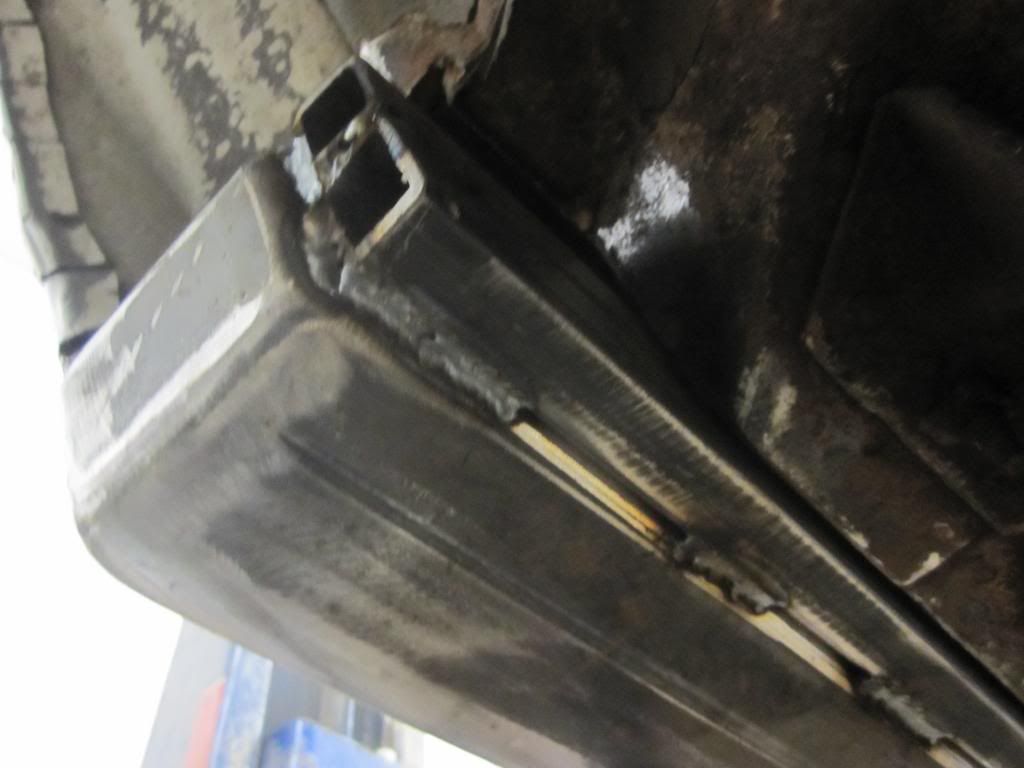 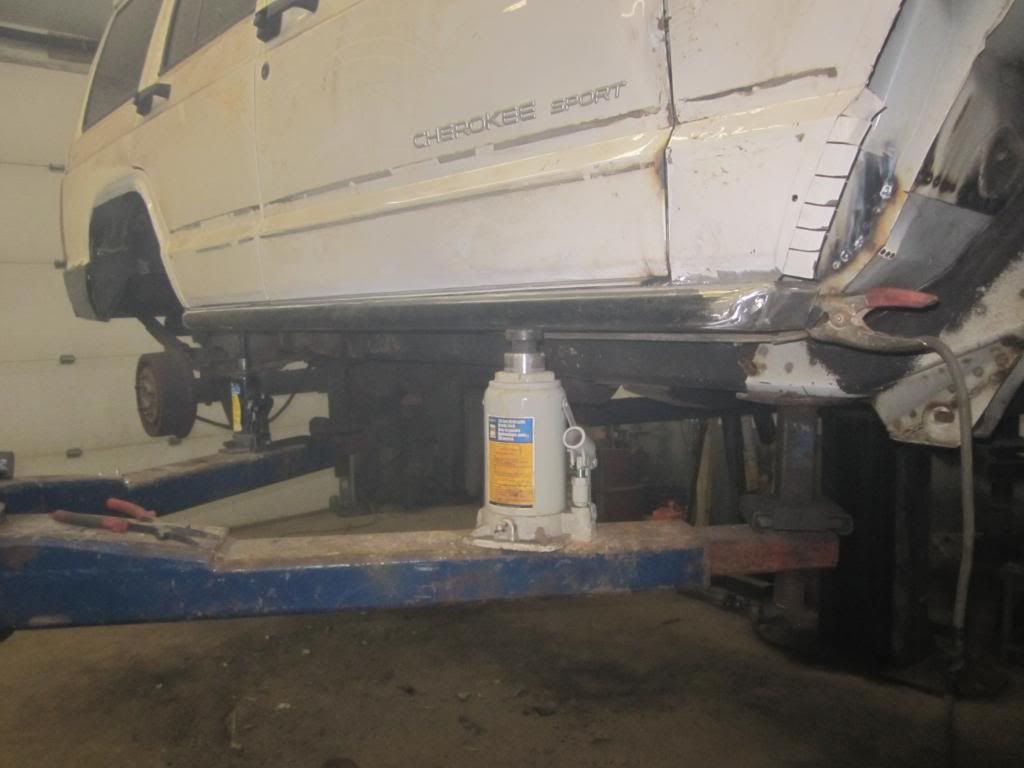 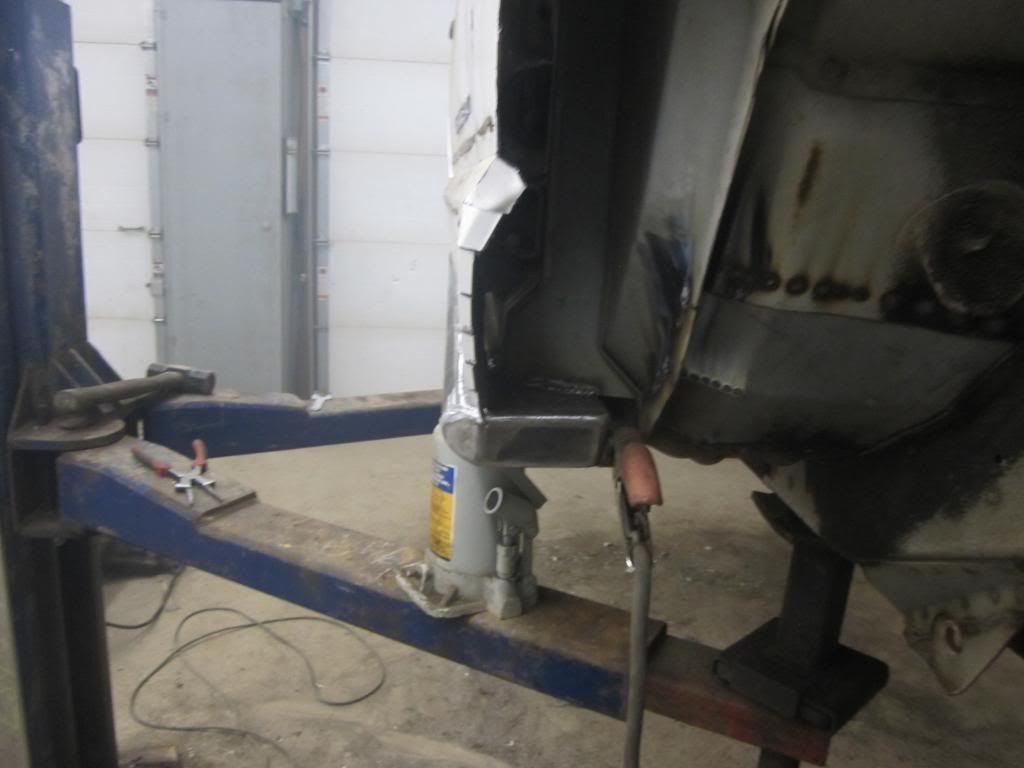 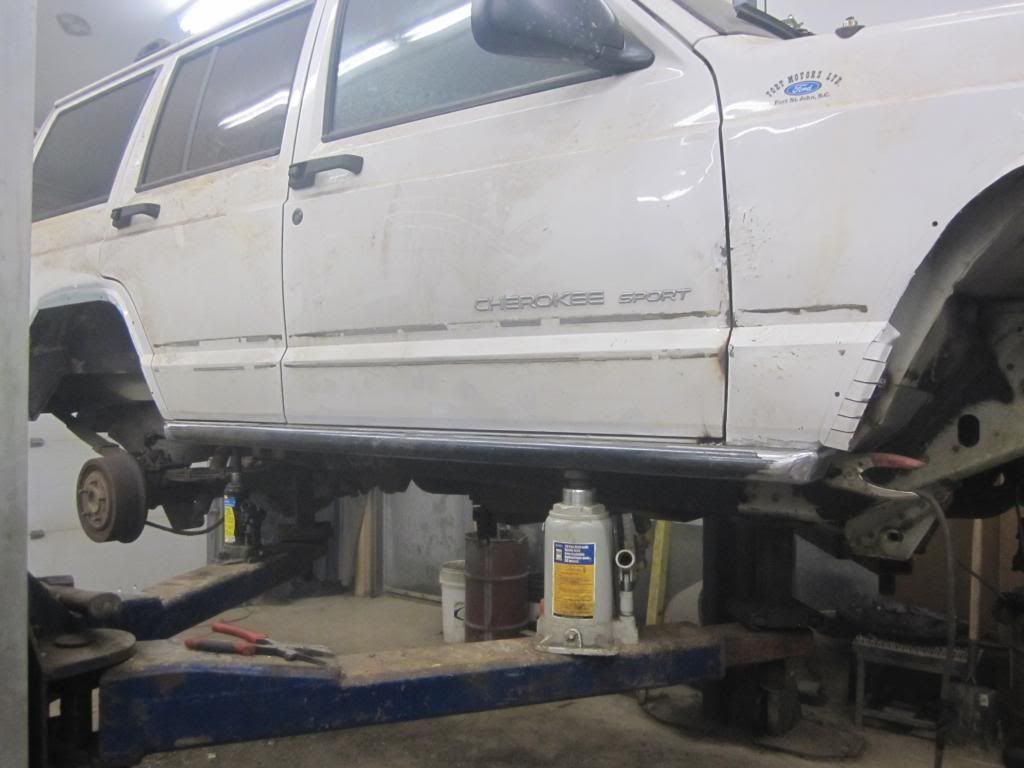 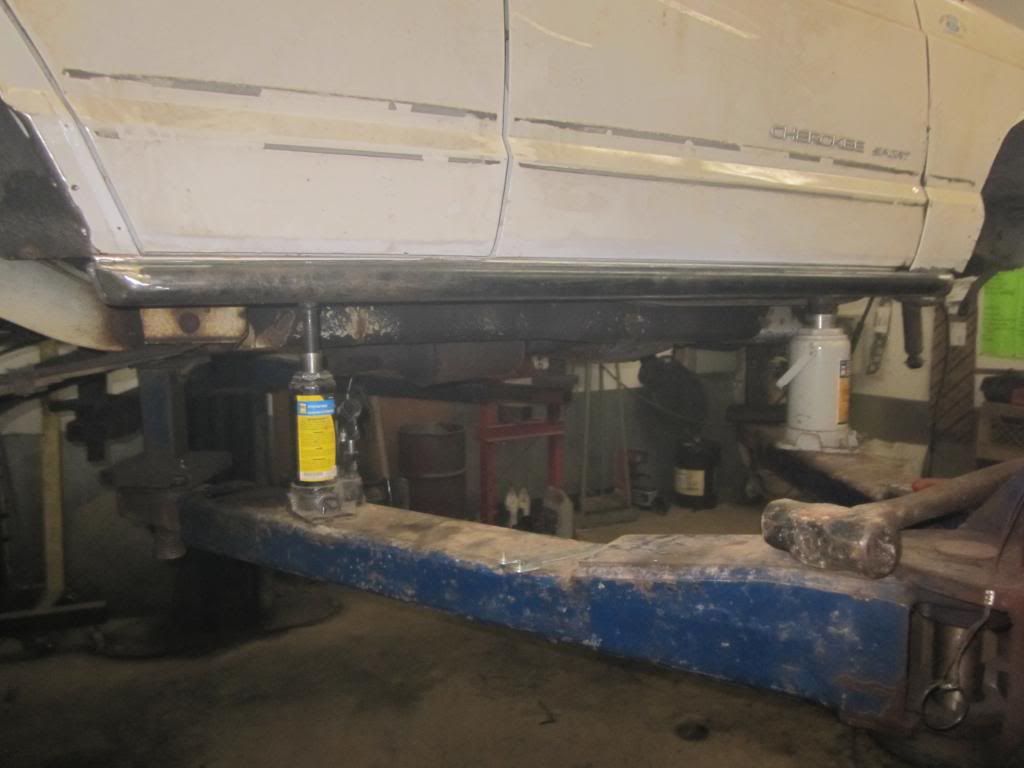 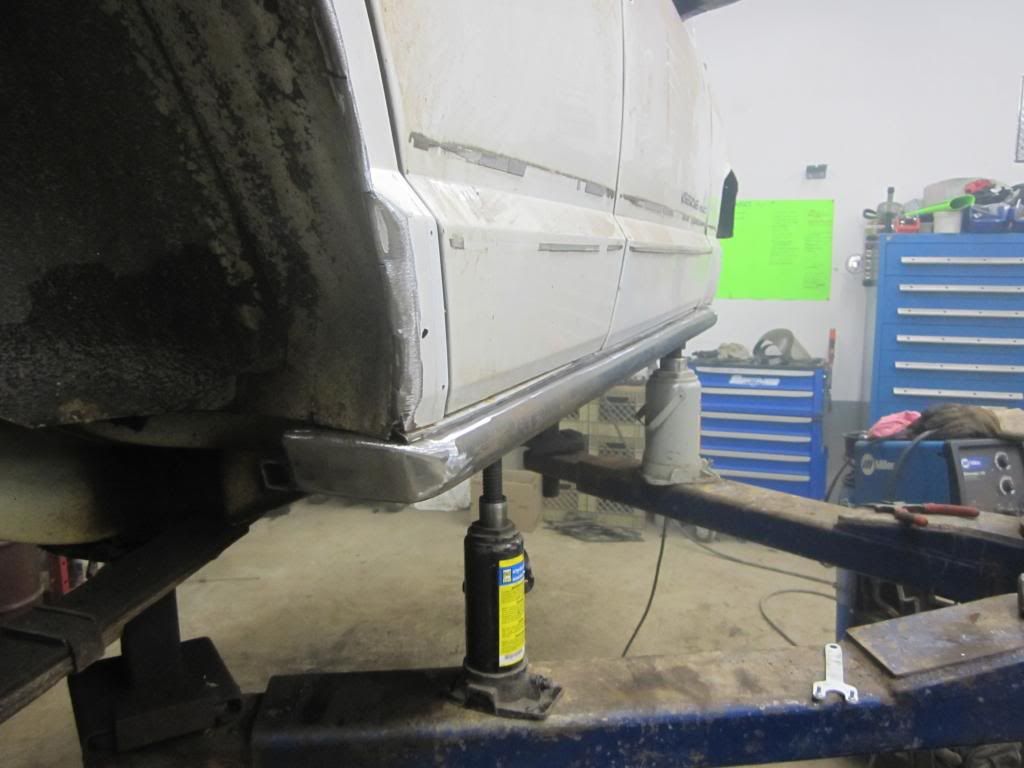 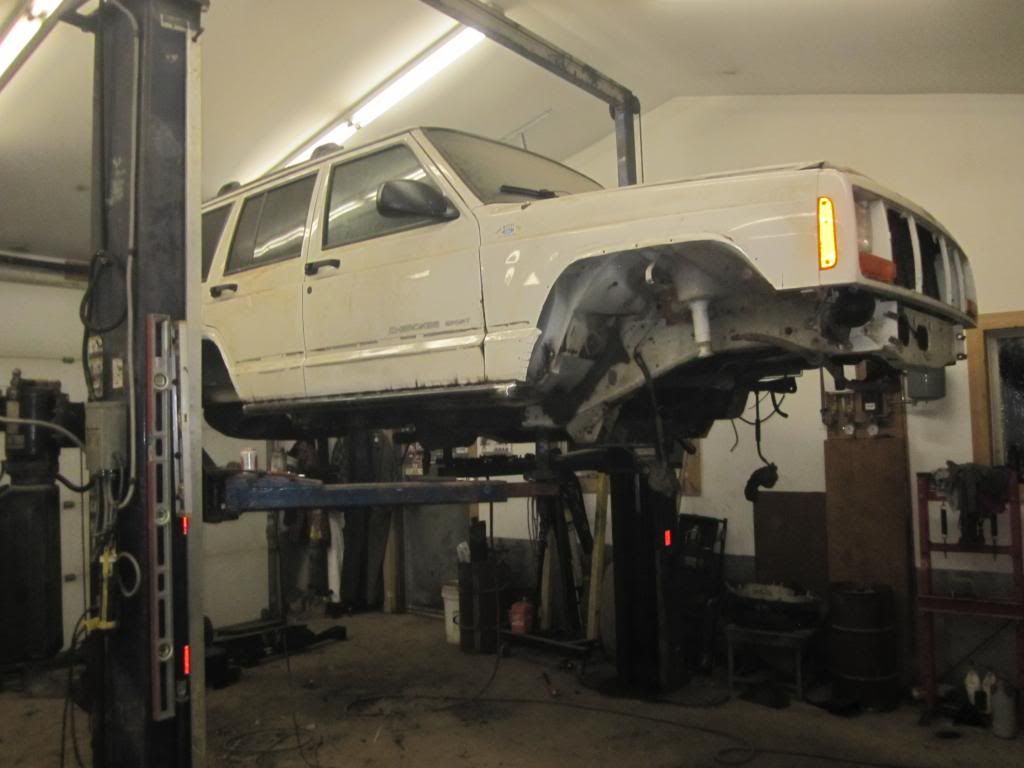 Rear quarter panels . These had to go back on , there was no cutting / trimming the flat fender flares The backs went in first 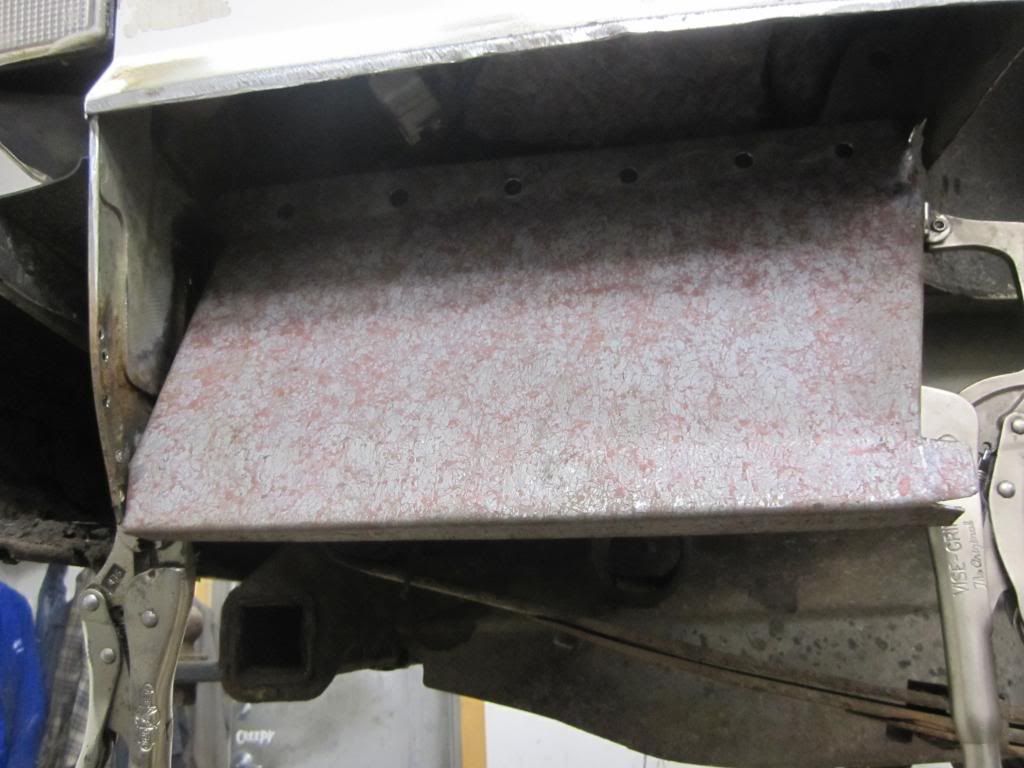 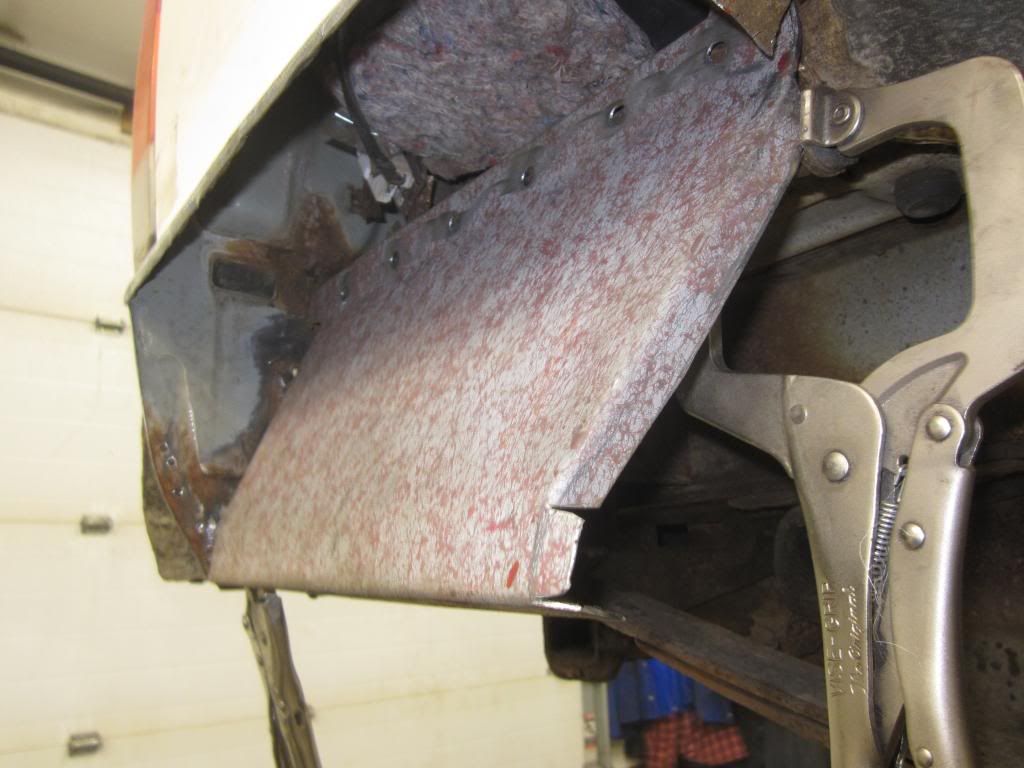 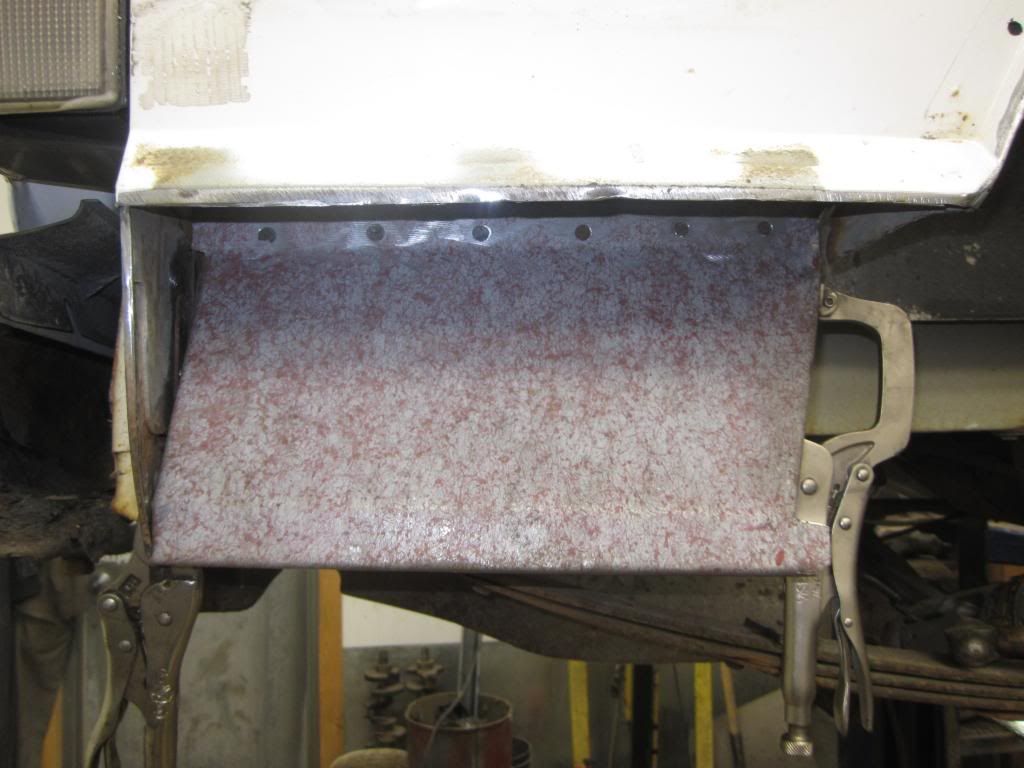 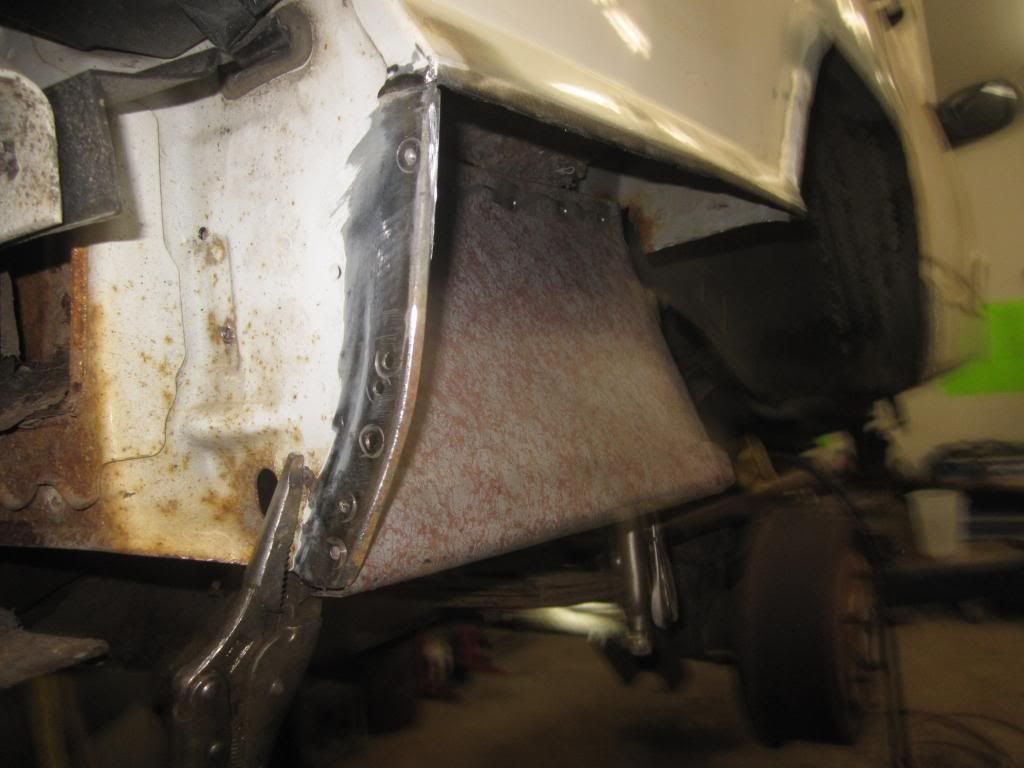 Chris had bought the outers , this saves alot of time 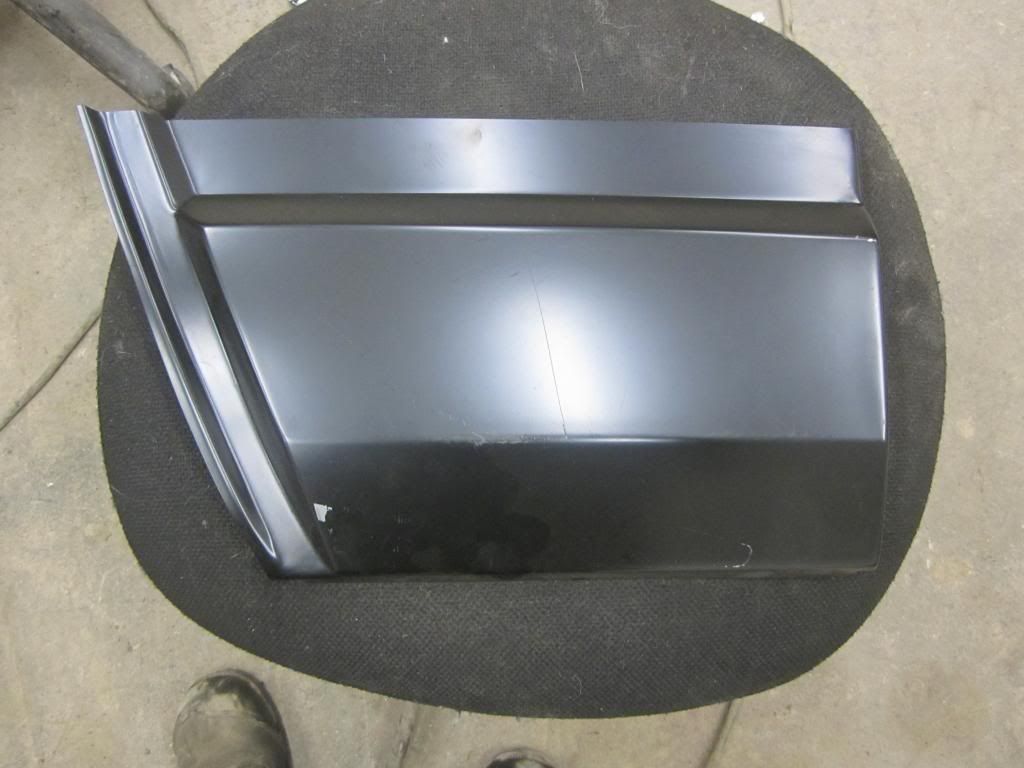 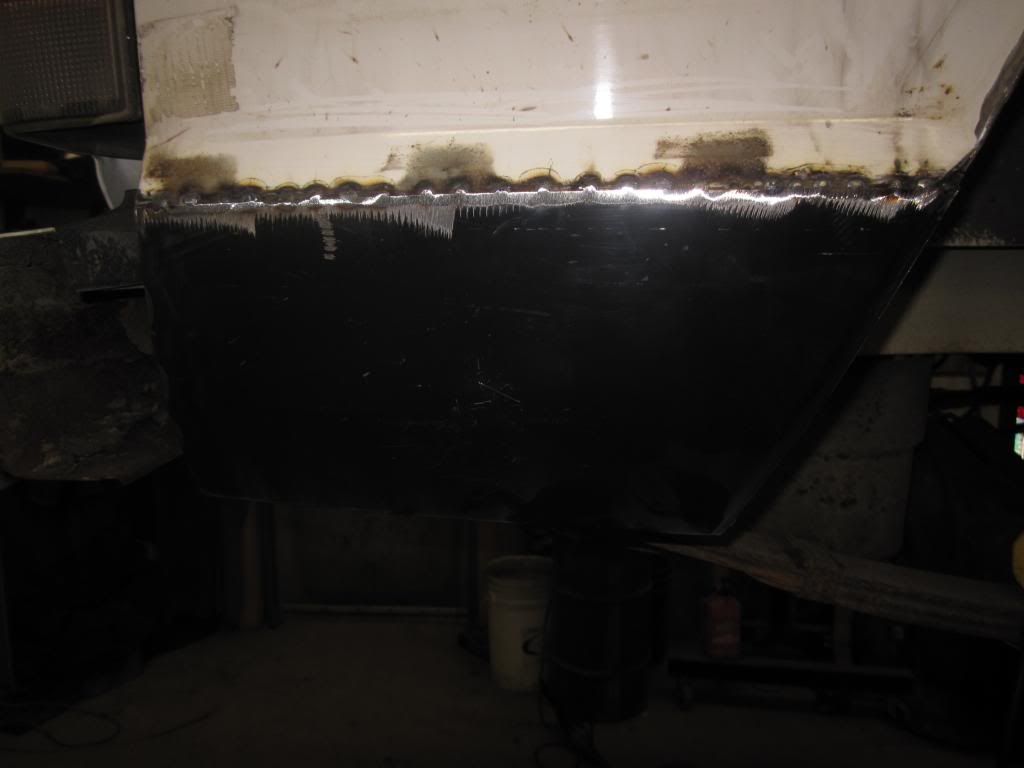 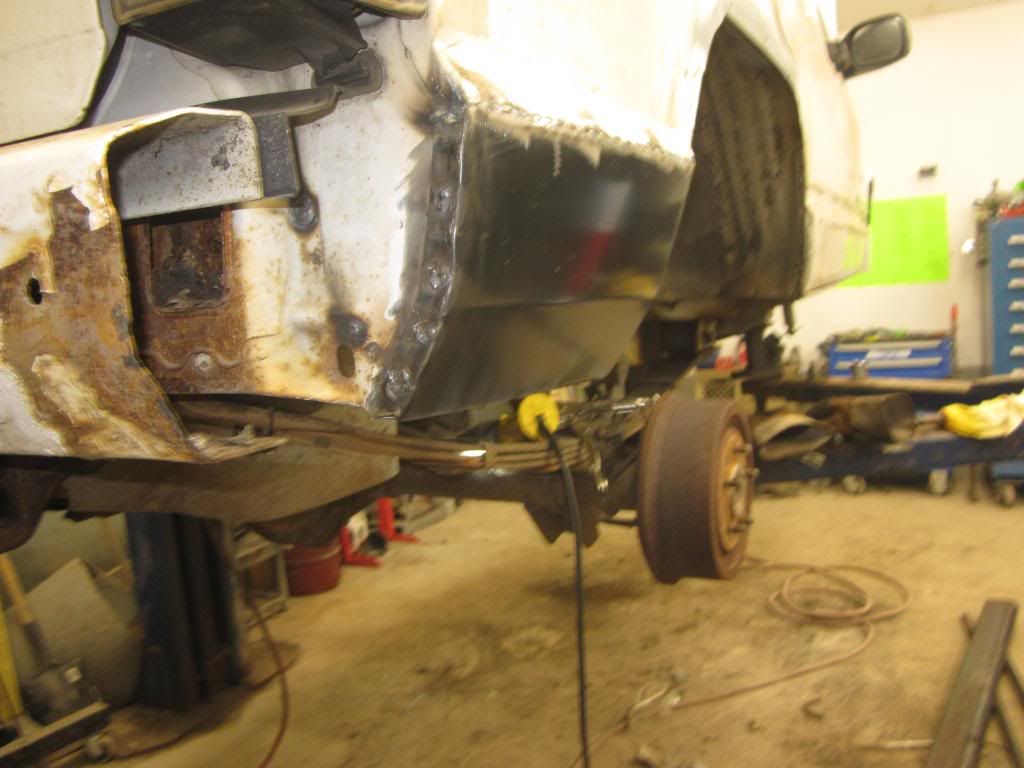  Drivers side is done the same 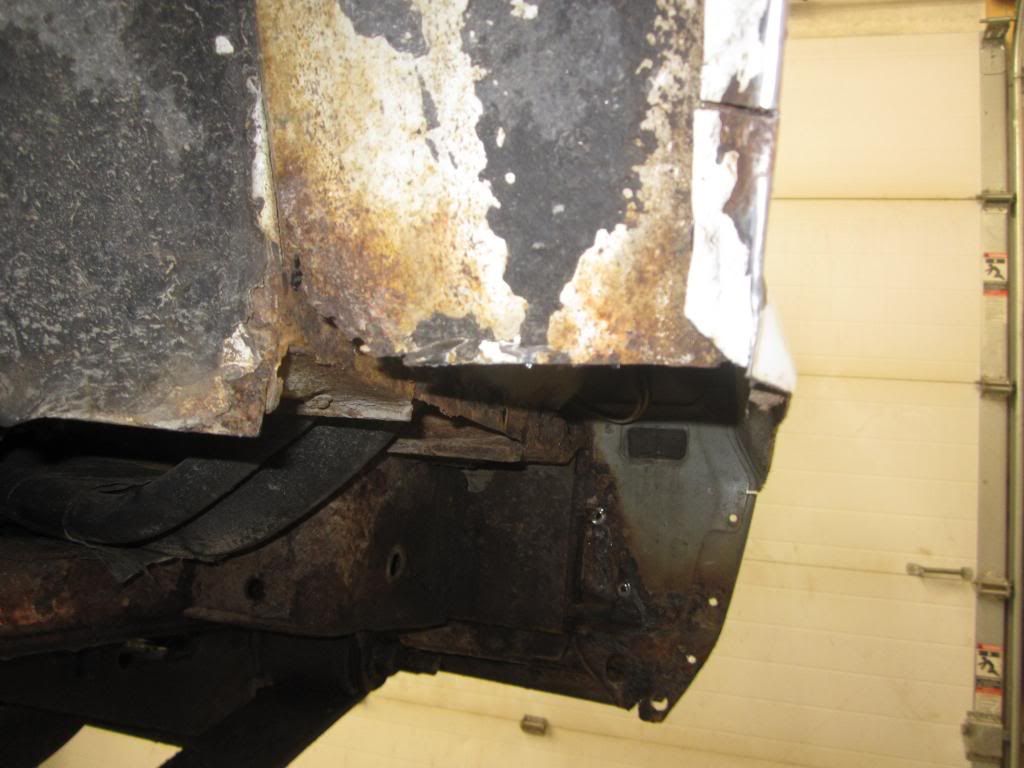 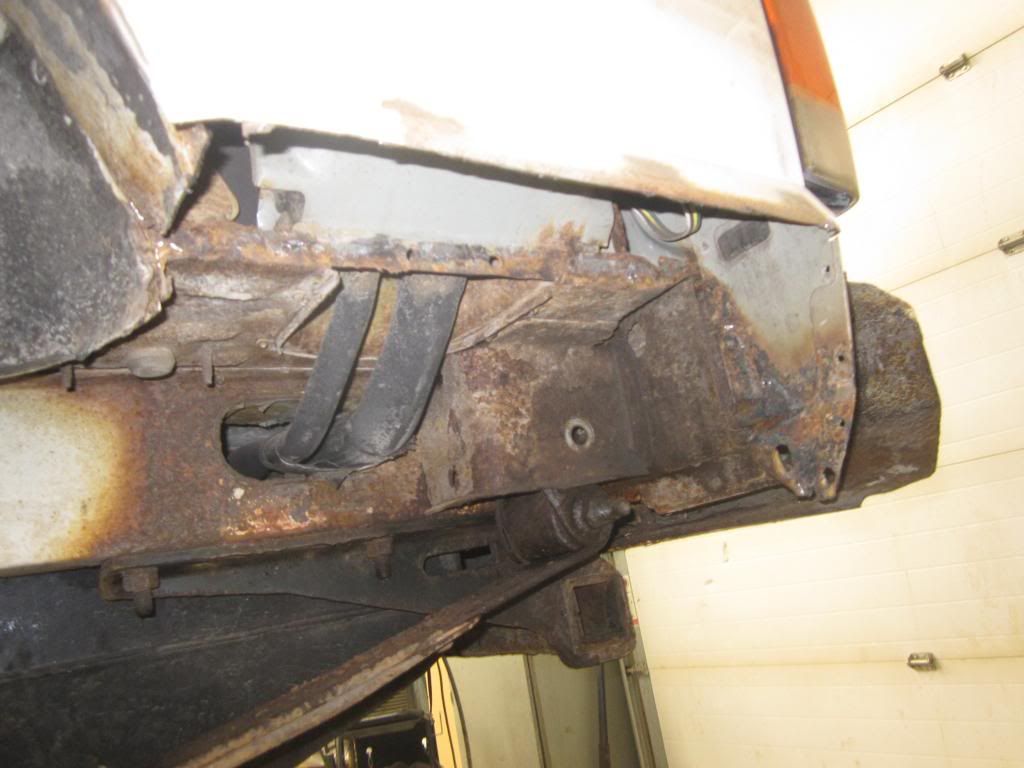  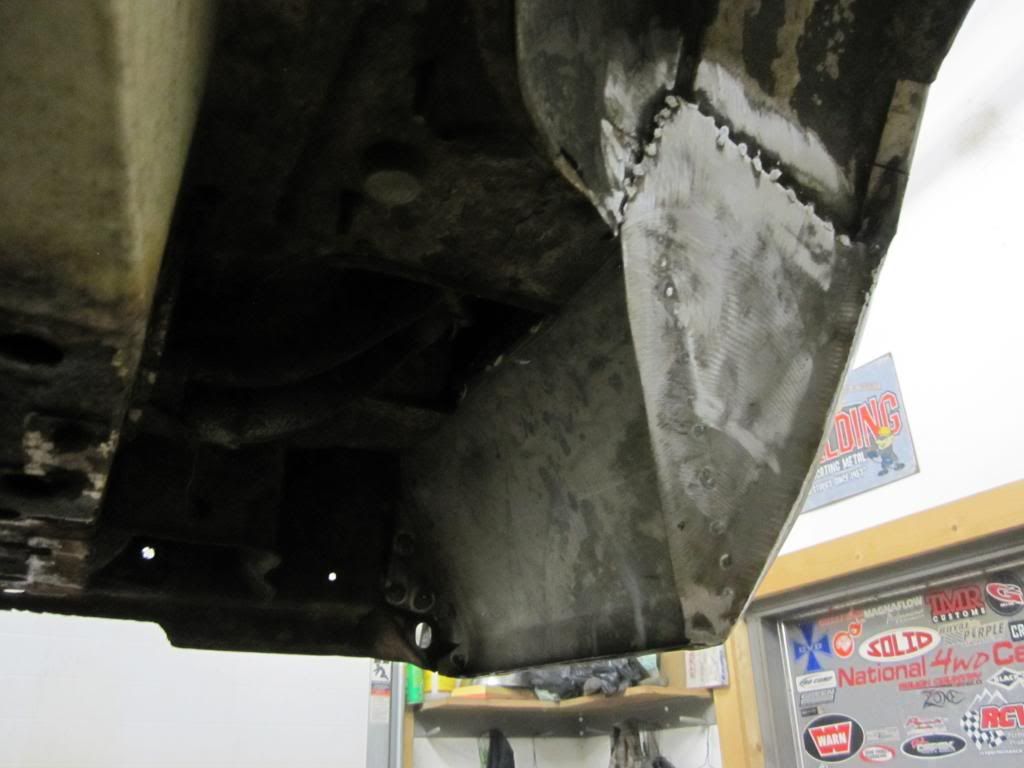 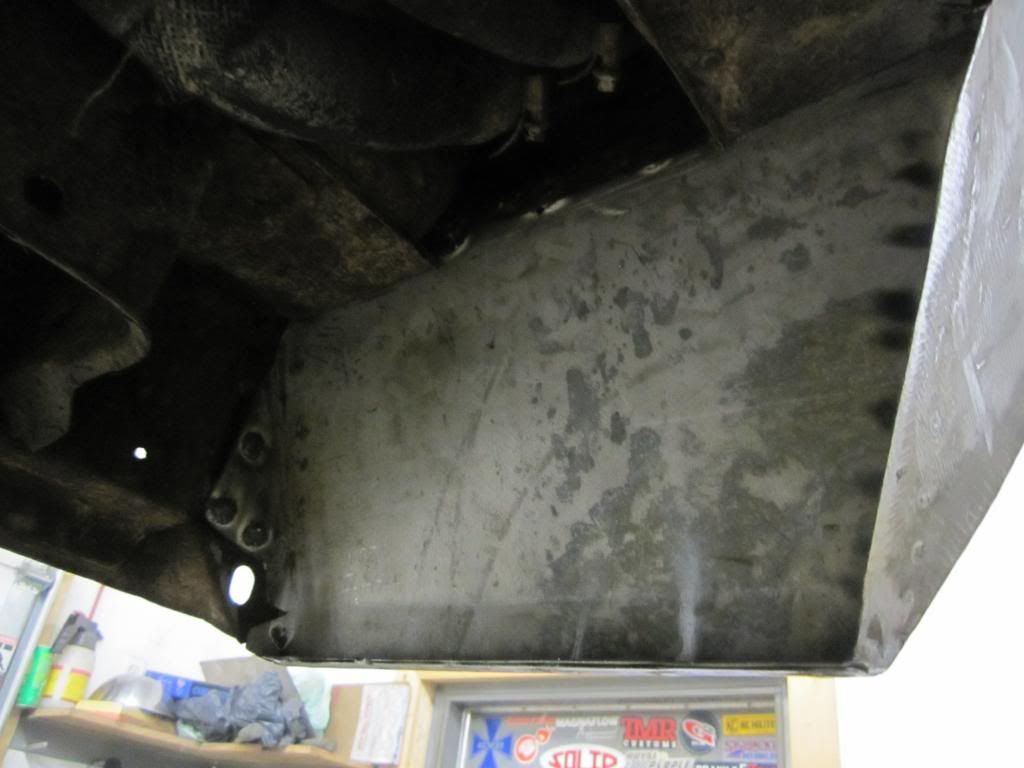 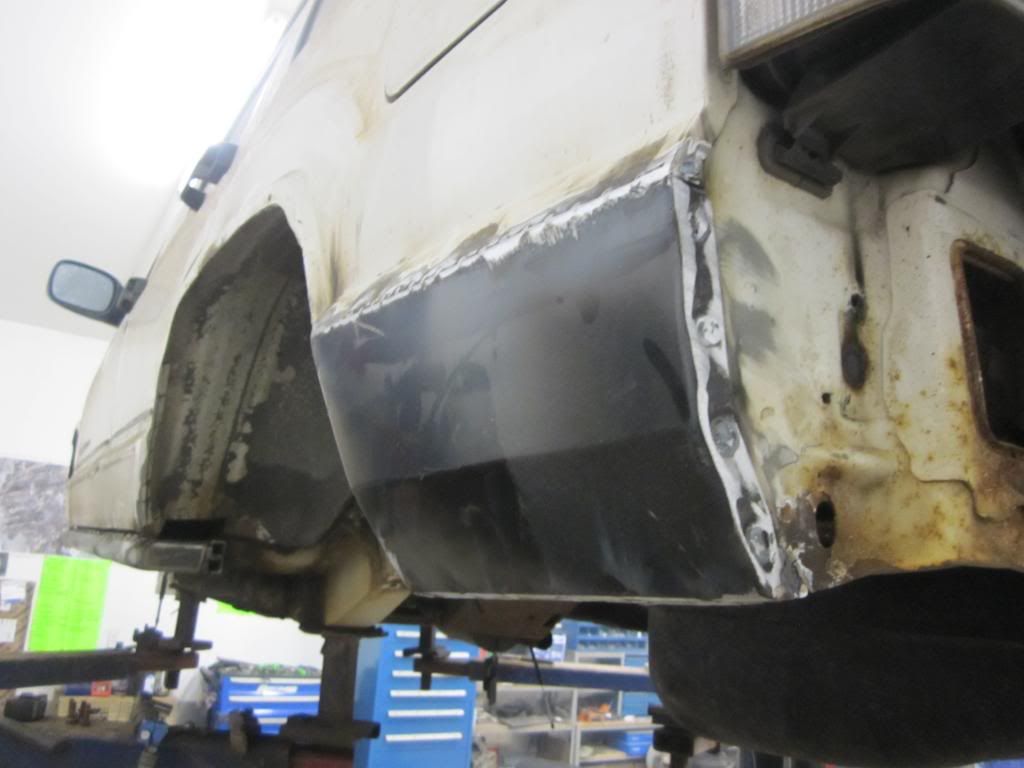 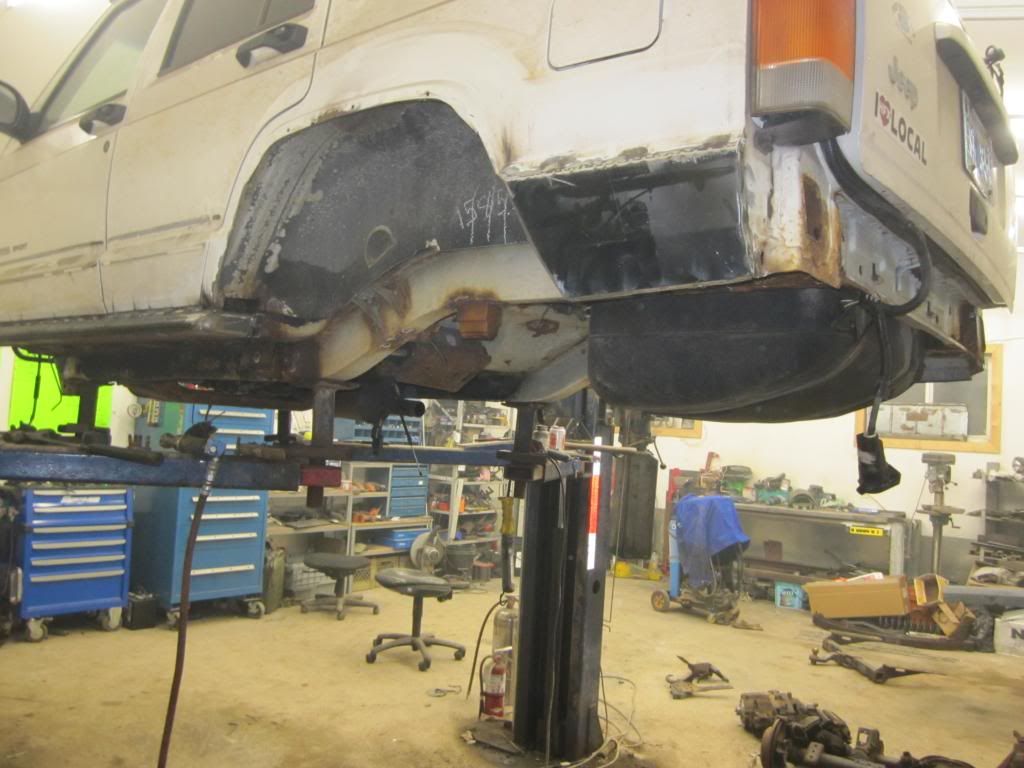 The old suspension / axles are completely stripped of the rig now . Old axle off and the gas tank skid and trailer hitch go on 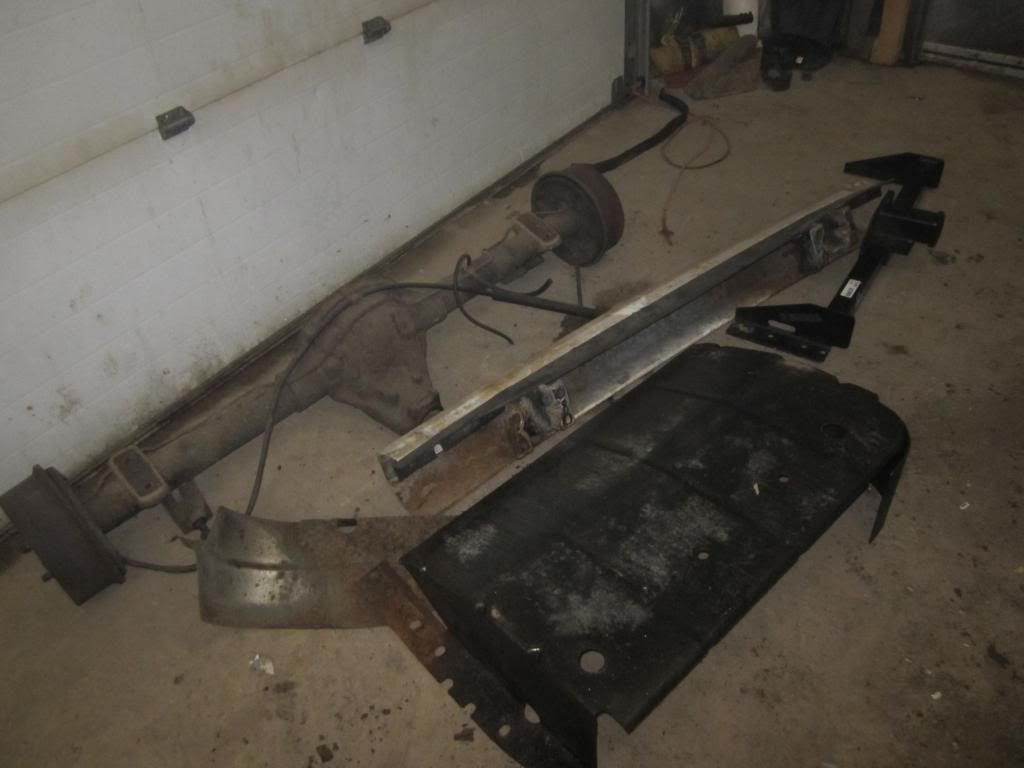 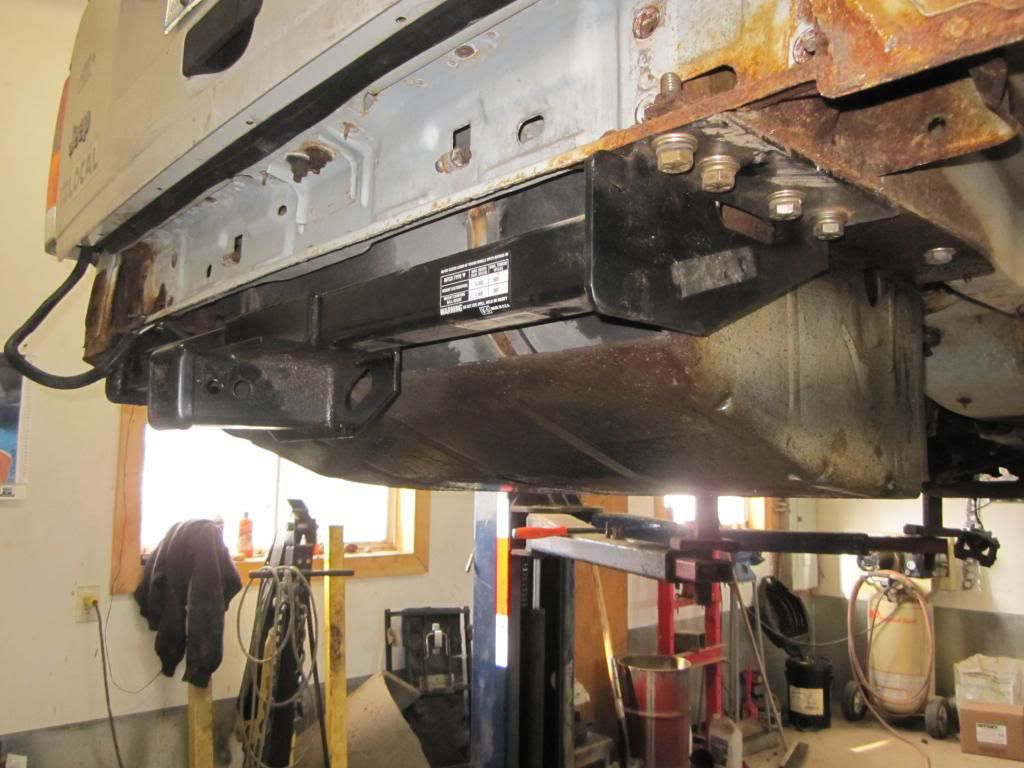 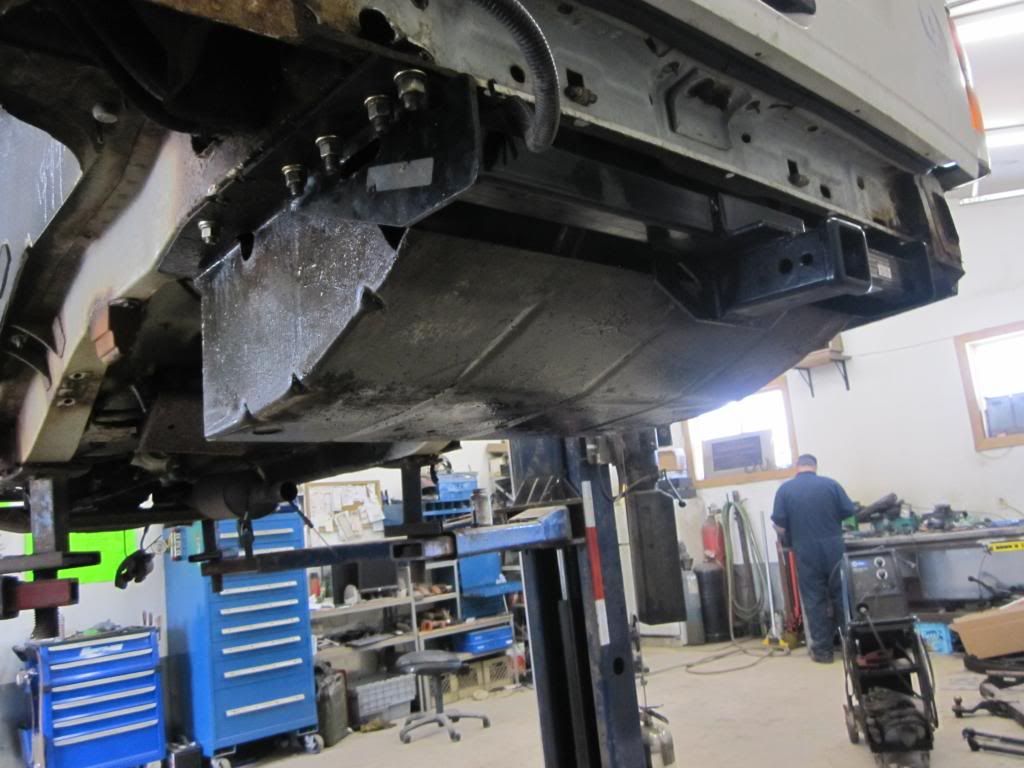 Also got the SYE T-case from the old rig in the new rig , 4.56 geared / Detroit / axles waiting to go in 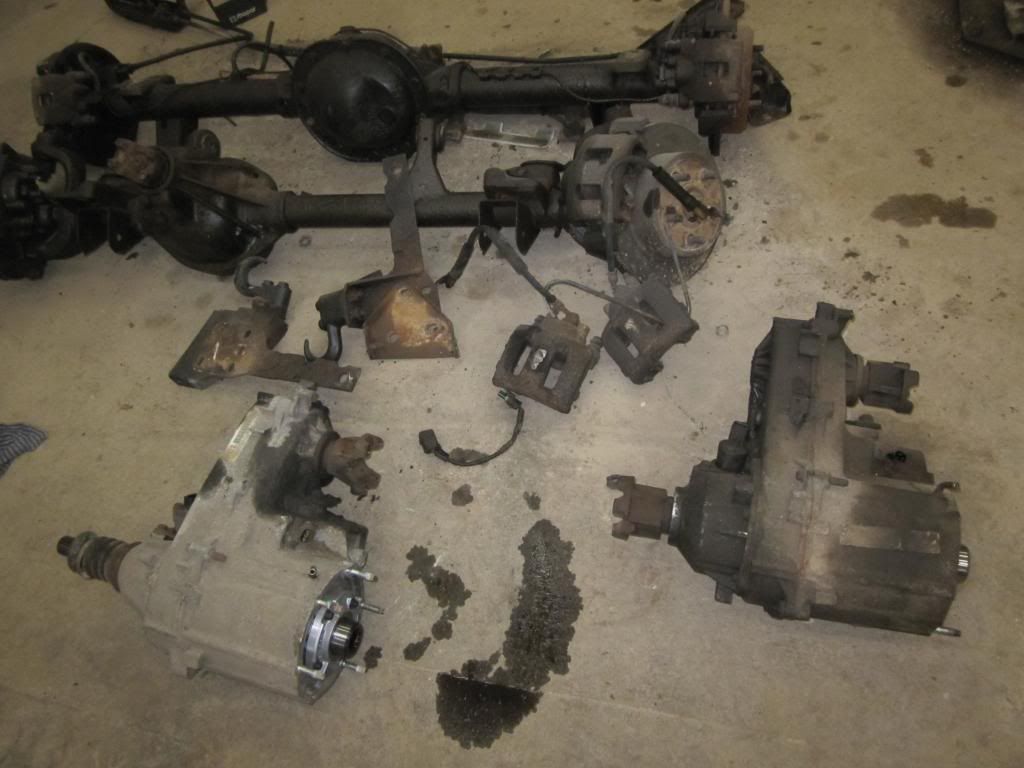 Had Alan make up 1 ton steering linkage , Its laying in wait 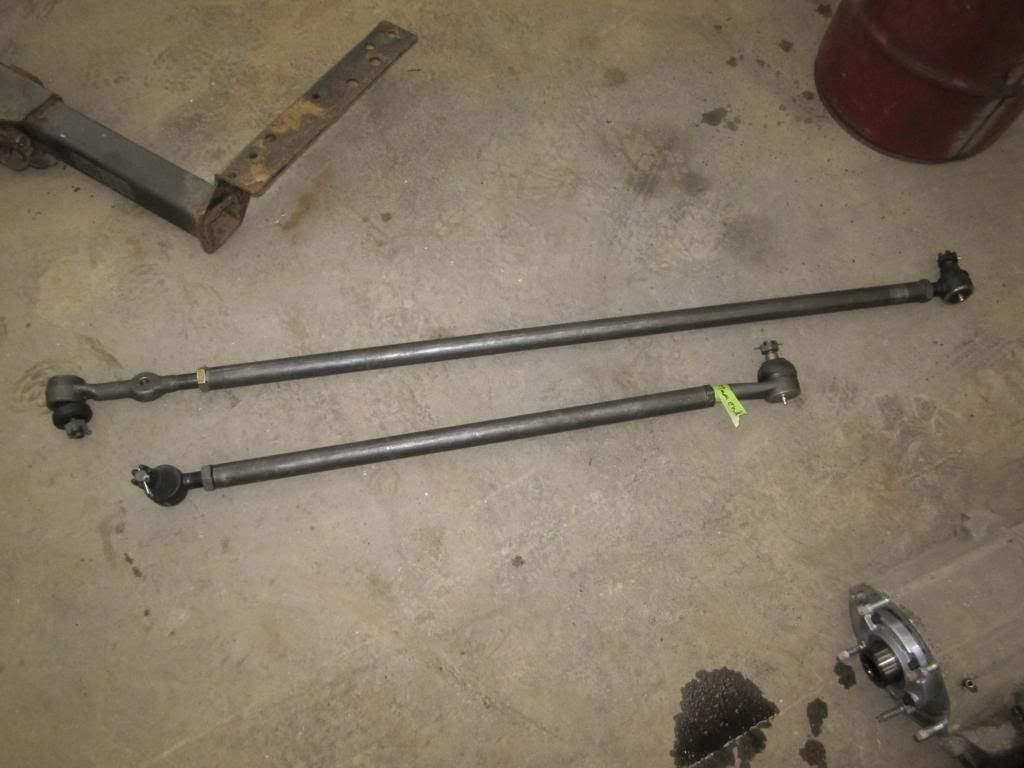 Jan made up some frame skids , laying in wait as well 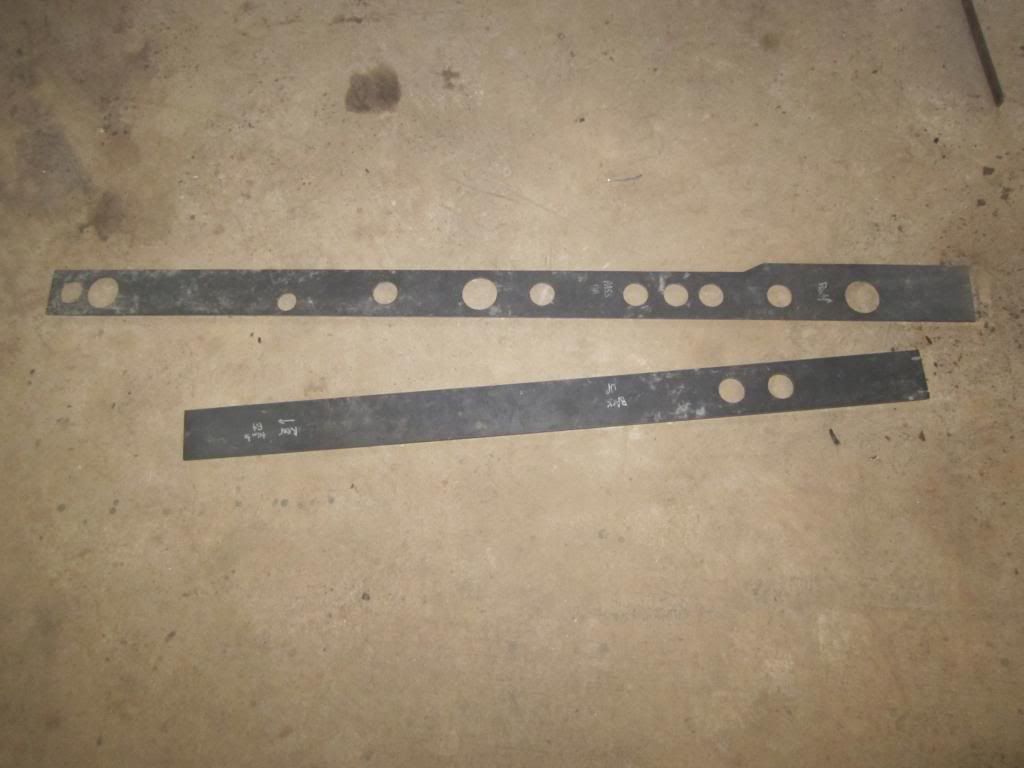 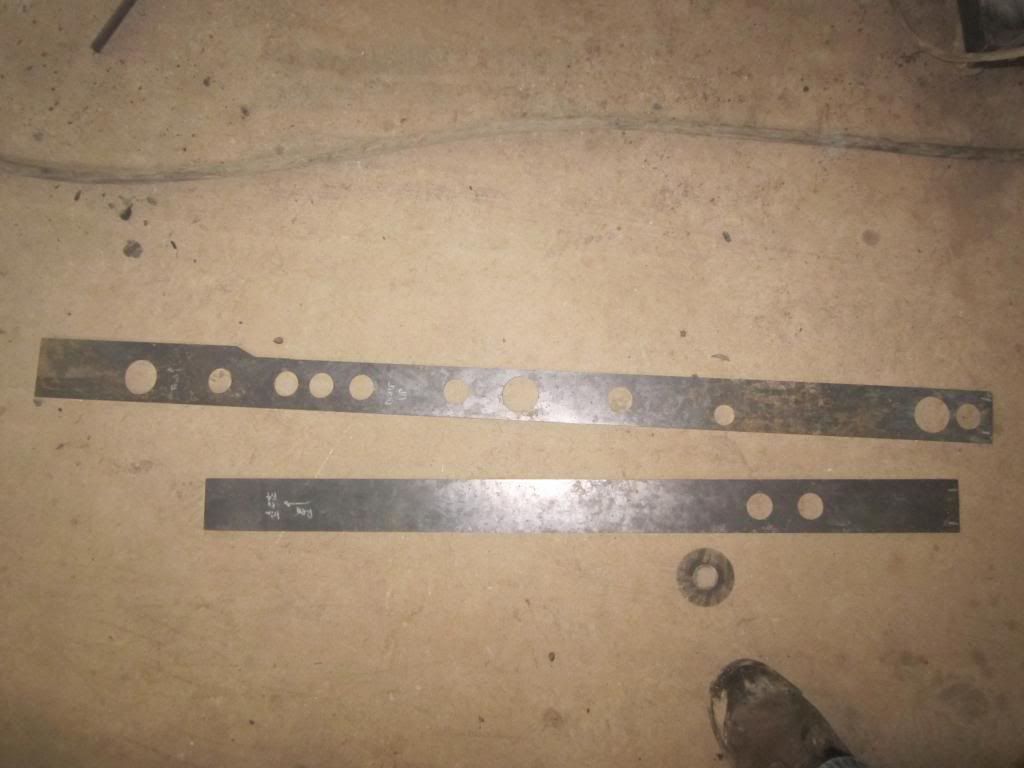 While the front axle was out , it was the perfect time to put in a rear main seal , it was leaking , but turns out the rear main crank bearing was gone too 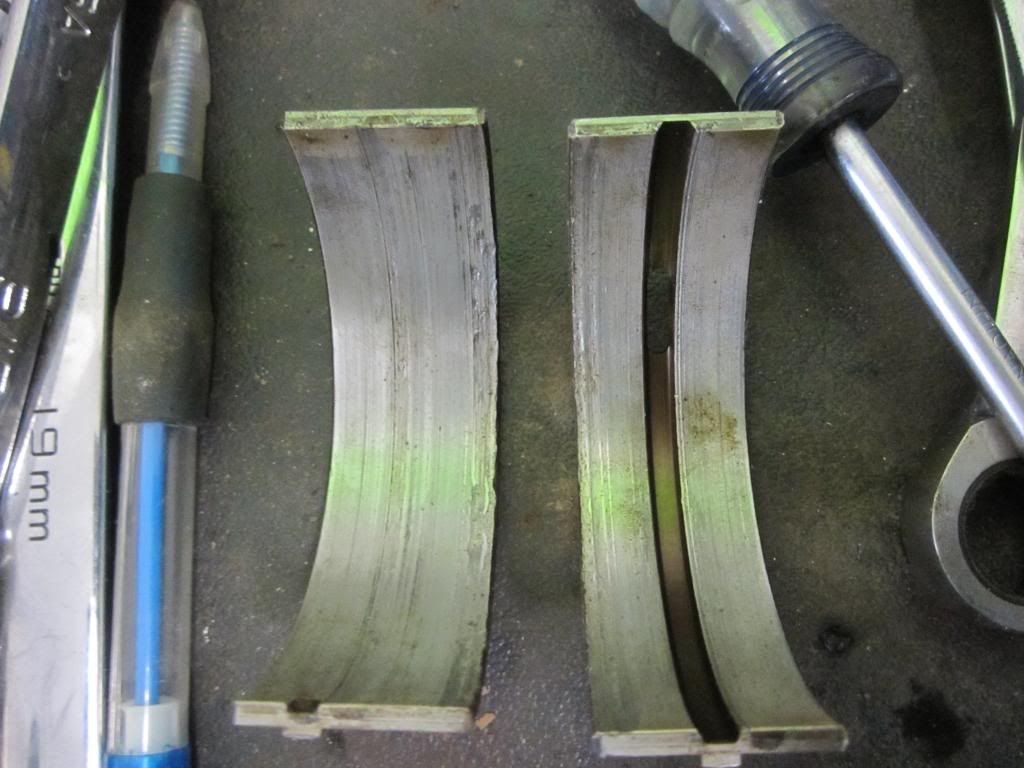 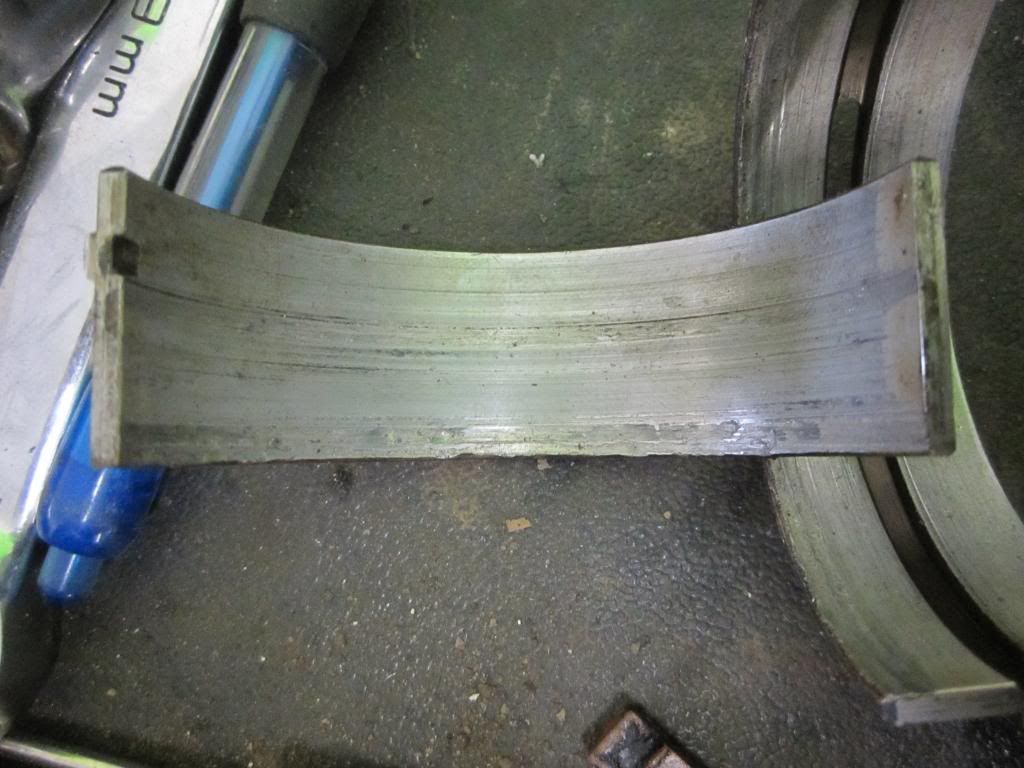 These are made from alum , the crank has some very light scoring , worth a try to put in new crank bearings . The engine before worked very well , good and strong Chris has been over , picking at stuff , even tho he has a new born baby boy at home 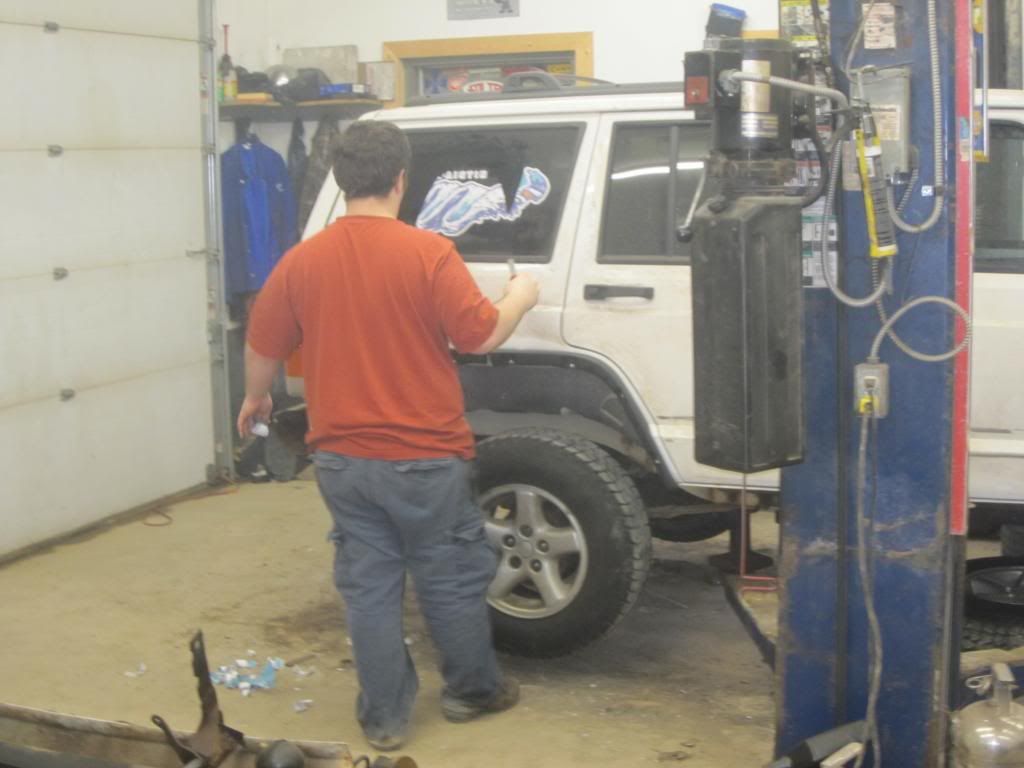 Getting the bumper ready for paint 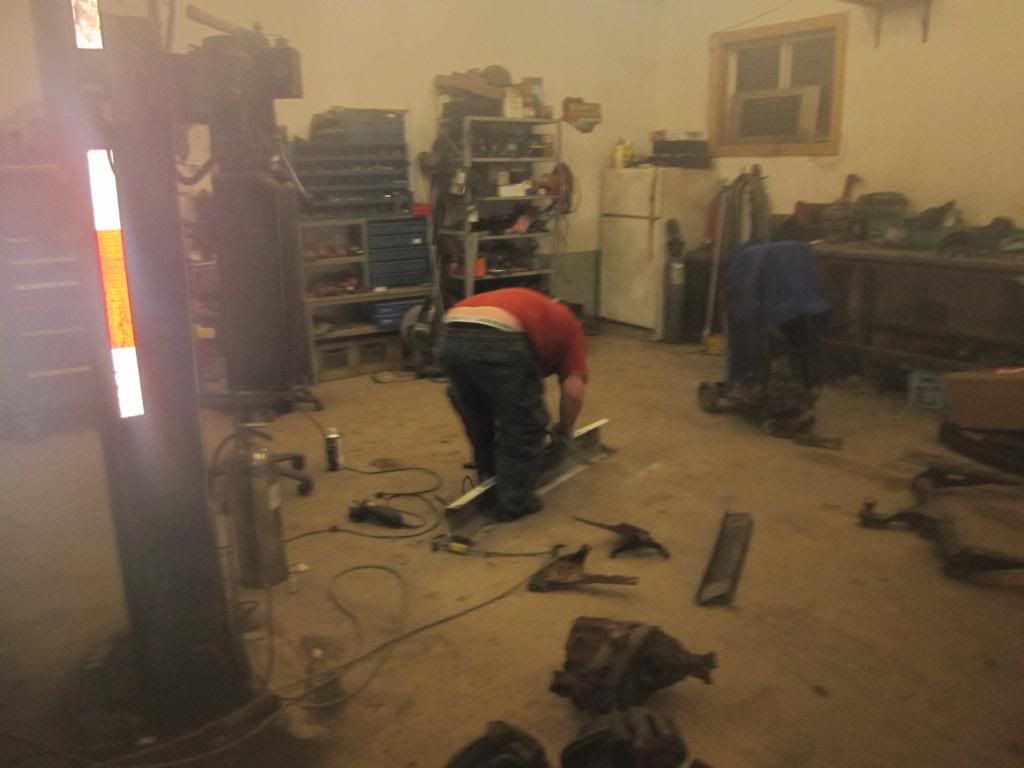 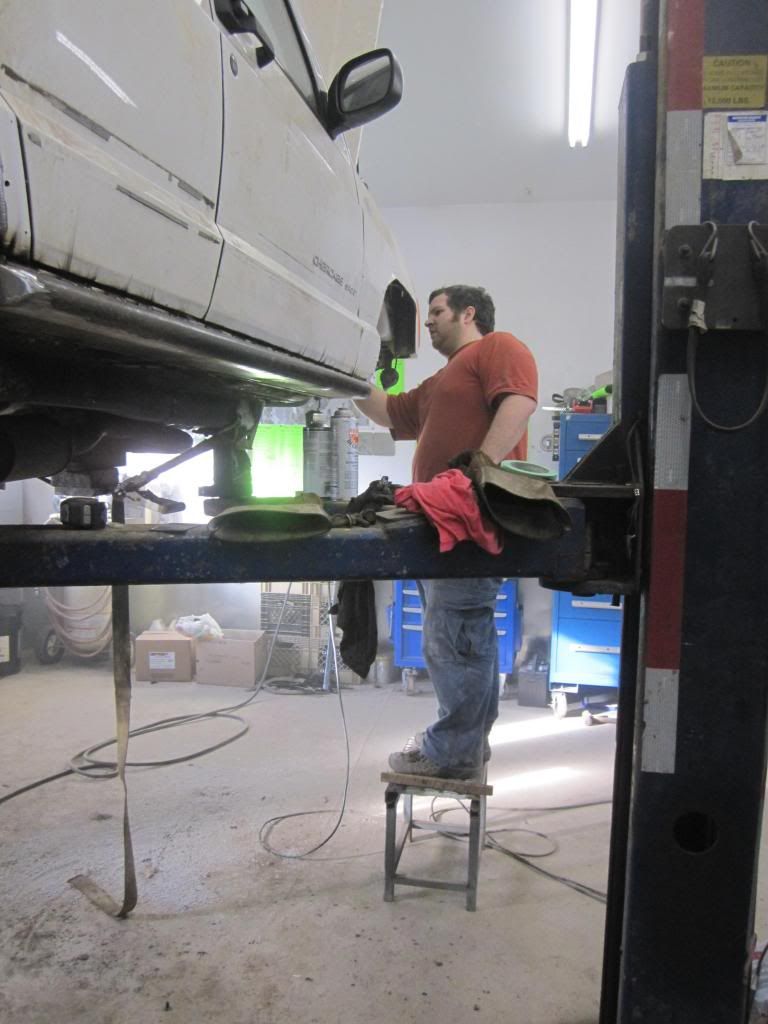 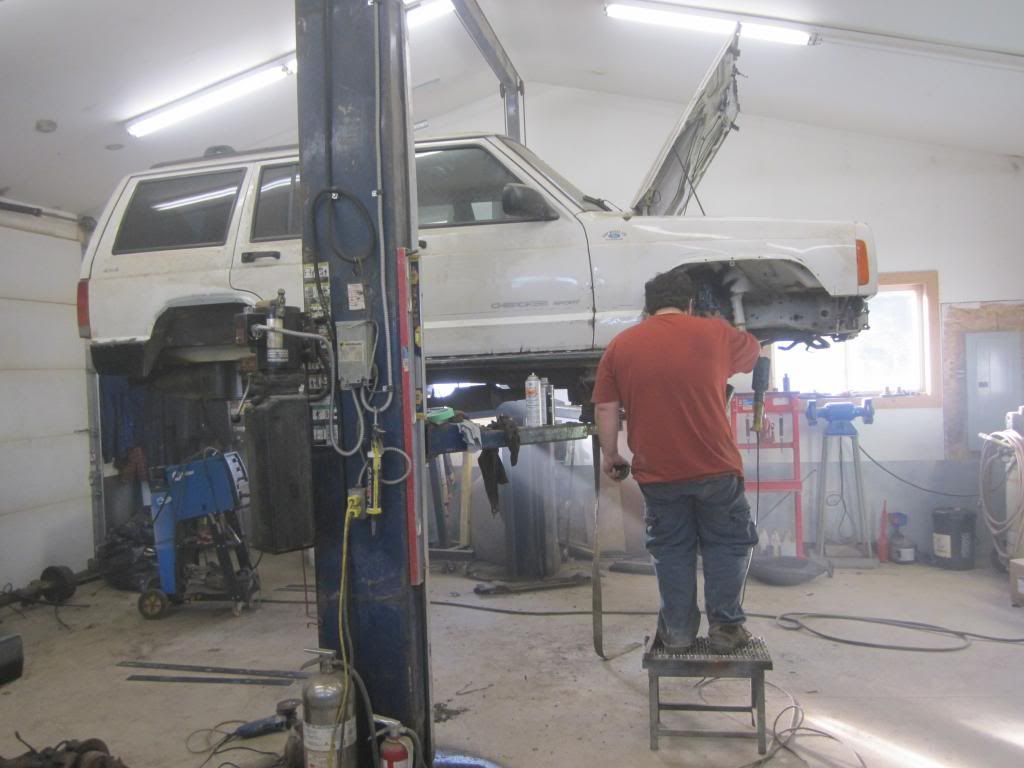 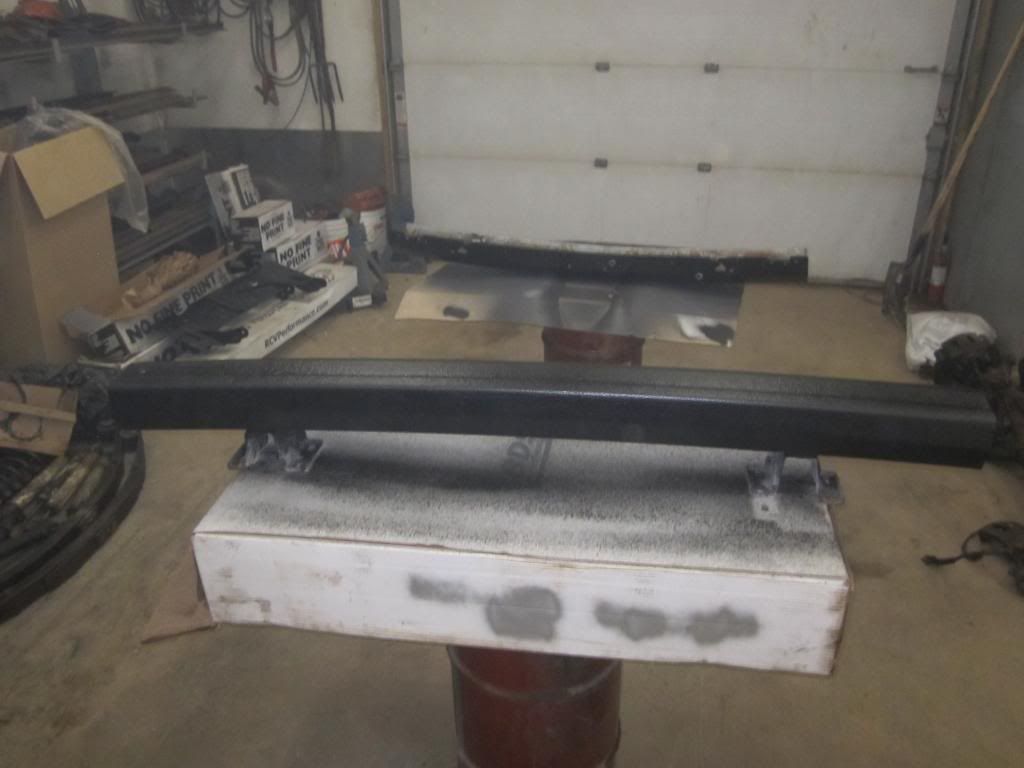 Painting the old header panel 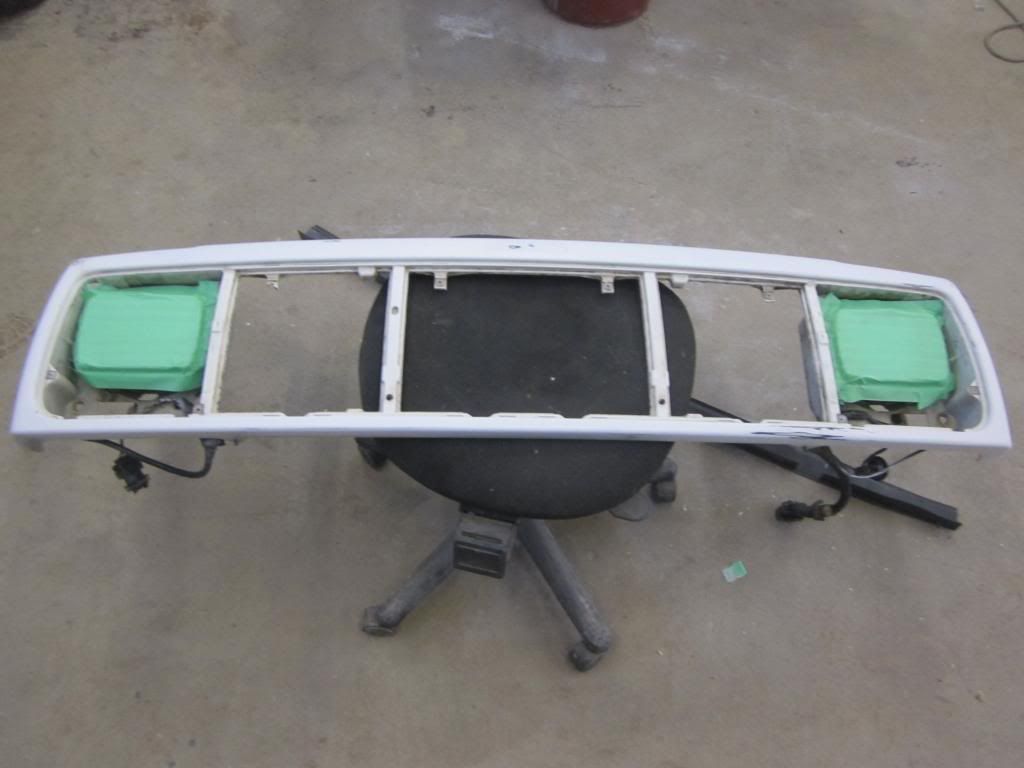 A little more work needing to be done then expected , but Chris is in pretty good spirits 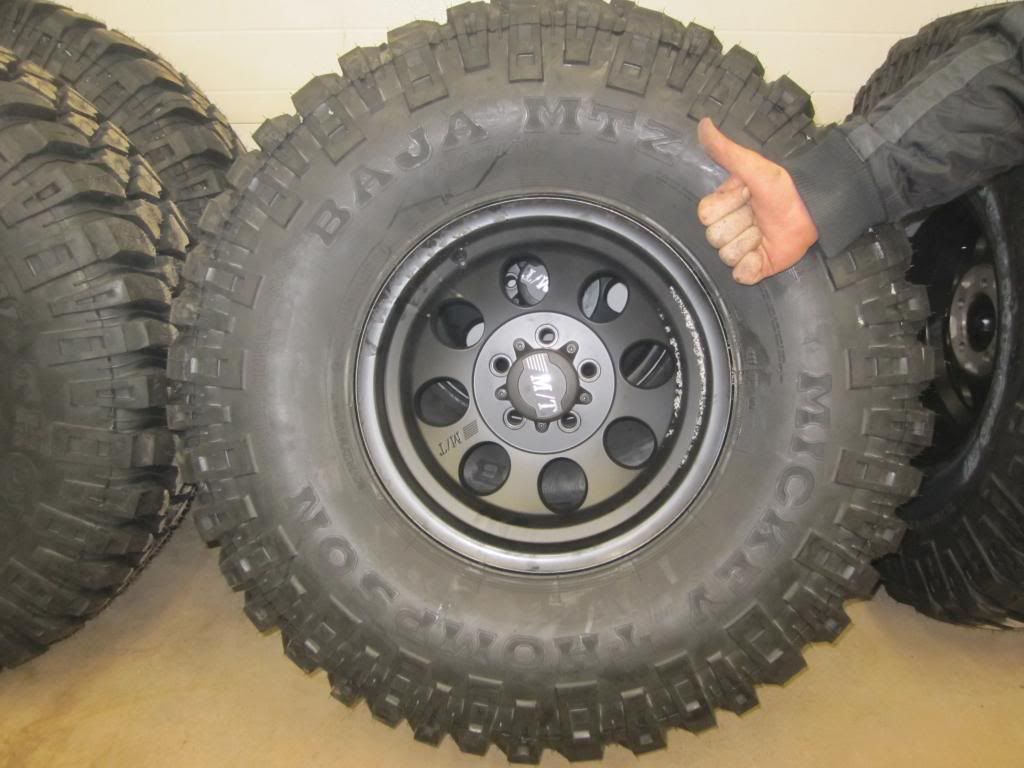 Ya the new tires and rims showed up . 35's !! ( i want to try them on my tj ) 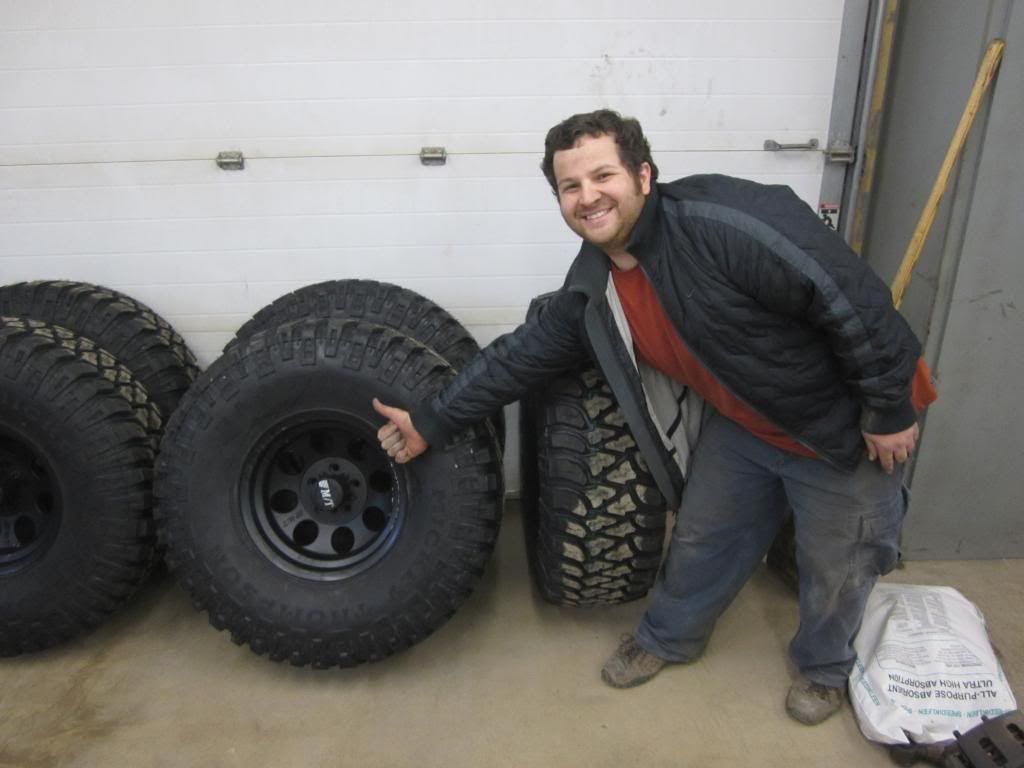 Now off to the shop ! |
|
ronin
Jeeper
 Out on the Mira
Posts: 661
|
Post by ronin on Jan 28, 2014 10:24:35 GMT -4
very nice work there Scott . Your a true artist.
|
|
badwithcomputer
Jeeper
You have DC2's? You just made a new best friend.
Posts: 2,863 
|
Post by badwithcomputer on Jan 28, 2014 10:35:37 GMT -4
coming along very nicely! Subscribed!
|
|
|
|
Post by SocialWheeler on Jan 28, 2014 10:56:19 GMT -4
Nice rubber
|
|
dan
Jeeper
Membership Co-ord - Valley
Posts: 3,397
|
Post by dan on Jan 28, 2014 11:51:09 GMT -4
awesome work. really glad you're putting so much detail up on here, I have to do much of the same stuff to the Wife's XJ. doing different style rockers, but otherwise, much of the same issues.
That's some very nice rubber. He won't regret getting MTZ's. You wouldn't regret trying them out either, Scotty.
|
|
The Garagemahal
Moderator
Build Thread King
Resident Army Ranger , Navy Seal , Super-Warrior , Ninja !!
Posts: 11,518
|
Post by The Garagemahal on Jan 28, 2014 23:24:55 GMT -4
More done today Got the frame skids welded in 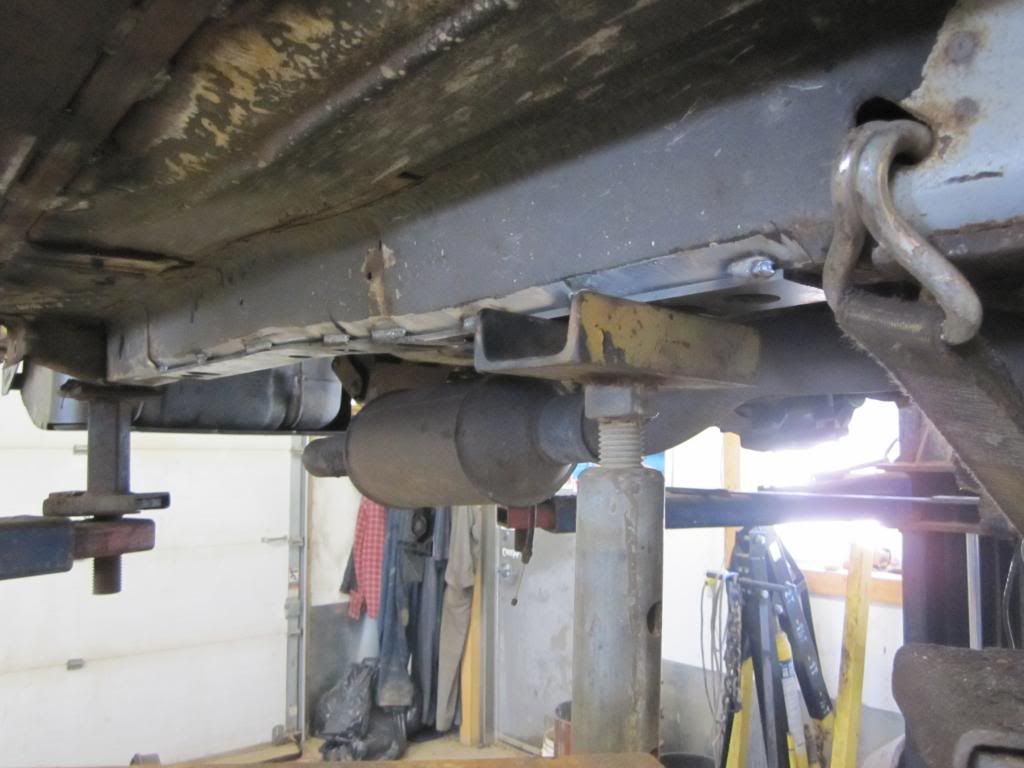 Using my stand to hold the metal tight to the frame 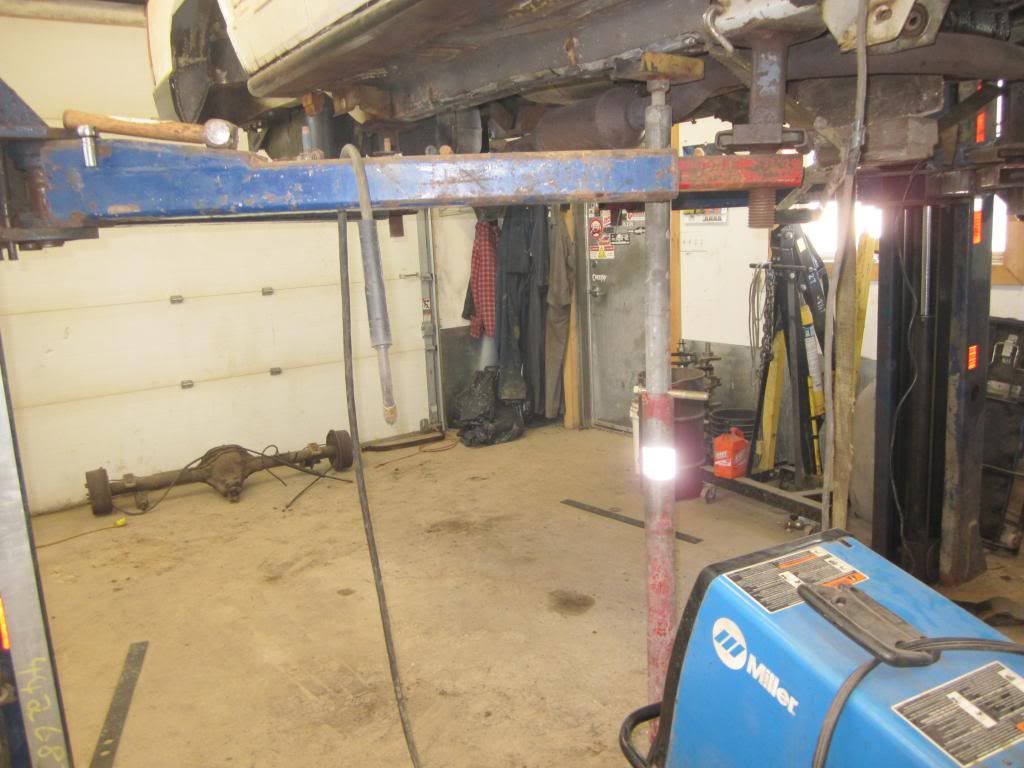 Held the corner up on the jeep with the stand , so I could weld in the piece where the hoist leg was 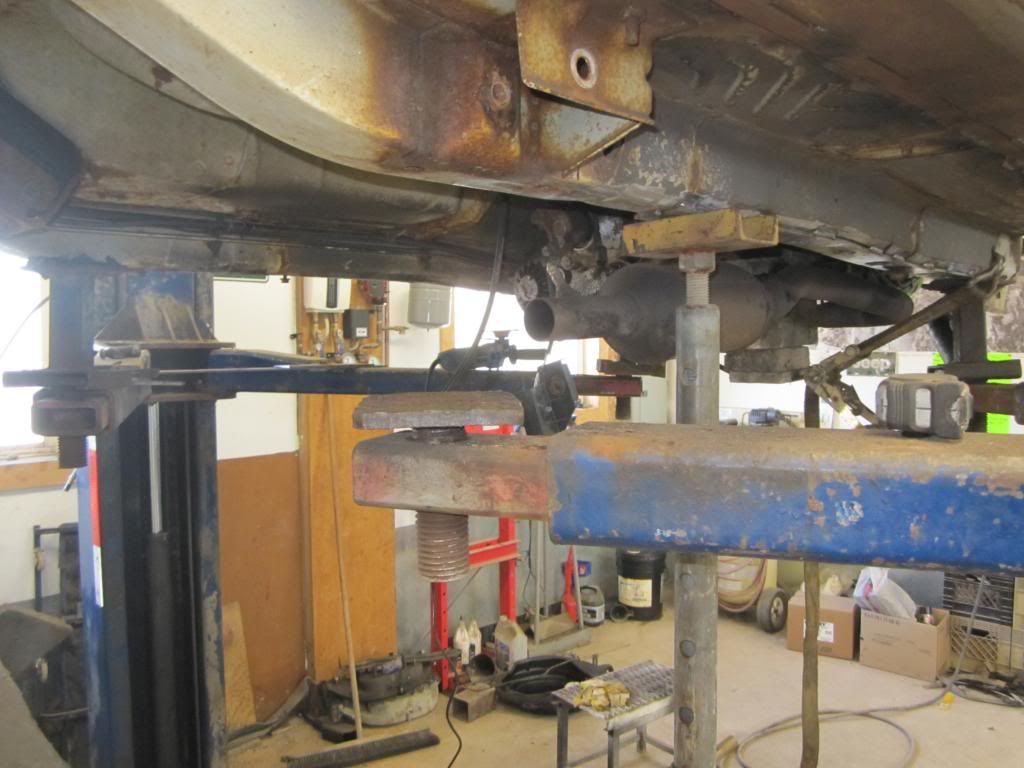 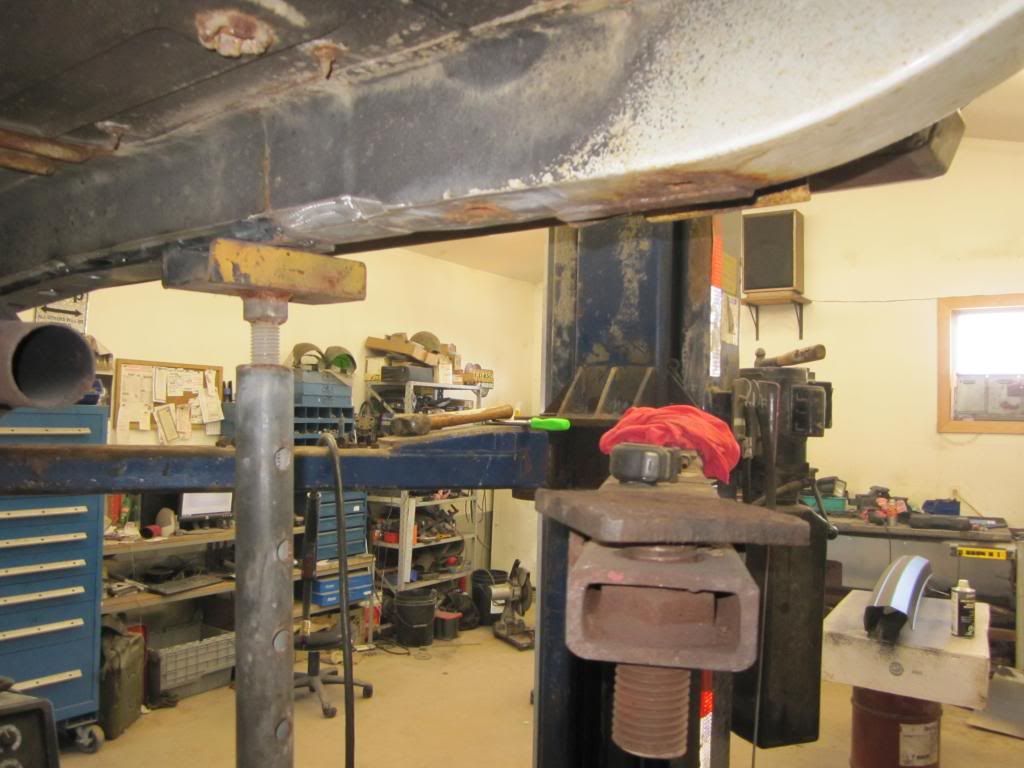 I had to notch out a section to clear the leafspring bracket , and drill a hole . I also cut 16 in off the end 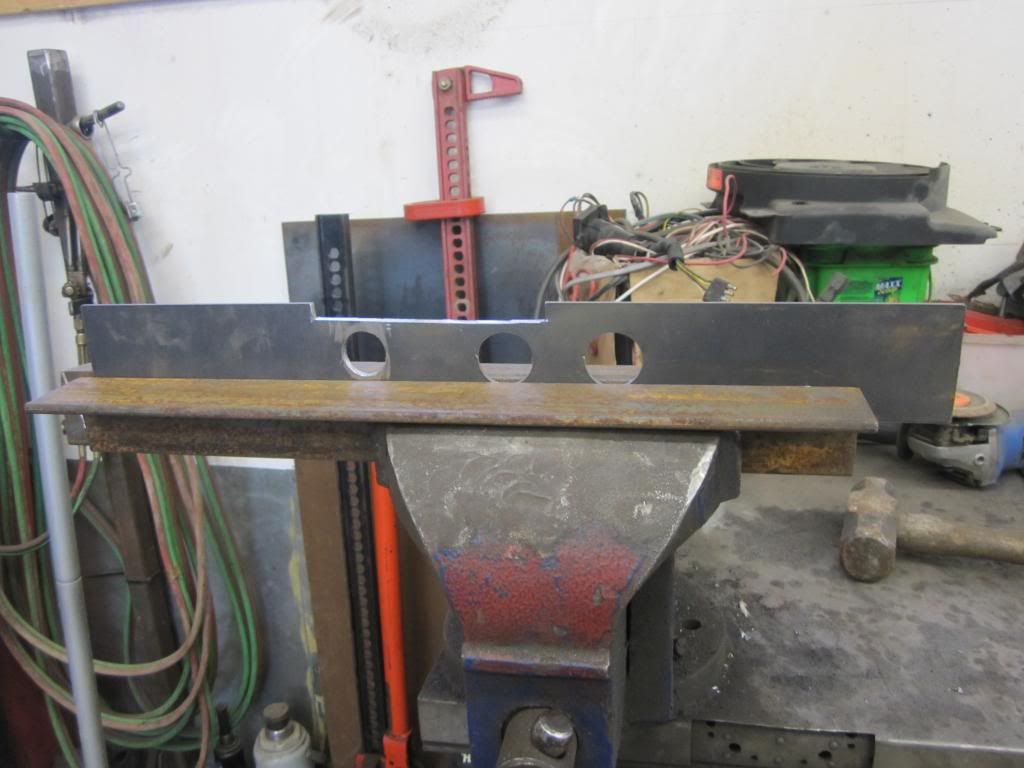 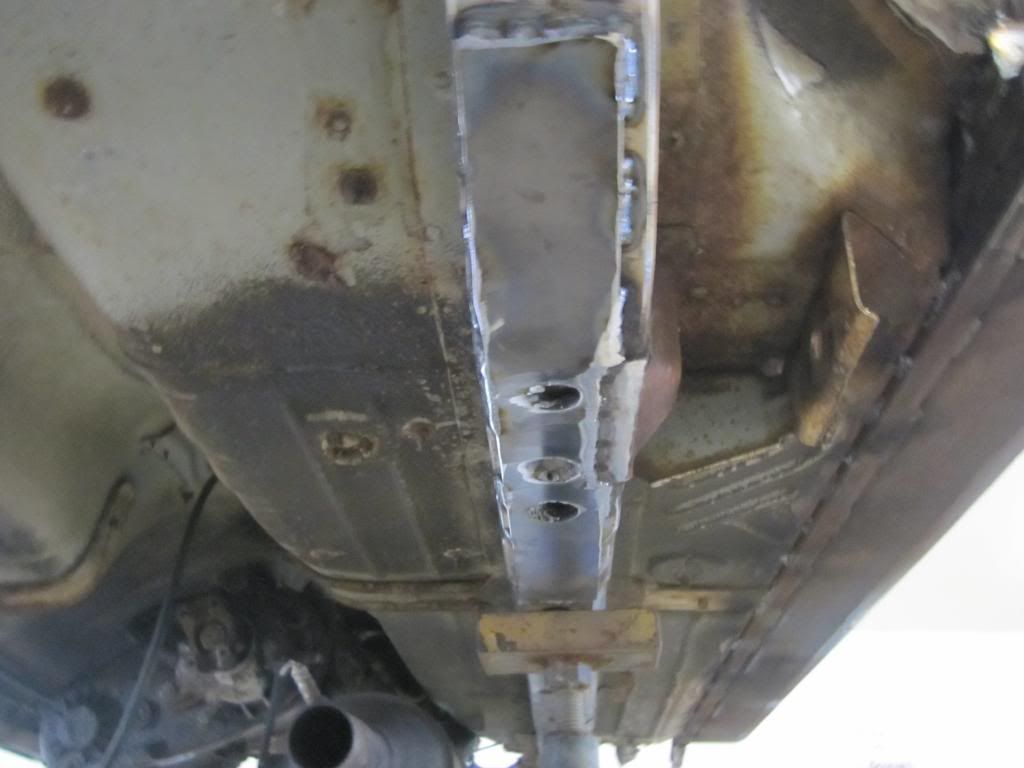 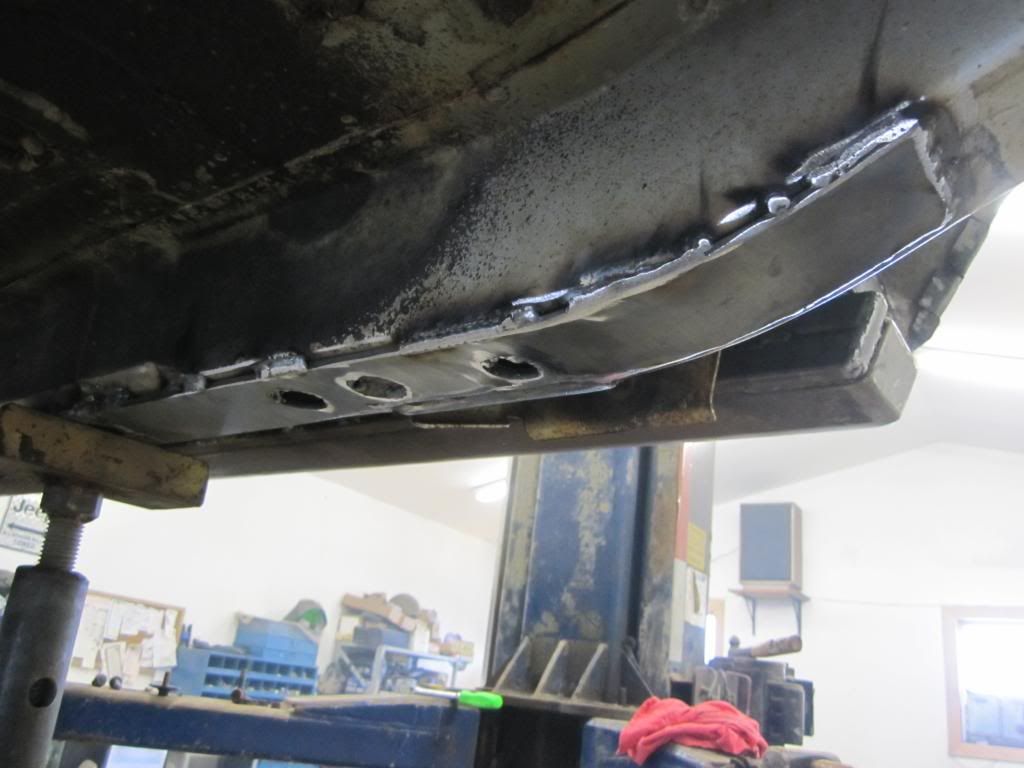 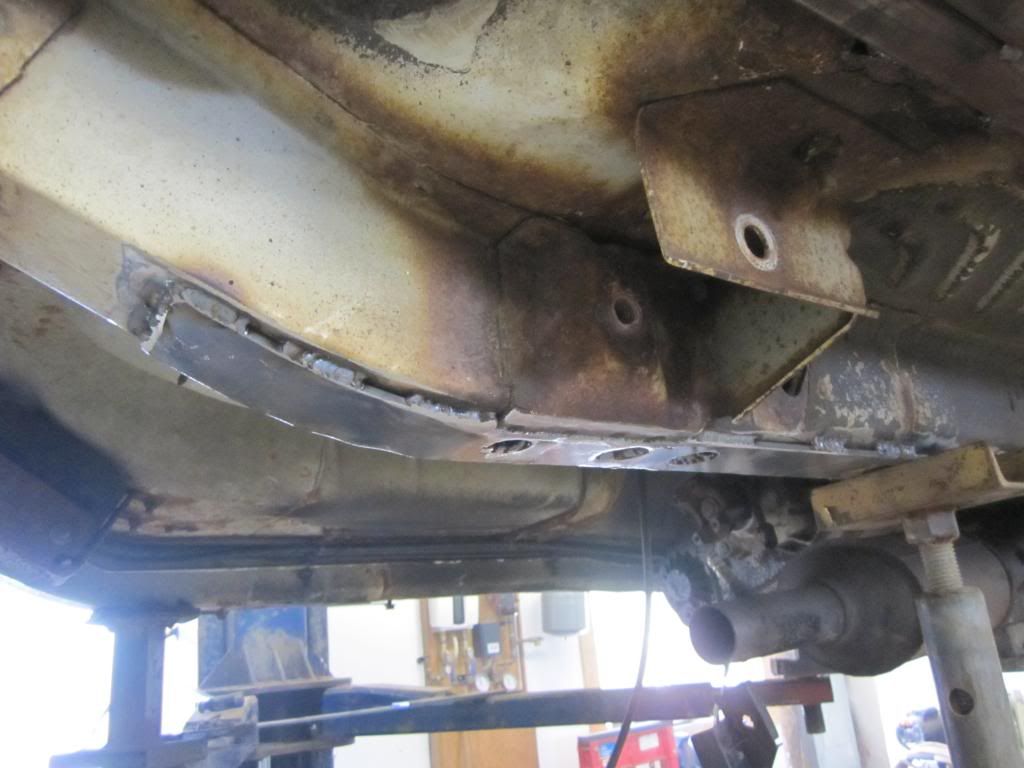 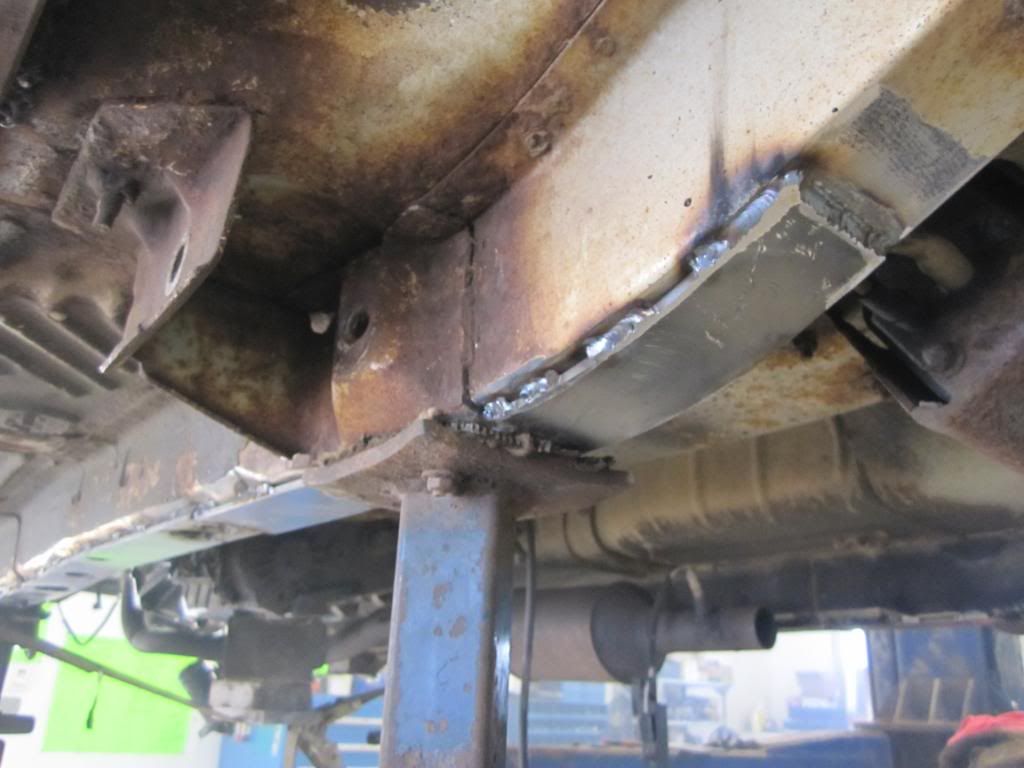 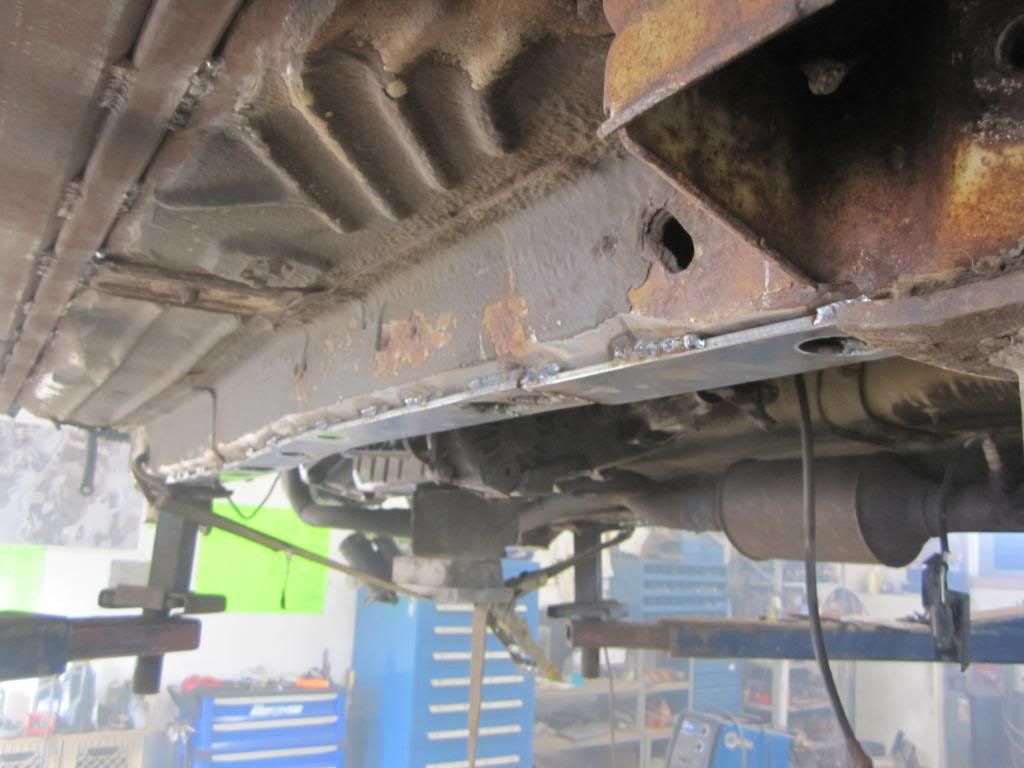 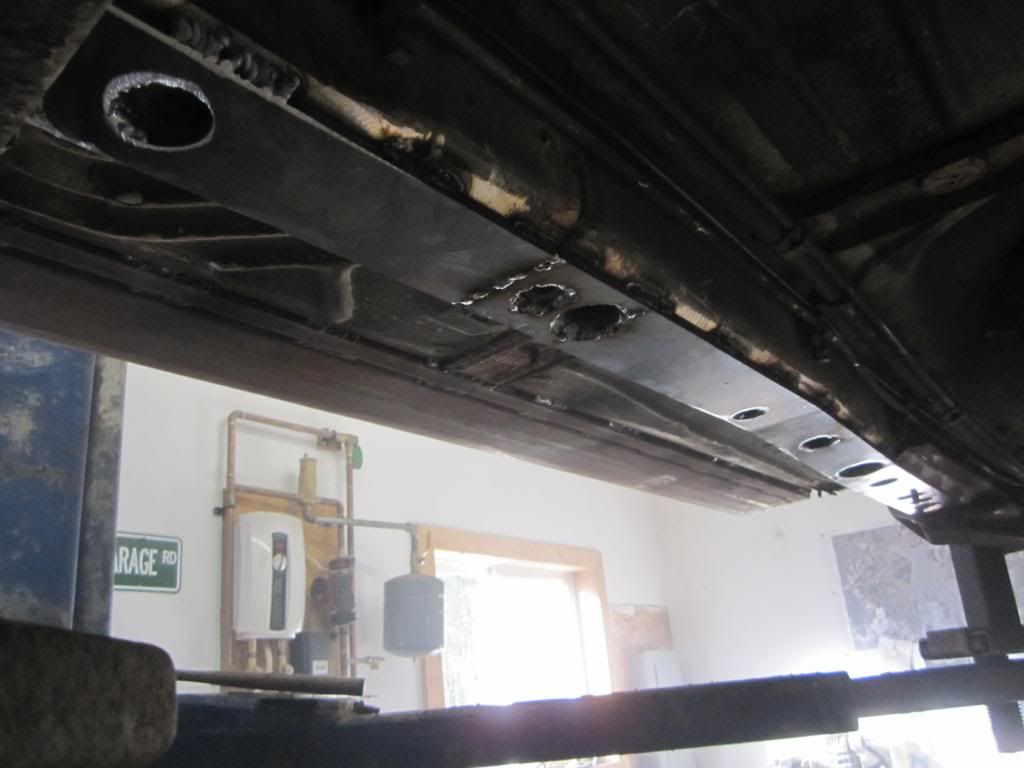 Chris was over for a bit , we zinc weld primered everything , and seam sealed it 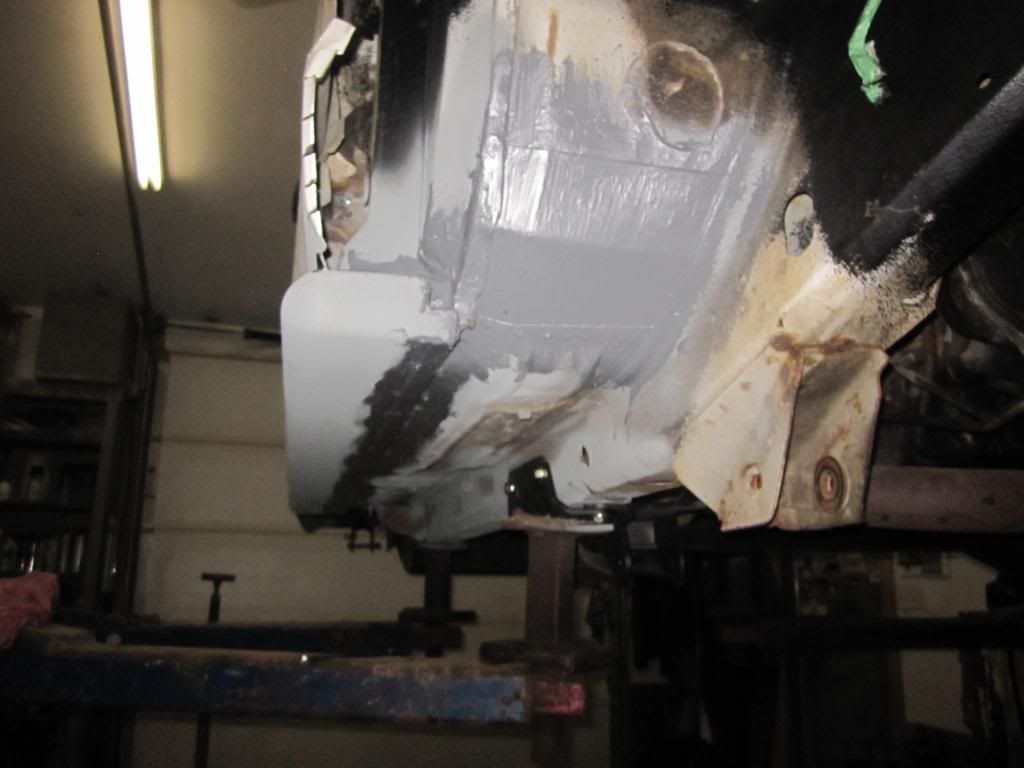 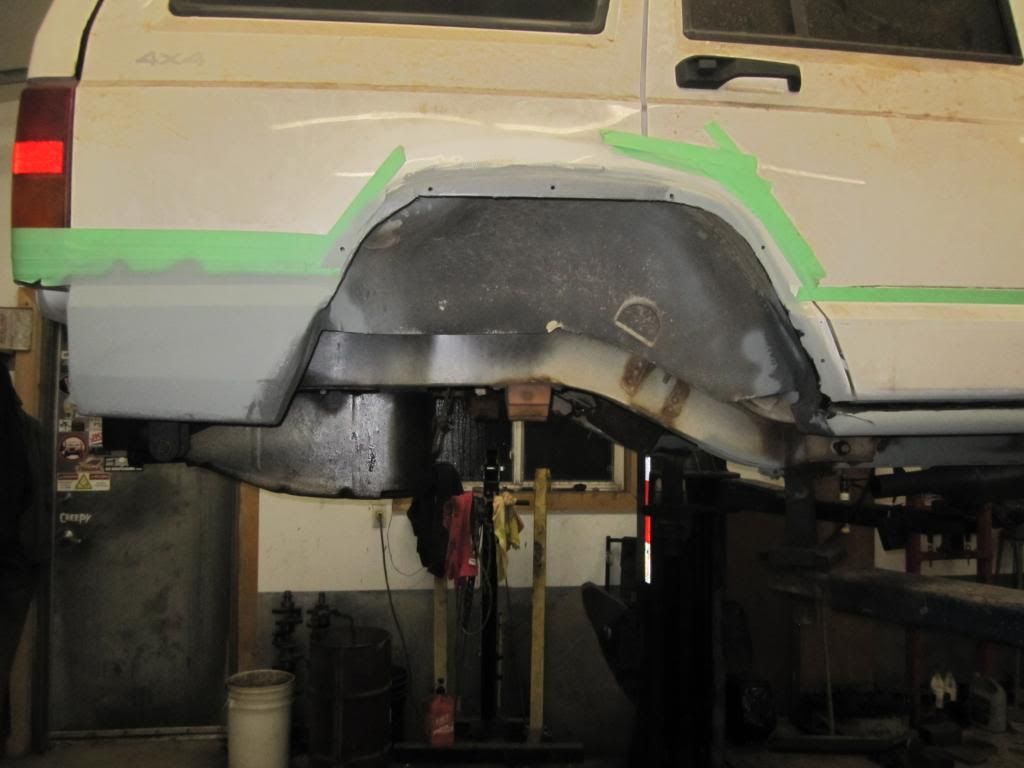 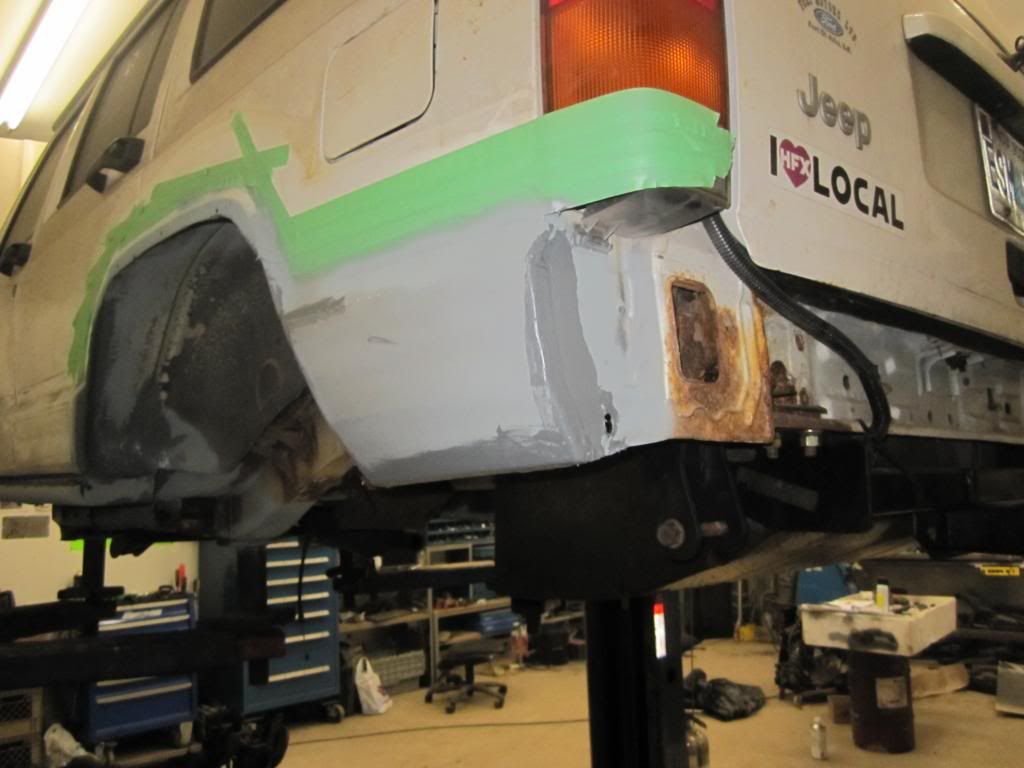 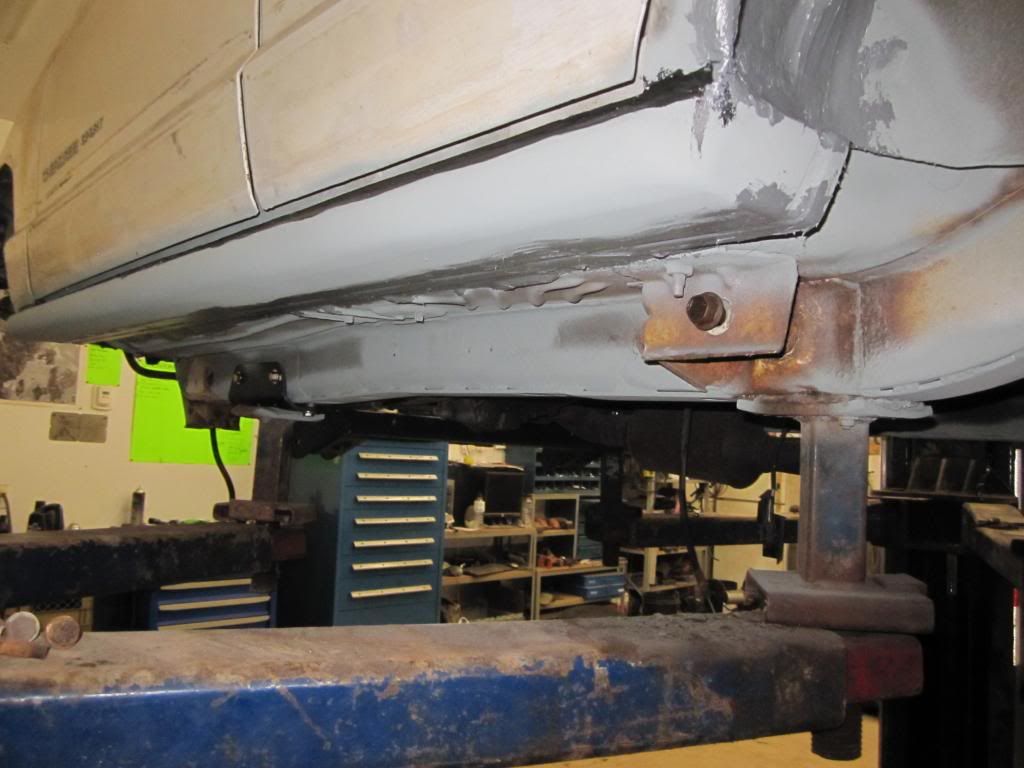 Lift shackle in the back ground 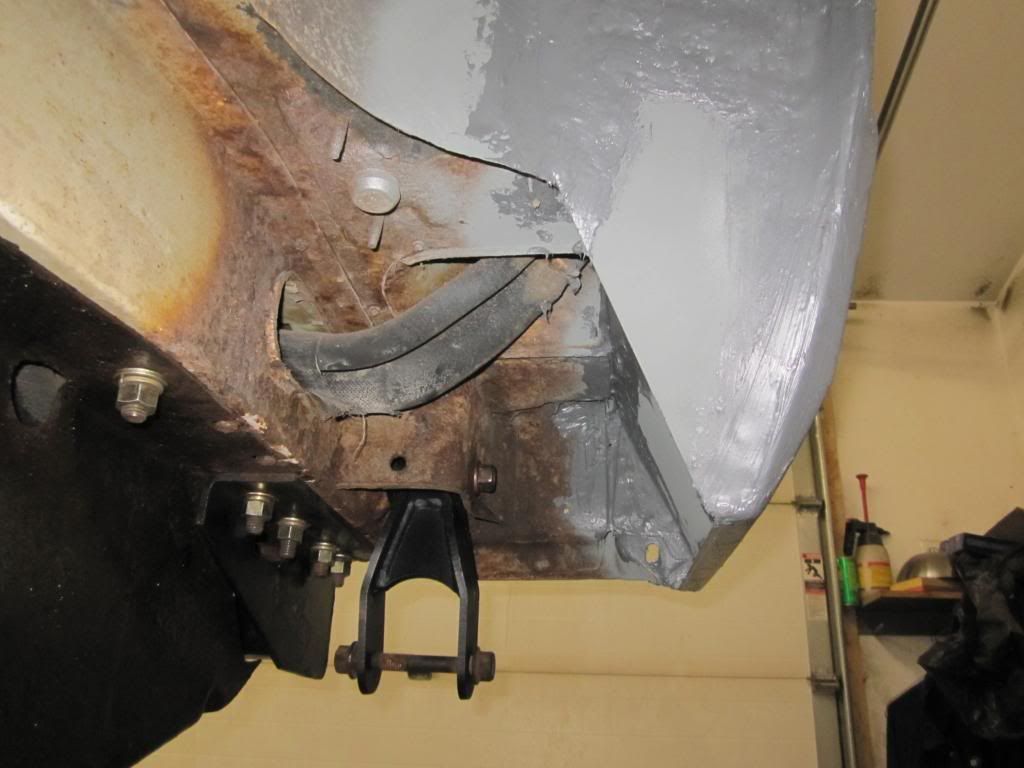 I got the longarm crossmember all bolted in 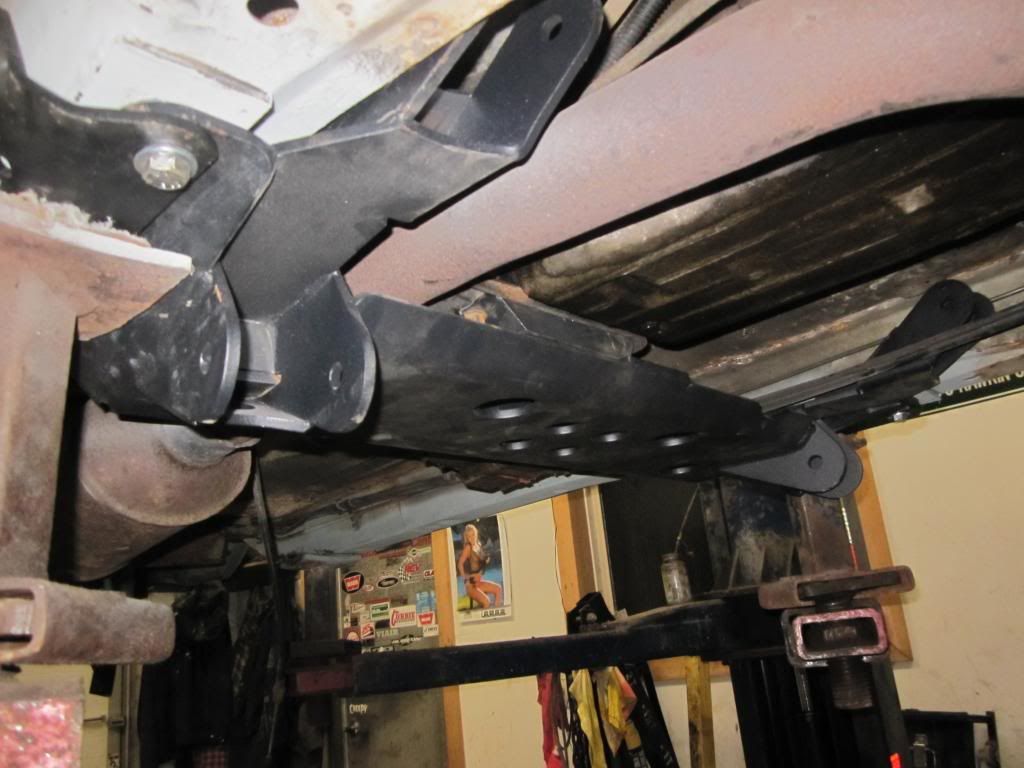 Got the crank bearings and rear main seal in , oil pan on ( pretty exciting eh ? )  Need to pick up 3 seals for the oil filter housing 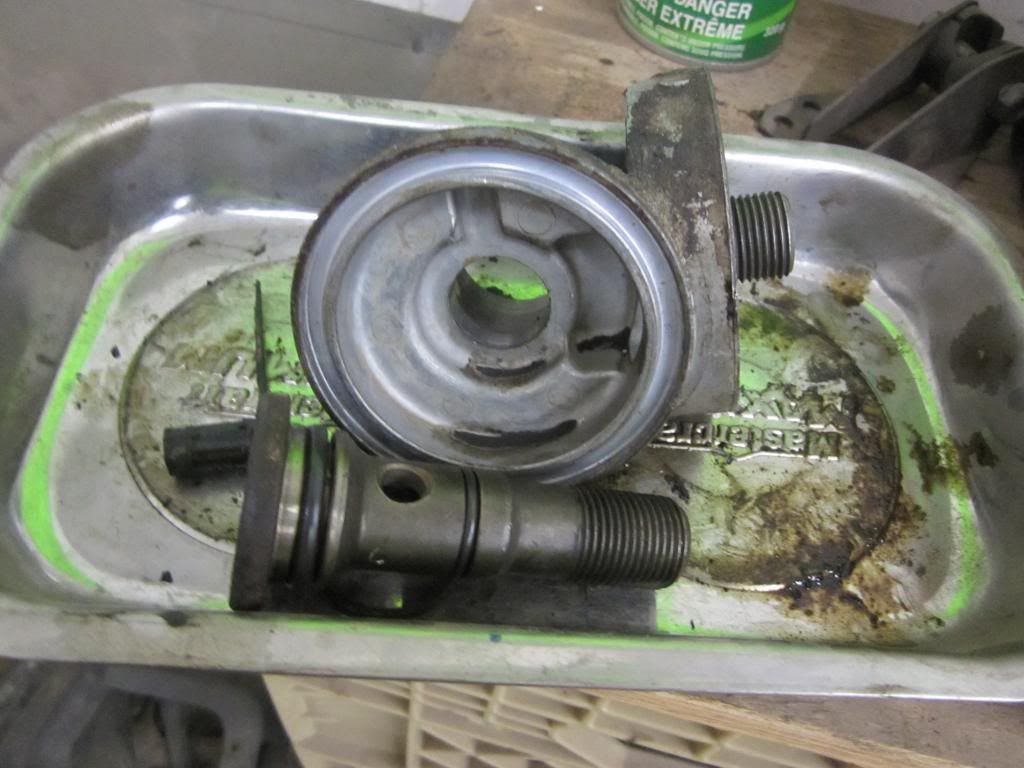 Started to put the rear suspension in , first off I was short a bushing , hehehe , get it ? 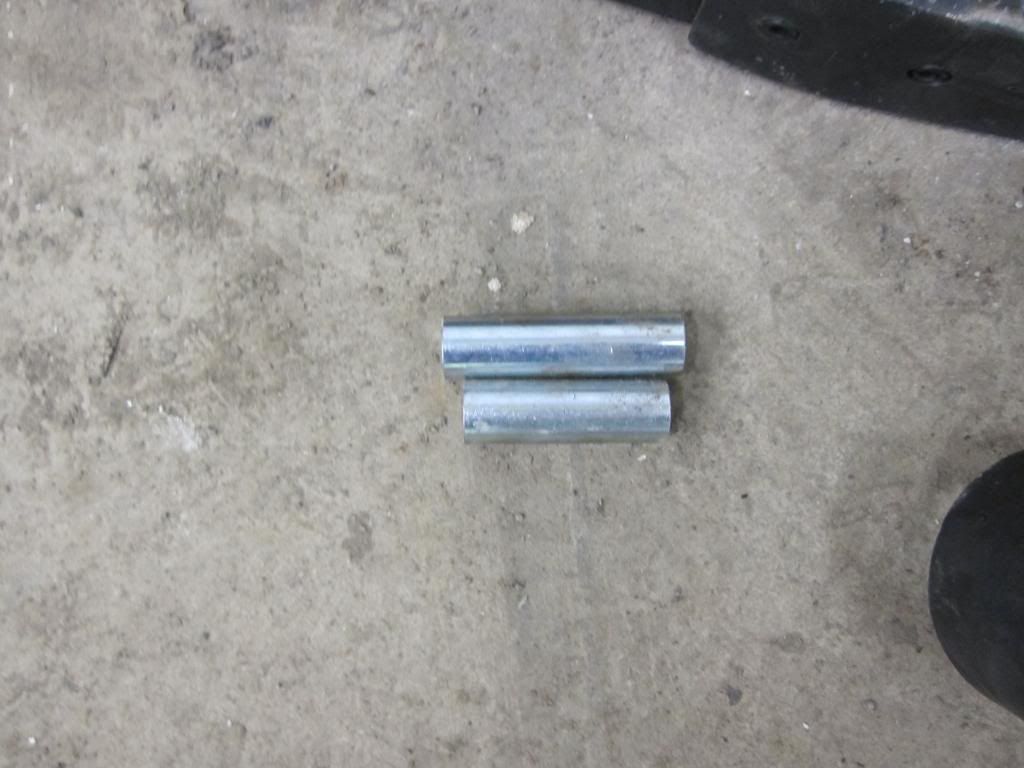 Then .......... Did anyone order in a BDS , 4 in CJ suspension Lift ? Pretty sure I have a set of your springs ...... maybe you have The XJ 6.5 lift springs I am missing ? This was a kick right square in the balls  I hope they are at least some place in NS , and not state side 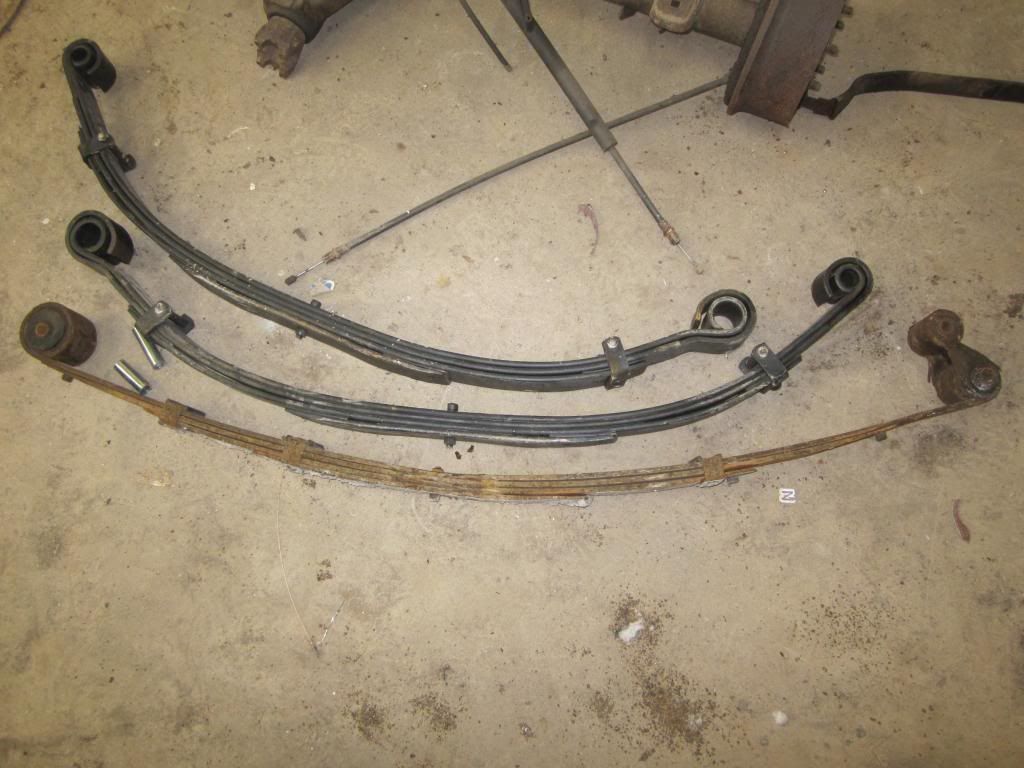 Sorry you had to find out here Chris I relocated the front legs on the hoist so I can weld the last foot of frame skid in and cut out the lower control arm brackets . Moved the front axle over in place under the jeep so I can start bolting it back in with the longarms 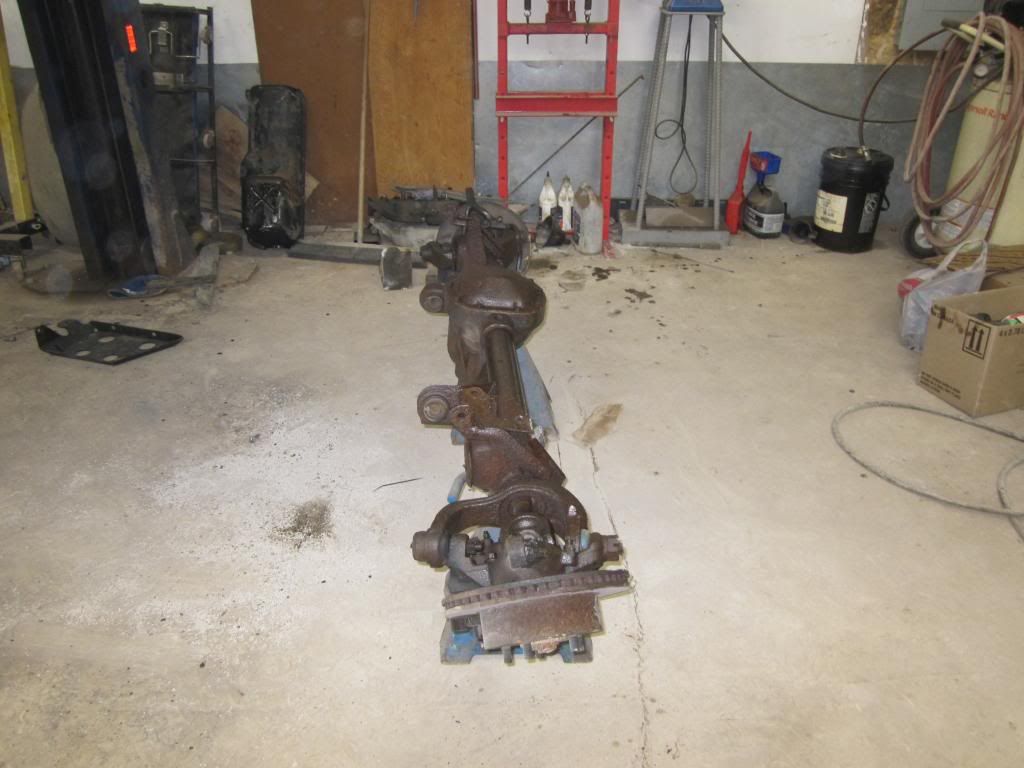 |
|
|
|
Post by TomWood on Jan 29, 2014 11:07:05 GMT -4
Work is looking good, sucks about the springs though.
|
|


 I hope they are at least some place in NS , and not state side

