chevystroker
Jeeper
 NEVER CONFUSE HAVING A CAREER WITH HAVING A LIFE ! ! ! ! ! !
Posts: 896
|
Post by chevystroker on May 28, 2016 23:13:46 GMT -4
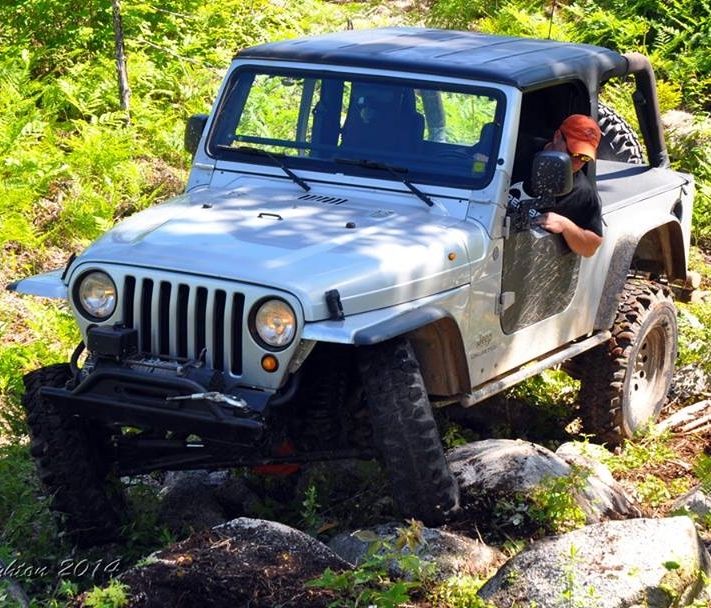
Started trimming the front fenders. Going to cut up the support at the back of the inner fender. Going to pull the inner fender back 2 inches at the bottom to match the 2 inches I cut off the back of the fender opening. And of course, cut the flares to match. 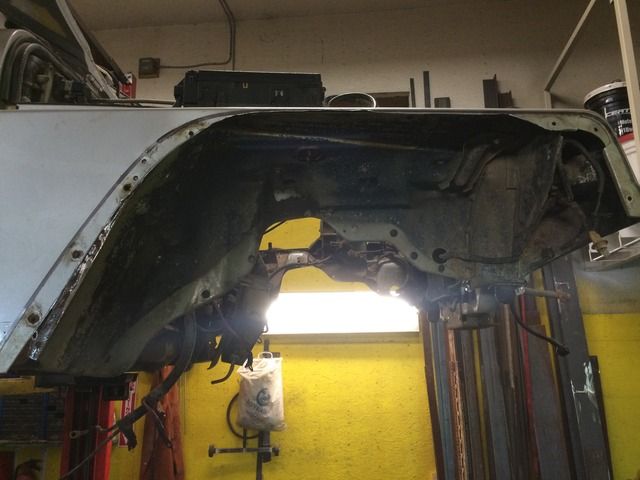 Rear fenders and flares trimmed about 1 1/2 inches at the bottom, front and back. 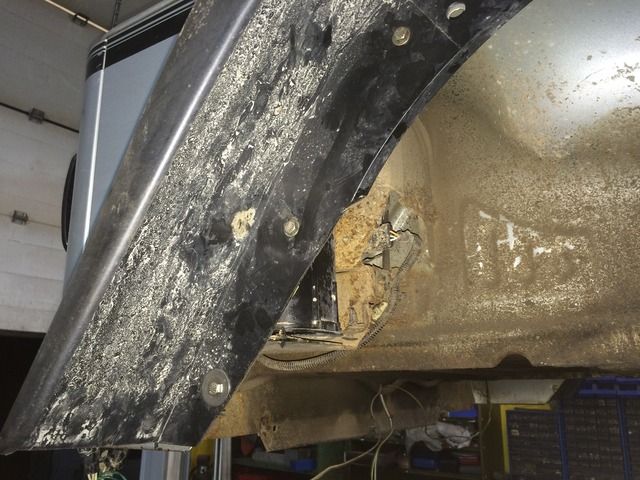 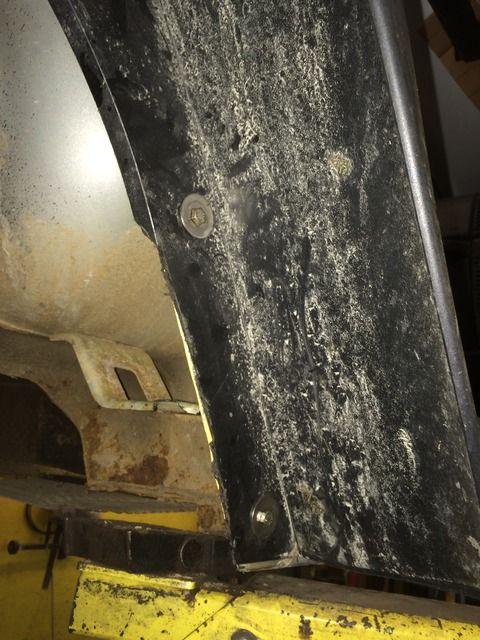 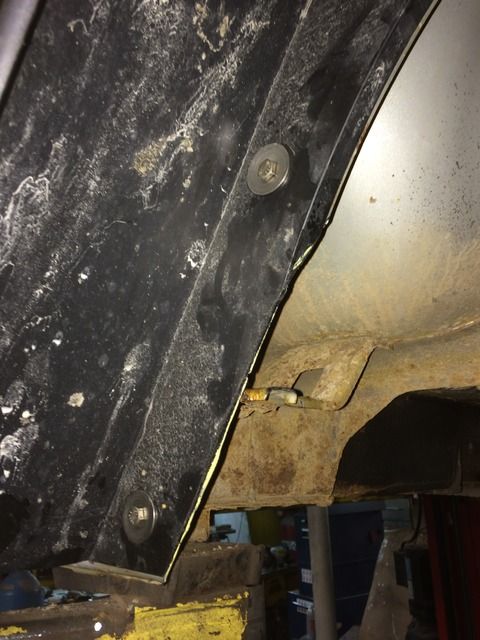 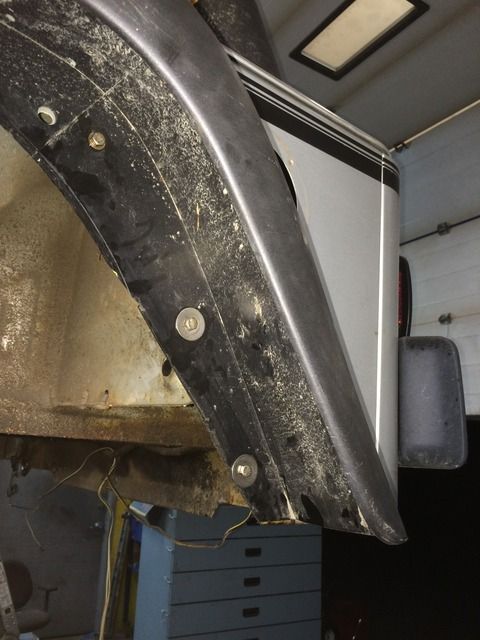 Pictures I took earlier on where the tires rub. 35 x 12.50 x 15 with a good offset rim. Rear hits at the back of the opening, and will probably be worse now with the long arms extended a bit. 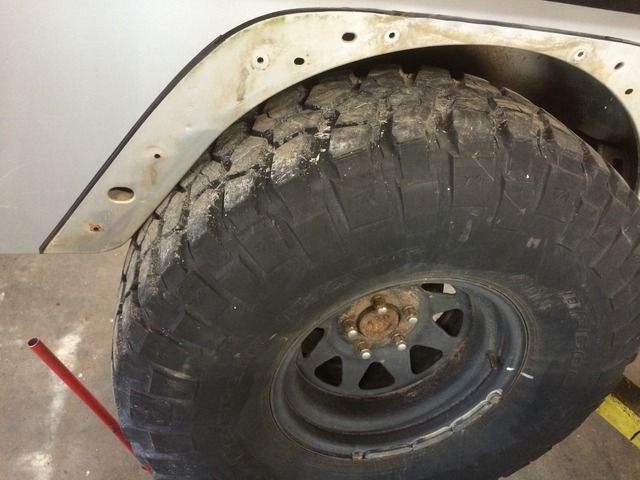 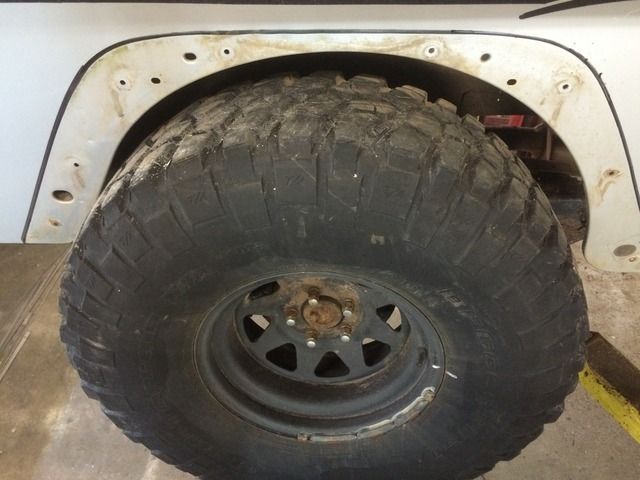 Still 2 1/2 inches from top of tire to top of wheel arch. 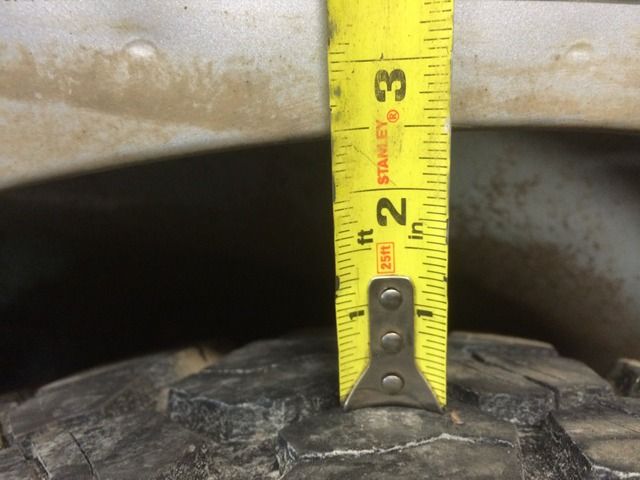 Front tire straight ahead 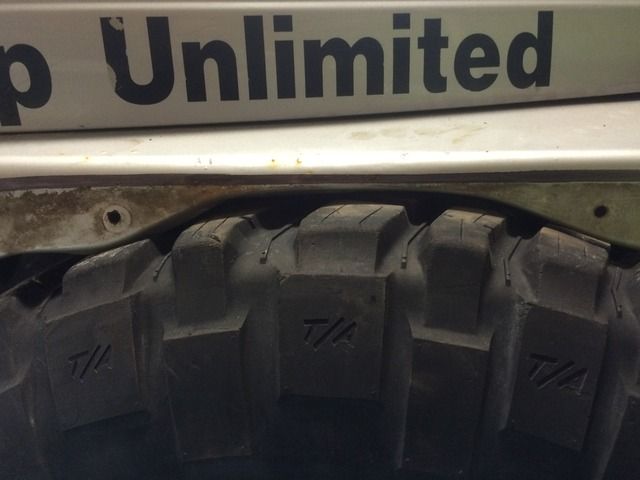 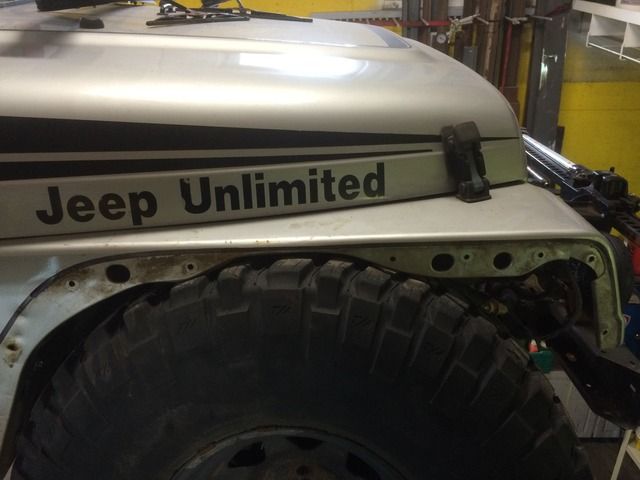 Right tire turned to the left. 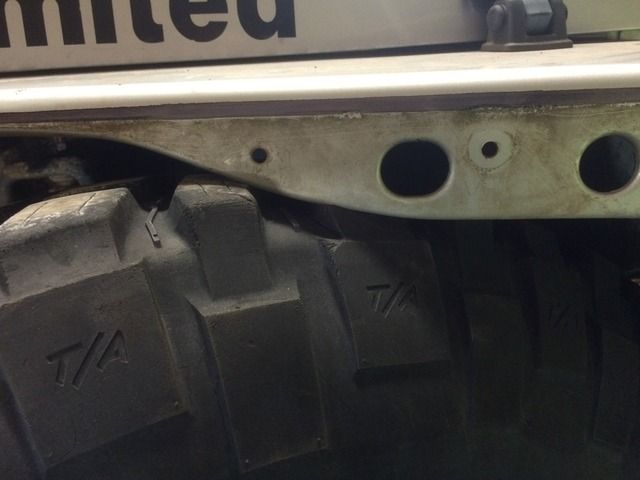 Turned to the right, tire hits back of inner fender 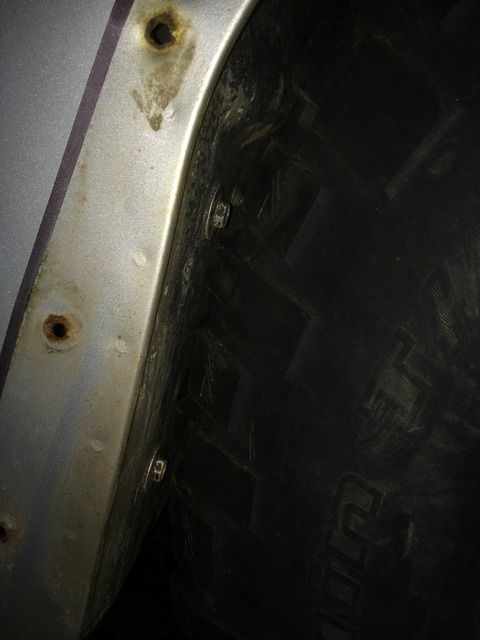 And at top of wheel opening.  Clears at the front 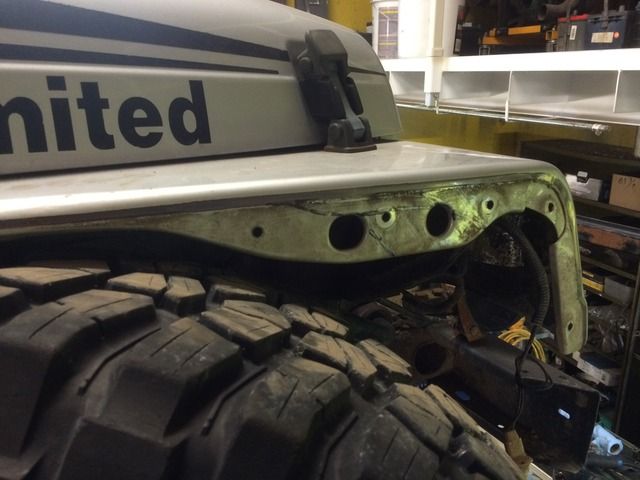 This is with lowered bump stops. Lowered about 1 1/2" or 2" |
|
chevystroker
Jeeper
NEVER CONFUSE HAVING A CAREER WITH HAVING A LIFE ! ! ! ! ! !
Posts: 896
|
Post by chevystroker on May 28, 2016 22:53:11 GMT -4
|
|
chevystroker
Jeeper
NEVER CONFUSE HAVING A CAREER WITH HAVING A LIFE ! ! ! ! ! !
Posts: 896
|
Post by chevystroker on May 28, 2016 9:03:53 GMT -4
|
|
chevystroker
Jeeper
NEVER CONFUSE HAVING A CAREER WITH HAVING A LIFE ! ! ! ! ! !
Posts: 896
|
Post by chevystroker on May 28, 2016 8:41:38 GMT -4
I don't have many pics of the long arm install. There are probably lots of info on that. Link to Rough Country Long Arm installation instructions 97-06 JEEP TJ/LJ LONG ARM UPGRADE KITFor the upper tabs on the long arm mount, the instructions just say to drill two holes and put a bolt through the frame. I enlarged the holes and welded sleeves in the frame. Much stronger this way. Ready for weld 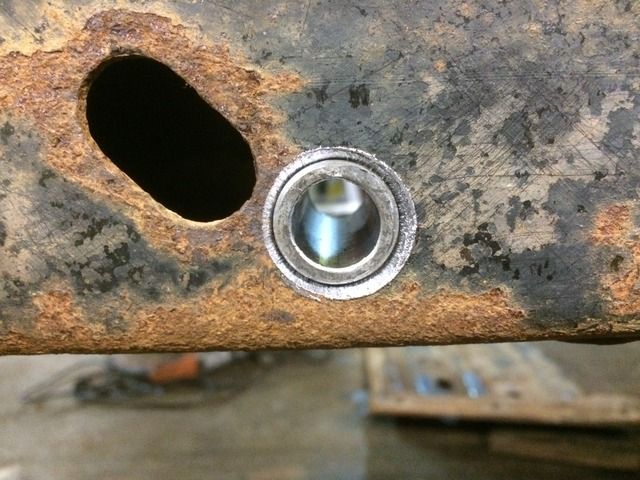 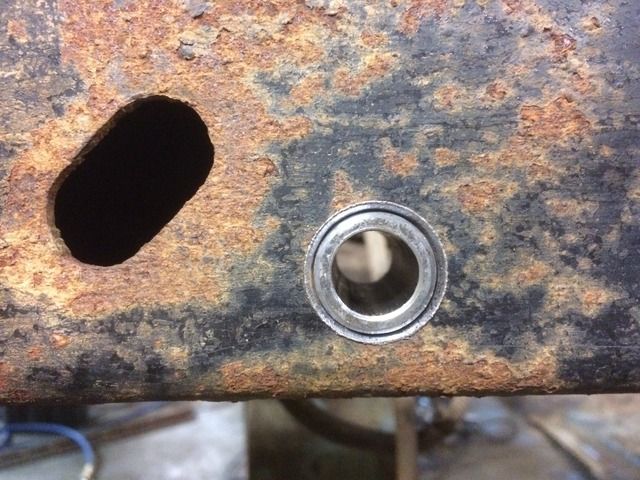 Ground flush 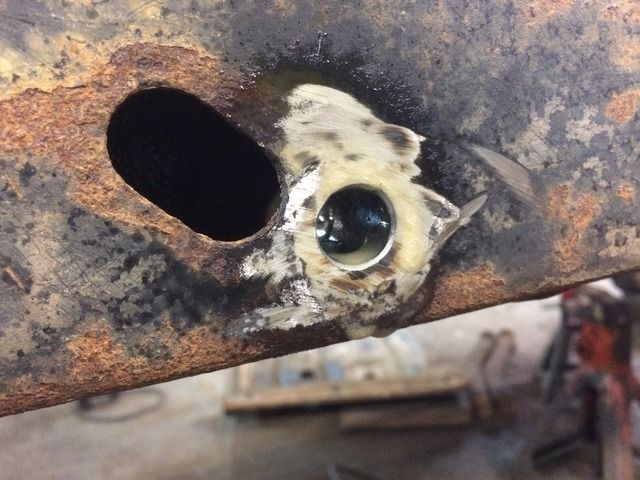 Clean frame. Looks much better this way. 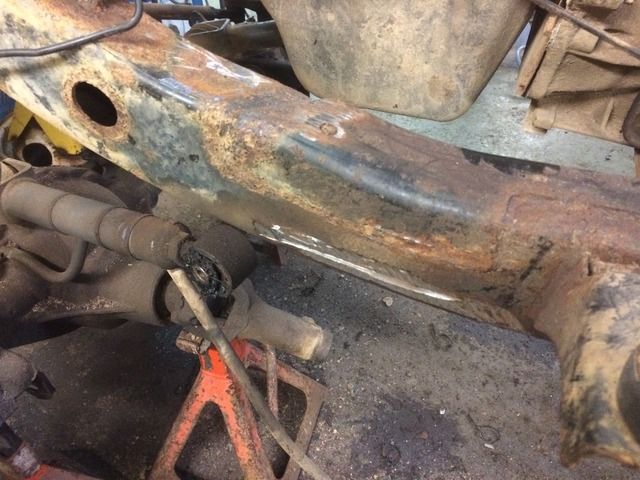  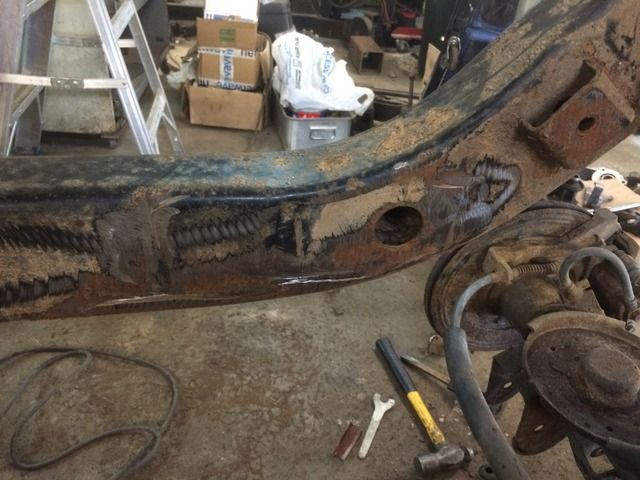 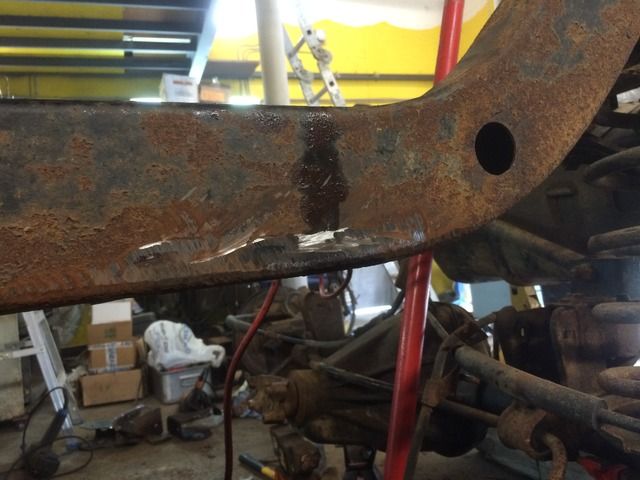 Full stuff 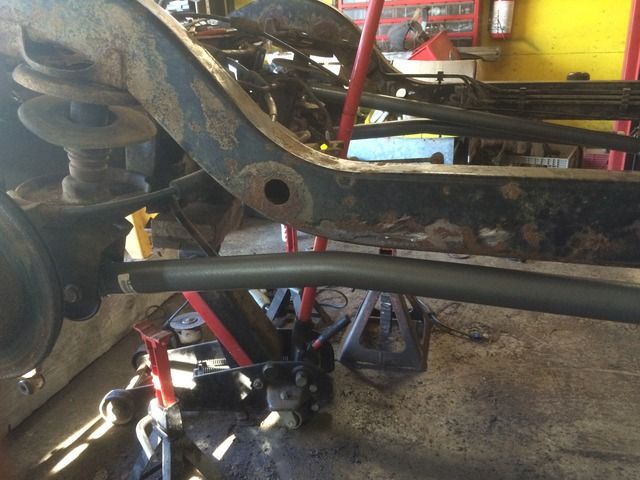 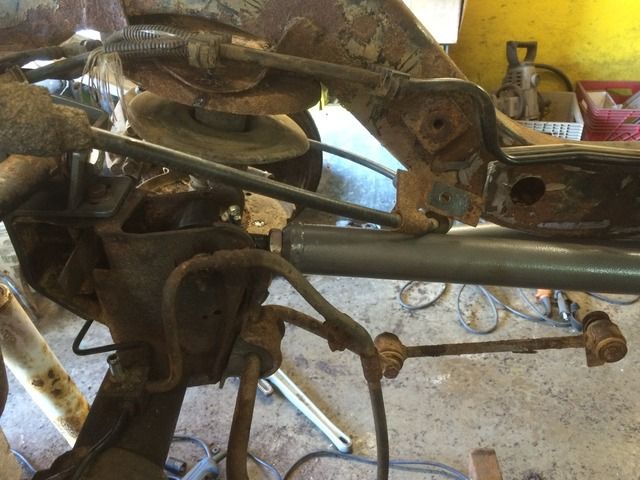 Long arm with CV shaft 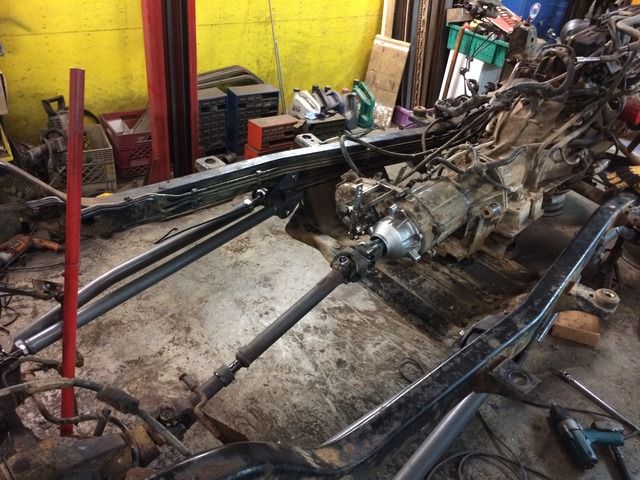 The drive shaft is a stock front shaft from a Jeep J10 or J20, I think it might have had a quadratrac in it.  I did have to extend the arms a little bit from the measurements in the instructions to get it to fit, it was a bit long. I also tilted the pinion back down a bit to help. The pinion does not need to be pointed at the T/C when you have a CV shaft. The pinion and driveshaft should NEVER be in a perfectly straight line. A U-joint needs a little bit of an angle so the needles with rotate. Otherwise, the needles stay in the same spot on the u-joint and wear grooves in the trunnion. 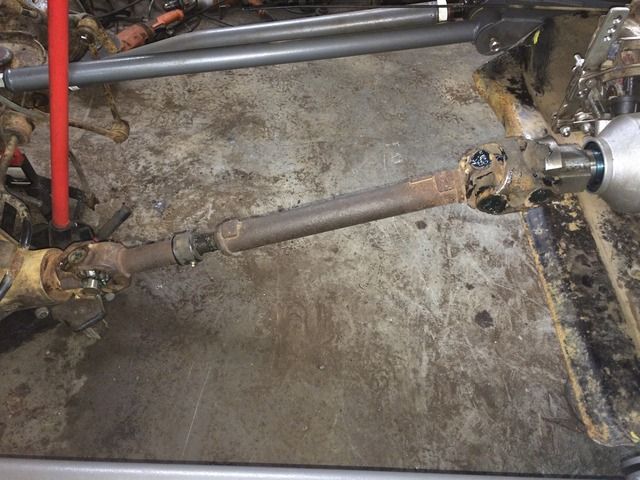 Trimmed T/C skid. The back bolt hole is cut off, so there is only 4 out of 6 bolts holding the skid in place, and they are only metric grade 8.8. This tells me the skid does not do much structurally for the frame, if it is safe to leave out 33% of the clamping hardware. The long arm mounts have all 6 bolts. 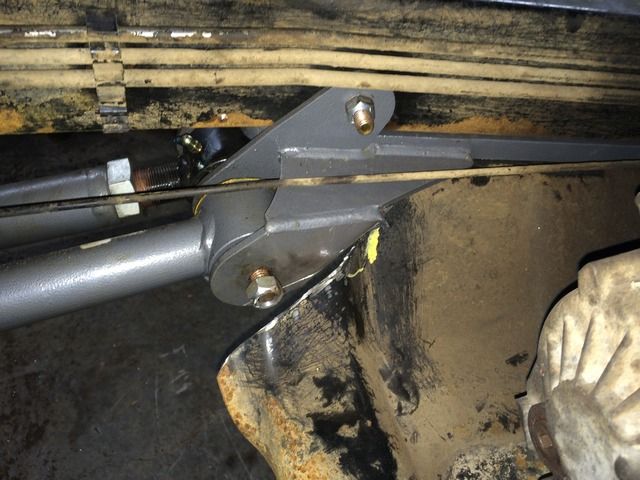 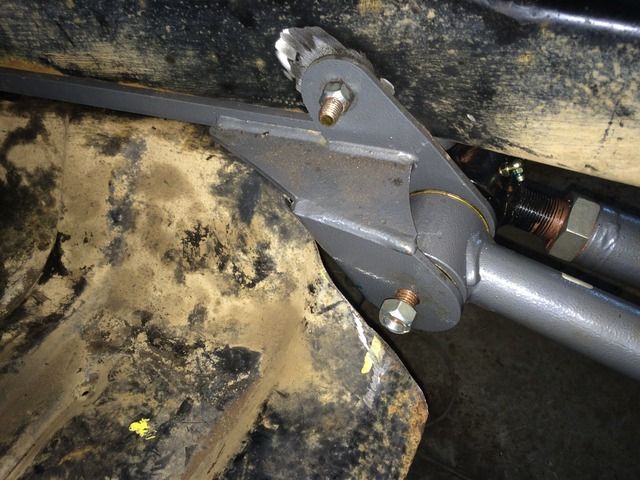 Some exhaust goodies. V-band clamps in stainless steel 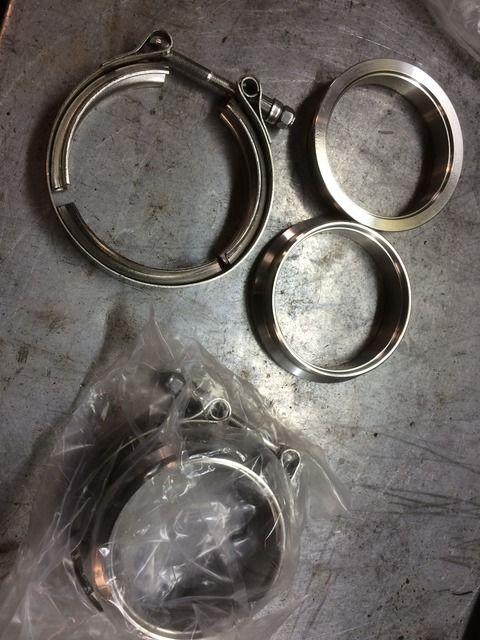 |
|
chevystroker
Jeeper
NEVER CONFUSE HAVING A CAREER WITH HAVING A LIFE ! ! ! ! ! !
Posts: 896
|
Post by chevystroker on May 28, 2016 8:27:11 GMT -4
|
|
chevystroker
Jeeper
NEVER CONFUSE HAVING A CAREER WITH HAVING A LIFE ! ! ! ! ! !
Posts: 896
|
Post by chevystroker on May 27, 2016 23:39:04 GMT -4
|
|
chevystroker
Jeeper
NEVER CONFUSE HAVING A CAREER WITH HAVING A LIFE ! ! ! ! ! !
Posts: 896
|
Post by chevystroker on May 27, 2016 23:31:05 GMT -4
Modified a NEW shift fork.  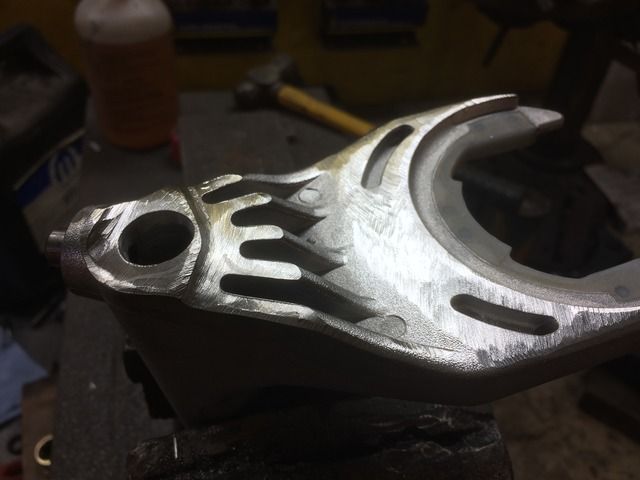 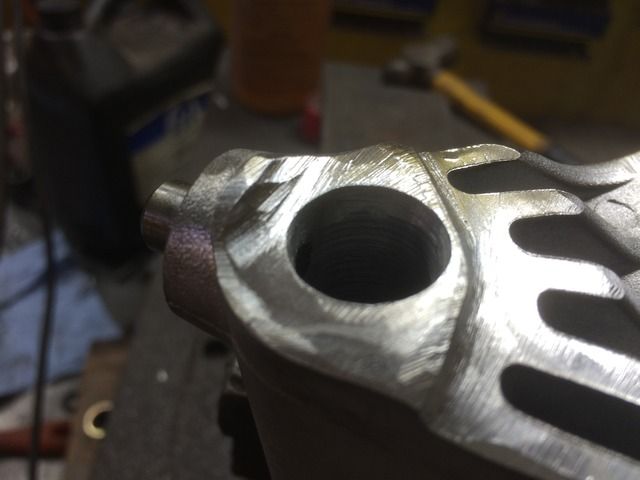 Clearances inside T/C 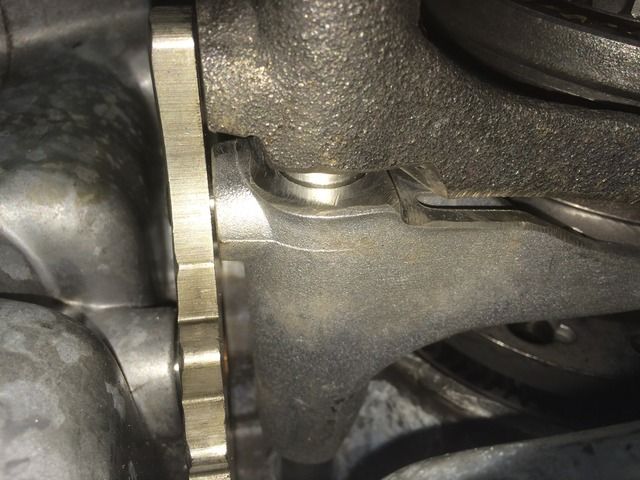 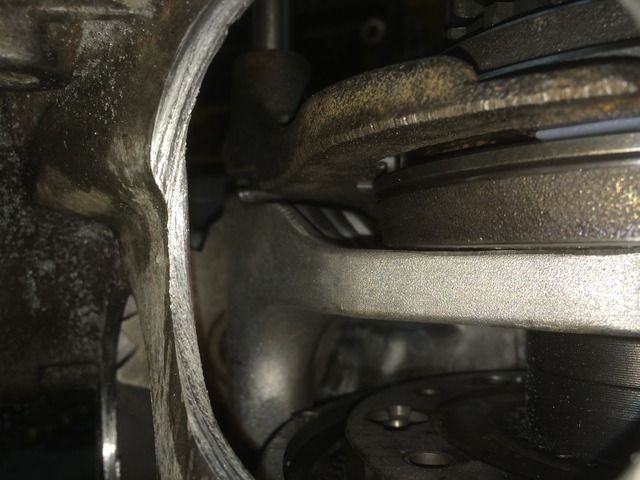 Detent notch viewed through port 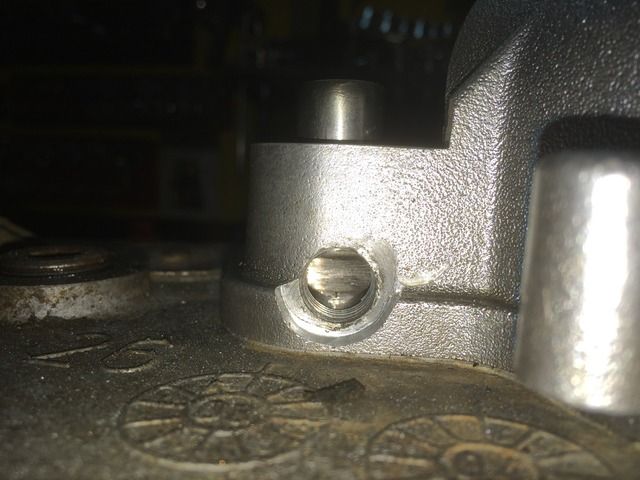 Factory shifter is sealed with an o-ring and plastic retainer that is simply snapped in place 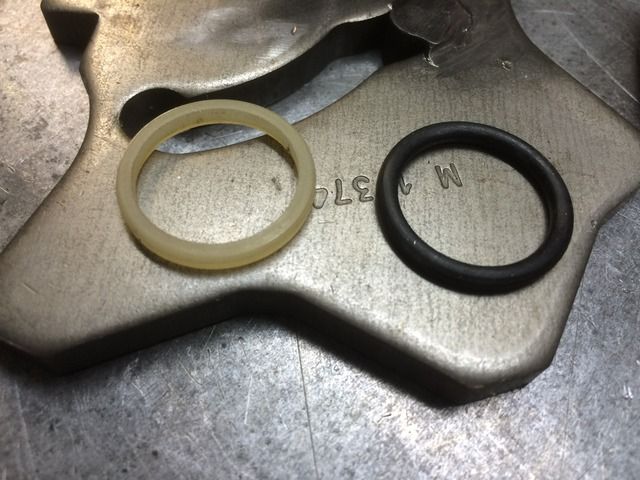 No longer need the spring to return the shift forkas it is no longer following the cam, but added a spacer to limit travel. 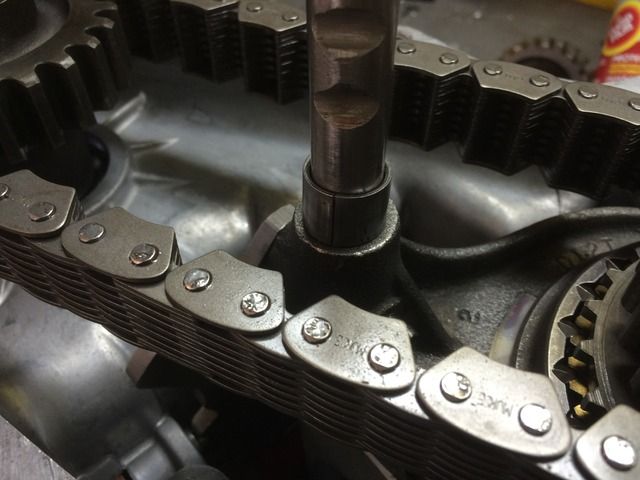 If I had more time, I would have welded a boss below the magnet holder, and drilled an tapped it for a drain plug. This is now the lowest point in the T/C since I clocked it flat. There is not enough material there to tap without building it up with weld. 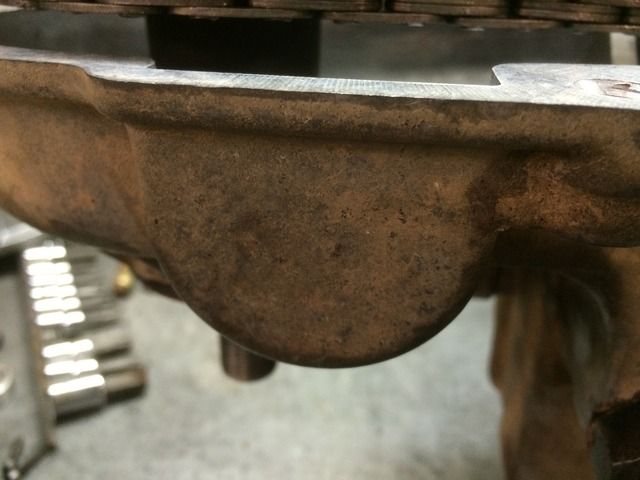 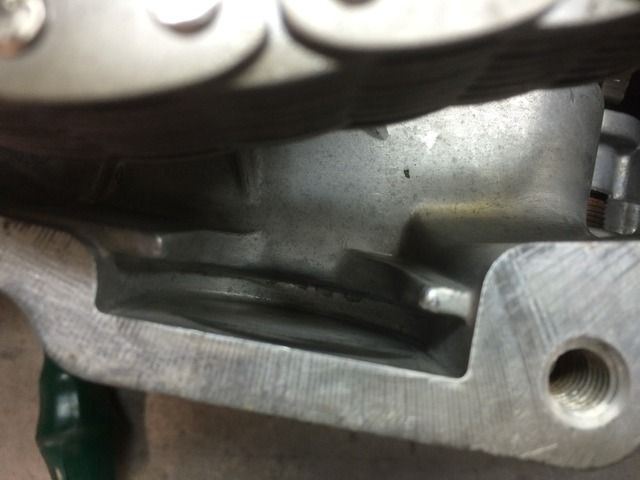 Internal view of the pump. It does not appear to pump when in reverse. 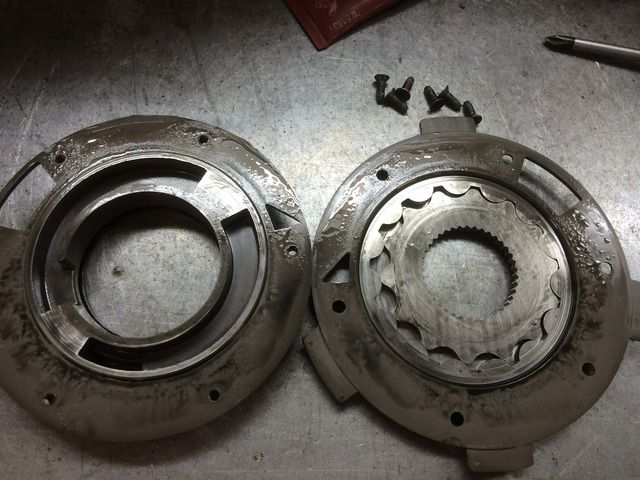 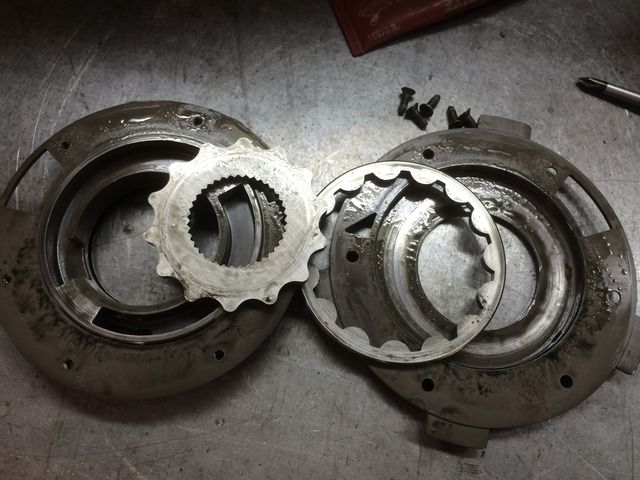 I went with non-hardening gasket maker. 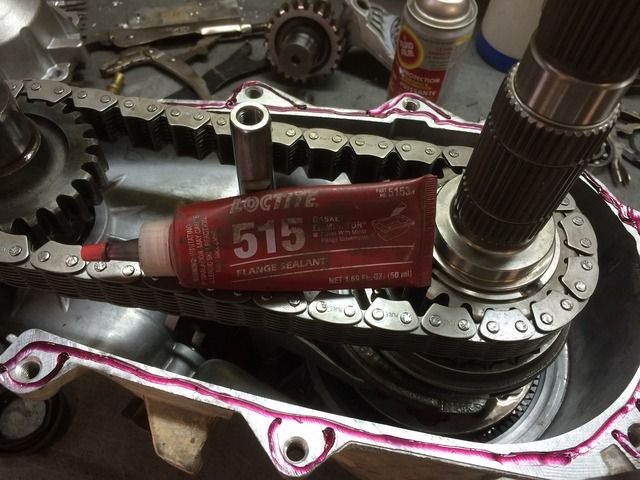 Squishes out fine. 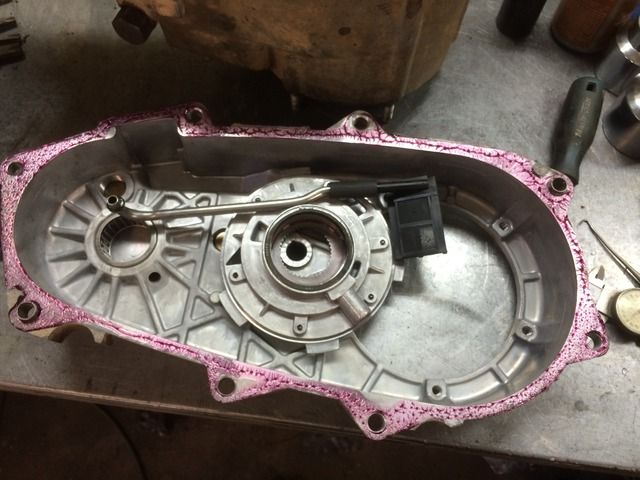 Cannot push the pickup tube into the pump AFTER assembly as per instructions as the new SYE shaft is too big and does not allow the pump to move enough to get the tube in place. Had to put the tube and pump in place BEFORE putting the tail housing in place. 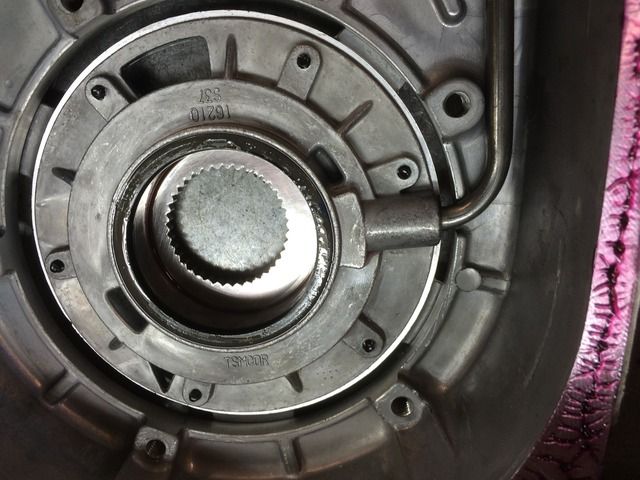 Non-hardening gasket maker spreads out fine. 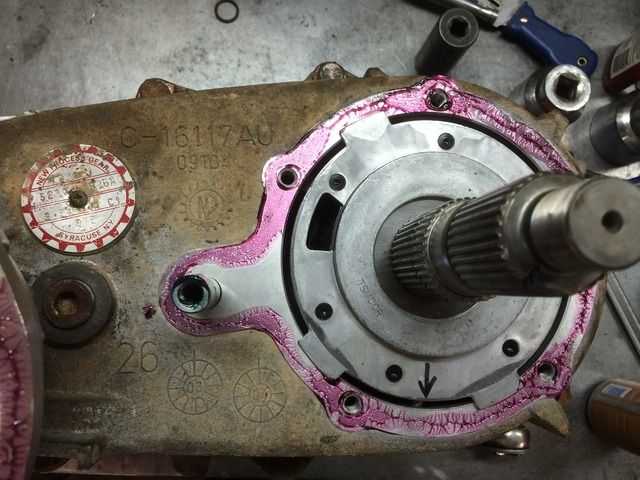 Marks from the flanged tail housing bolts show that the slots I made are covered. No water getting into the threads. 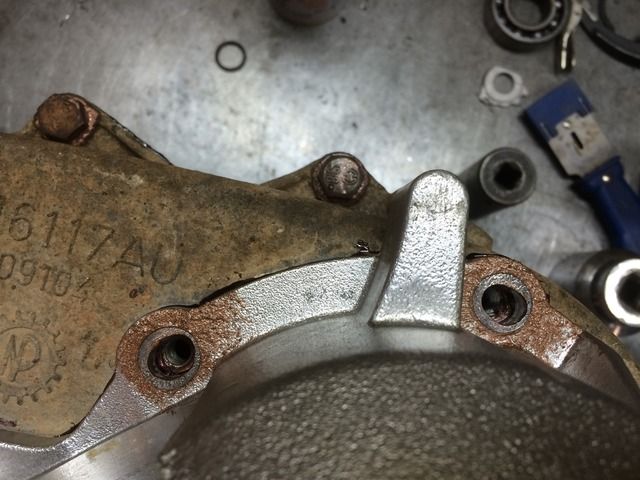 Non-hardening gasket maker around output shaft as well, instead of silicone. 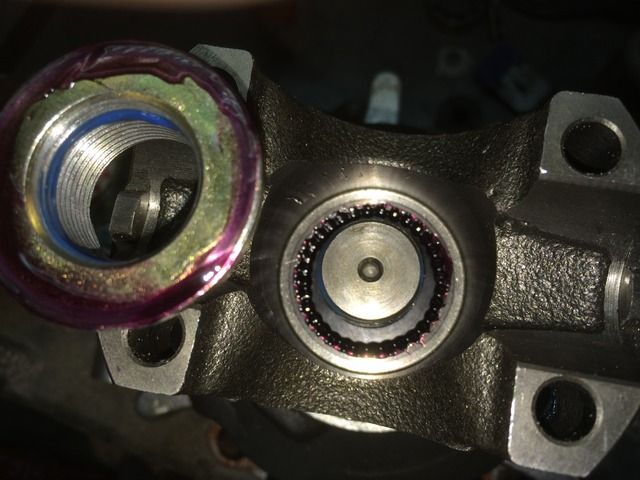 Pipe wrench is a good way to hold output for torquing. 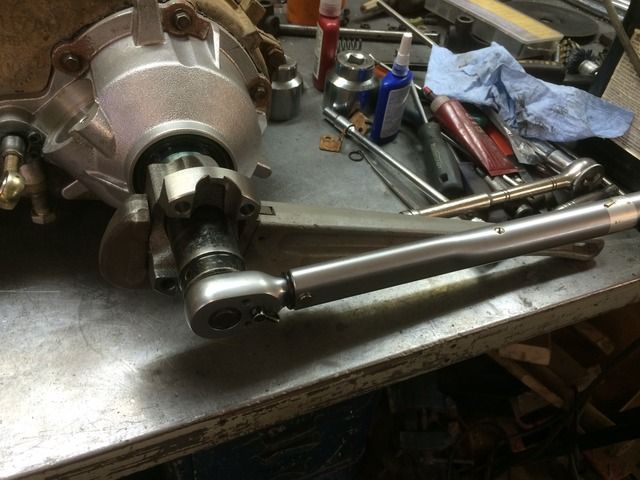 Assembled 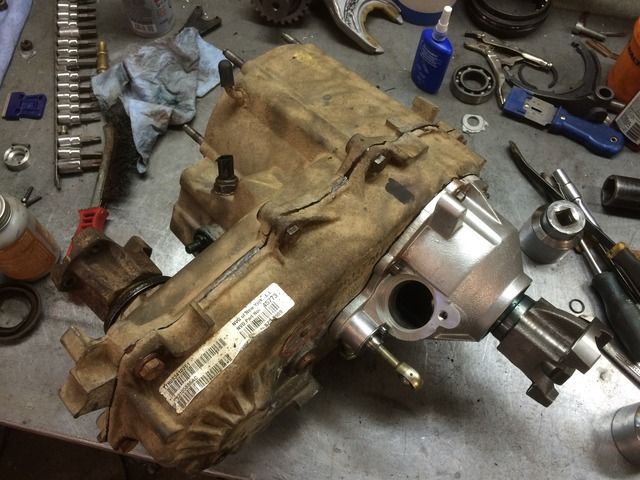 |
|
chevystroker
Jeeper
NEVER CONFUSE HAVING A CAREER WITH HAVING A LIFE ! ! ! ! ! !
Posts: 896
|
Post by chevystroker on May 27, 2016 23:14:02 GMT -4
|
|
chevystroker
Jeeper
NEVER CONFUSE HAVING A CAREER WITH HAVING A LIFE ! ! ! ! ! !
Posts: 896
|
Post by chevystroker on May 25, 2016 22:43:00 GMT -4
Damn the facebook page..... It is ruining the proboards forum. I agree. |
|
chevystroker
Jeeper
NEVER CONFUSE HAVING A CAREER WITH HAVING A LIFE ! ! ! ! ! !
Posts: 896
|
Post by chevystroker on May 23, 2016 11:03:59 GMT -4
TJ and Jk have bolt on skids for the oil pans , bolt to the oil pan and or bellhousing Thanks, good to know. Were they factory skids, or aftermarket? |
|
chevystroker
Jeeper
NEVER CONFUSE HAVING A CAREER WITH HAVING A LIFE ! ! ! ! ! !
Posts: 896
|
Post by chevystroker on May 23, 2016 7:28:52 GMT -4
Sorry for the lack of updates. I have been busy, honest. Anyway, I now have a twin sticked 231 T/C with the option of 2WD Low Range.  More pics to follow. These mods do not need a SYE to work. They will work on the stock case, stock tail housing and stock shaft. They should work on any similar styled T/C. |
|
chevystroker
Jeeper
NEVER CONFUSE HAVING A CAREER WITH HAVING A LIFE ! ! ! ! ! !
Posts: 896
|
Post by chevystroker on May 23, 2016 7:25:21 GMT -4
Couple other things I thought of.
Right now, my engine / trans skid is quite wide and the exhaust is above it. The skid will be keeping the exhaust, and engine, heat in the bay instead of letting it escape. The engine and trans will run warmer.
Putting the engine skid close to the pan and above the exhaust will act as a heat shield keeping exhaust heat out of the oil pan.
This would mean the exhaust crossover pipe is no longer protected, but I have never seen one of those dented, and it is fairly well protected by the front axle.
|
|
chevystroker
Jeeper
NEVER CONFUSE HAVING A CAREER WITH HAVING A LIFE ! ! ! ! ! !
Posts: 896
|
Post by chevystroker on May 23, 2016 7:10:23 GMT -4
Back in the 60's CJ's had a skid welded to the oil pan, but I'm sure it was made of thicker steel than they are these days. Those jeeps were lighter than they are today too. My Dad's 1978 Toyota Land Cruiser had one spot welded to the bottom of the oil pan as well. Covered the bottom and the front of the sump. Can't remember the thickness, it was 1/8" or 3/16" All it did in our Canadian winters with road salt was create a great place for rust to start and the oil pan started leaking.  Ended up brazing the entire perimeter of the skid to stop the leak. My question is more about skids that are not welded to the oil pans, but still mounted to the engine. |
|
chevystroker
Jeeper
NEVER CONFUSE HAVING A CAREER WITH HAVING A LIFE ! ! ! ! ! !
Posts: 896
|
Post by chevystroker on May 22, 2016 19:03:30 GMT -4
Has anyone heard of mounting the skid plates directly to the engine, transmission, and T/C? Looking for advantages / disadvantages. Any horror stories? Any pointers?
Advantages:
Can be made smaller for easier access for maintenance
Can be mounted close to oil pans for more ground clearance.
Easier mounting.
Easier to remove for maintenance.
Disadvantages:
Impacts transmitted to drive train.
Engine and trans mounts have be be in good shape.
Mounts could possibly take full weight of vehicle.
|
|
chevystroker
Jeeper
NEVER CONFUSE HAVING A CAREER WITH HAVING A LIFE ! ! ! ! ! !
Posts: 896
|
Post by chevystroker on May 19, 2016 22:04:50 GMT -4
4WD shift collar done. Carbide insert turned a bit black on the tip but held up well over all. 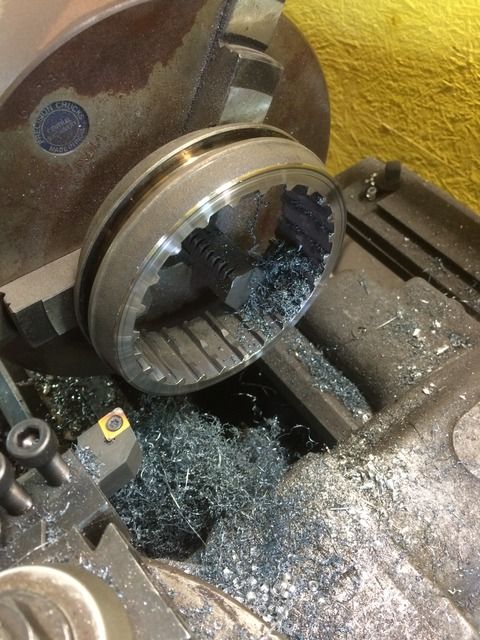 A lot of very fine shavings. I could only take 0.005" or 0.010" on each pass. The collar is heat treated. The outside is hard for wear resistance, and the inside is a bit softer, which gives the part toughness. Have to get under the hardened layer with the tool bit. 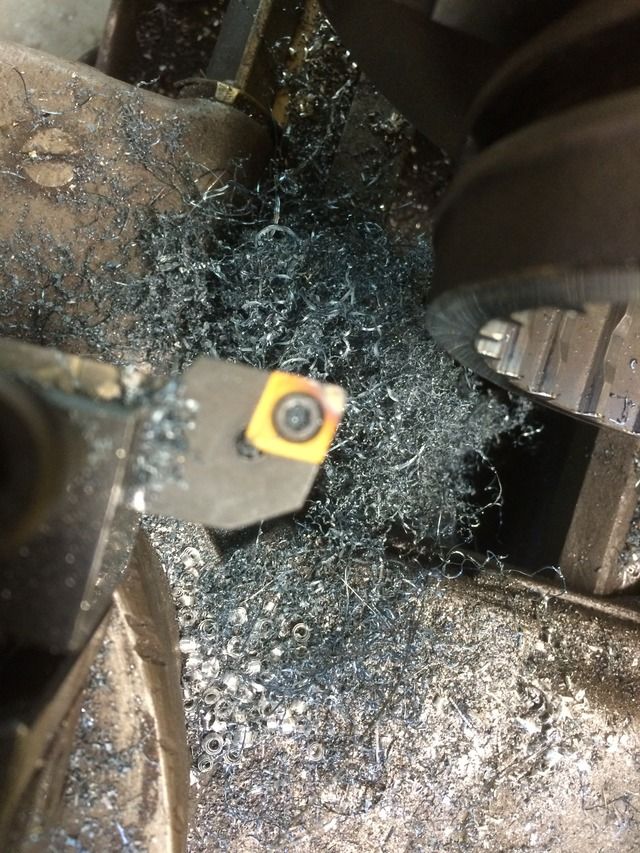 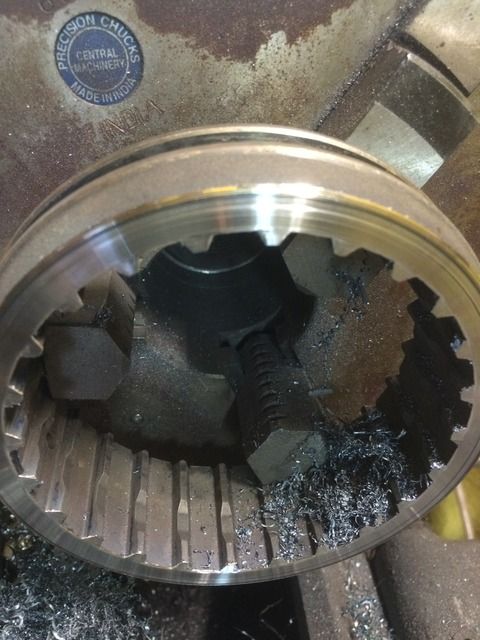 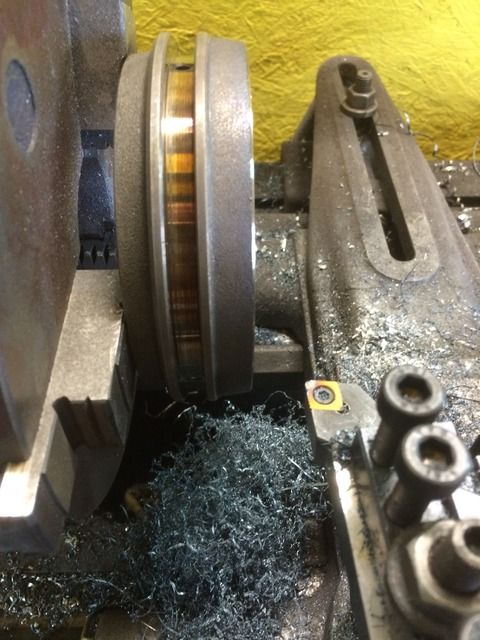 There were a lot of sparks during machining. Person at Rideout tools told me either lots of coolant or NO coolant with carbide inserts. Thermal shock of cold coolant hitting a hot insert can shatter them. Steel was coming off in bright orange ribbons as the steel contacted the carbide insert, and melted. 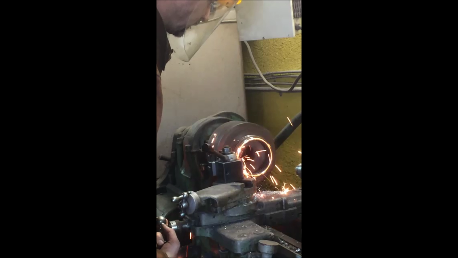 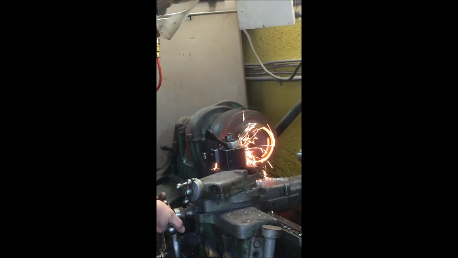 Stock on left versus modified on right 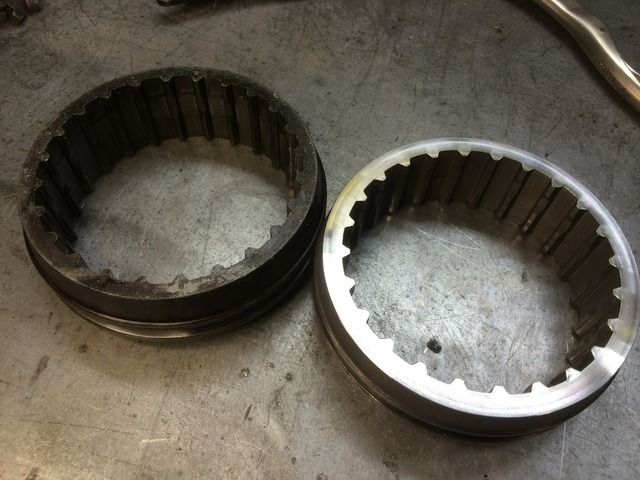 1/8" shorter 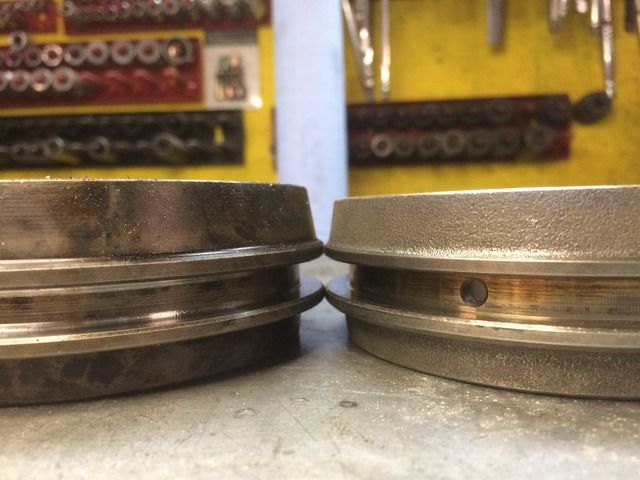 The silver inside the collar is a lot of extremely fine metal shavings inside the shift collar from my 04. Probably from grinding on trying to engage 4WD. 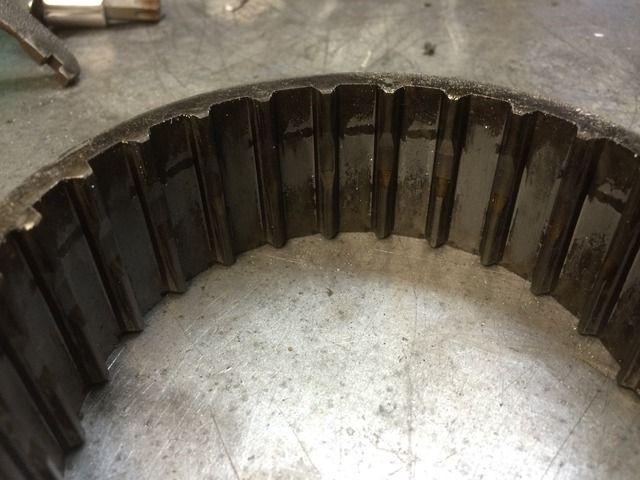 The shift collar from my 04 on the left is not bad, no rounded corners, but it does look a little rougher than the older one on the right that used a synchronizer. 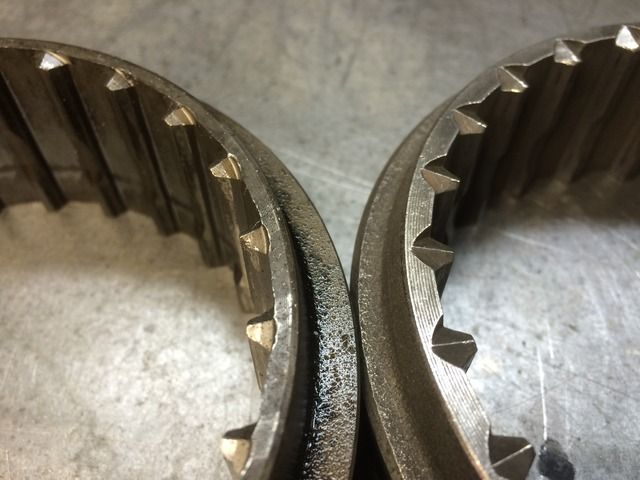 The black pen marks is where the 4WD forks touches on the the Range fork. If needed, that is the area that would have to be ground down for clearance. 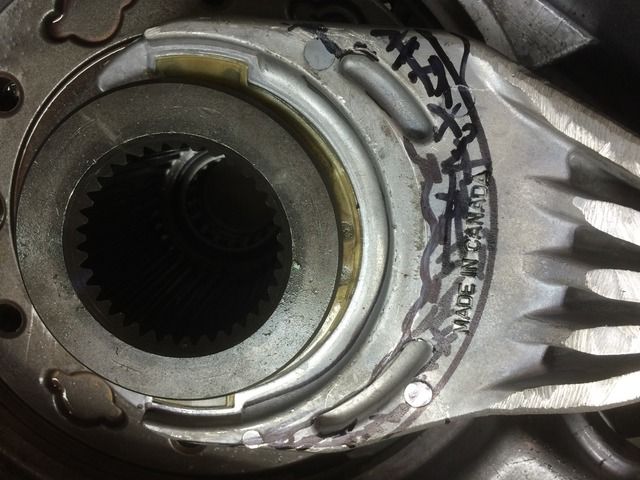 Hopefully, everything will clear now. I have a brand new range fork that I may have to grind for clearance. Tomorrow is pre-assembly and test fit in an old case, then final assembly in my 04 case. Fingers crossed. |
|


 I did have to extend the arms a little bit from the measurements in the instructions to get it to fit, it was a bit long. I also tilted the pinion back down a bit to help. The pinion does not need to be pointed at the T/C when you have a CV shaft. The pinion and driveshaft should NEVER be in a perfectly straight line. A U-joint needs a little bit of an angle so the needles with rotate. Otherwise, the needles stay in the same spot on the u-joint and wear grooves in the trunnion.


 Ended up brazing the entire perimeter of the skid to stop the leak.


