chevystroker
Jeeper
 NEVER CONFUSE HAVING A CAREER WITH HAVING A LIFE ! ! ! ! ! !
Posts: 896
|
Post by chevystroker on May 19, 2016 21:45:34 GMT -4
|
|
chevystroker
Jeeper
NEVER CONFUSE HAVING A CAREER WITH HAVING A LIFE ! ! ! ! ! !
Posts: 896
|
Post by chevystroker on May 19, 2016 21:20:01 GMT -4
Well, I managed to take about 1/8" off the shift collar, with a lot of sparks.  After a quick assembly, looks like everything should clear. I might have actually taken too much off the aluminum shift fork. It is hard to tell for sure as the main shaft is located fore and aft by the bearing in the tail housing, and without it, it sits too far down into the planetary. Does anyone know if the 231 cases, especially the front cases, are all the same? I think I am going to cut 2 or 3 viewing ports in an old case with a 3" hole saw, assemble everything in the case, and make sure everything lines up correctly before marking the detent notches in the new shaft. Then I can clean everything, assemble in my good case and call it done. I think I finally have a 2WD Low Range 231 T/C and it will be shifted with twin sticks.  I still have to build the shifter though.  Will be modifying the TJ floor shifter. |
|
chevystroker
Jeeper
NEVER CONFUSE HAVING A CAREER WITH HAVING A LIFE ! ! ! ! ! !
Posts: 896
|
Post by chevystroker on May 18, 2016 21:23:01 GMT -4
There Was An Old Woman who swallowed a flyI think I am up to goat. I am going to stop at cow. I don't want to be a dead horse.  I have the shift forks modified to clear each other, but NOW, the shift collar hits on the range fork. FFS. Tomorrow night then I will try to cut about 1/8" off the shift collar. Try. They are heat treated. TeraLow makes a 2WD low range kit, and looking at the shift fork, the pin is close to the top of the fork, but it is steel so it is thinner than the aluminum factory fork. teraflex 2 low kit teraflex.com/shop_items/528ffa7fead962f416e72ea0Their shift cam has five detents, closer together, and the ramps are steeper. So, I think I am on the right track. Pics tomorrow, or next day. Gettin a bit fed up with this T/C silliness.
|
|
chevystroker
Jeeper
NEVER CONFUSE HAVING A CAREER WITH HAVING A LIFE ! ! ! ! ! !
Posts: 896
|
Post by chevystroker on May 17, 2016 20:26:11 GMT -4
Ran into a little snag tonight. Yet another one.  The two shift forks interfere with each other. Putting the range fork into low range will push up on the 4wd fork and push it into 4wd. I am sure it was designed this way to try to prevent people like me from making it into a 2wd low range case. So, tomorrow night will see me shave about 1/4 inch off of each shift fork. That should do it. If it doesn't, I have run out of time on this and will put it back to stock, for now, and move onto the other stuff.  |
|
chevystroker
Jeeper
NEVER CONFUSE HAVING A CAREER WITH HAVING A LIFE ! ! ! ! ! !
Posts: 896
|
Post by chevystroker on May 16, 2016 22:41:49 GMT -4
So, while cleaning up the tail housing, I noticed that there is a lot of meat around the bolt holes. Manufacturers don't put extra material in where it is not needed, so I figure Chrysler had it there so they could move the bolt holes around for different clocking positions. Of course, they would have only one hole at each spot, not two like I will have.  With the T/C in stock location 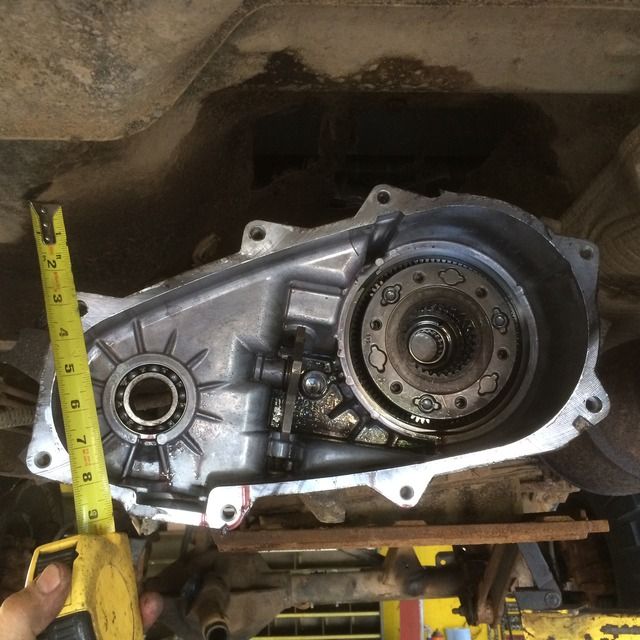 About 2 3/4" clearance 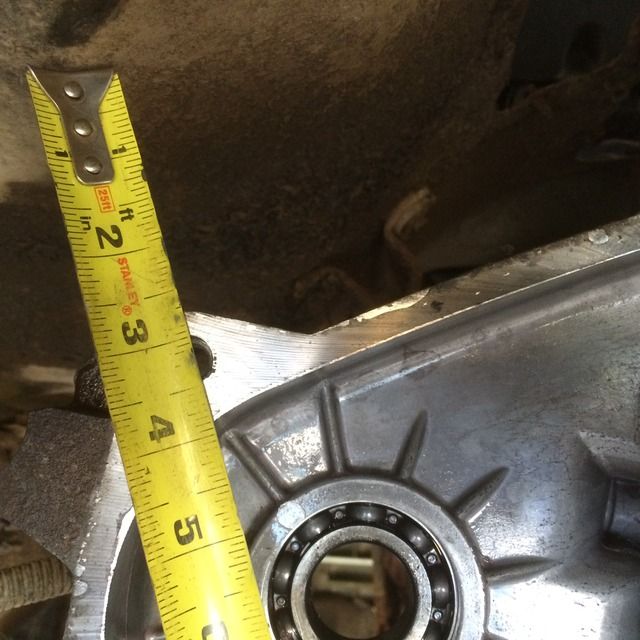 Holding the T/C in the flat position. (Much easier with only the front half there. ) 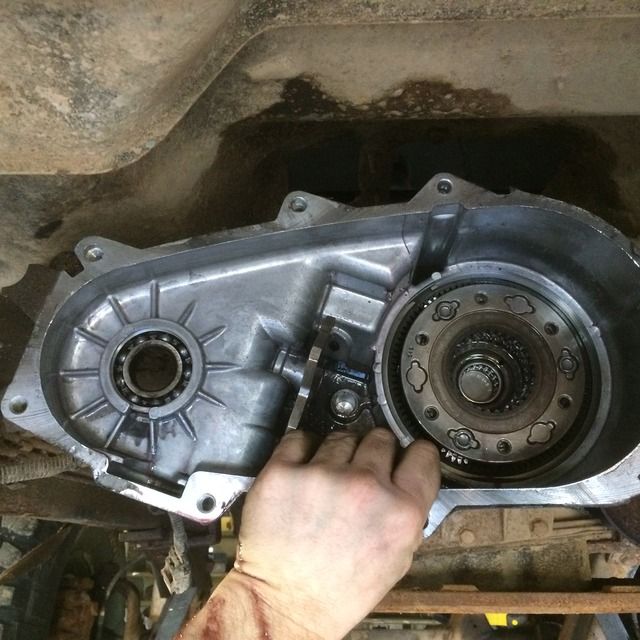 The bolt hole would have to move one bolt diameter clockwise 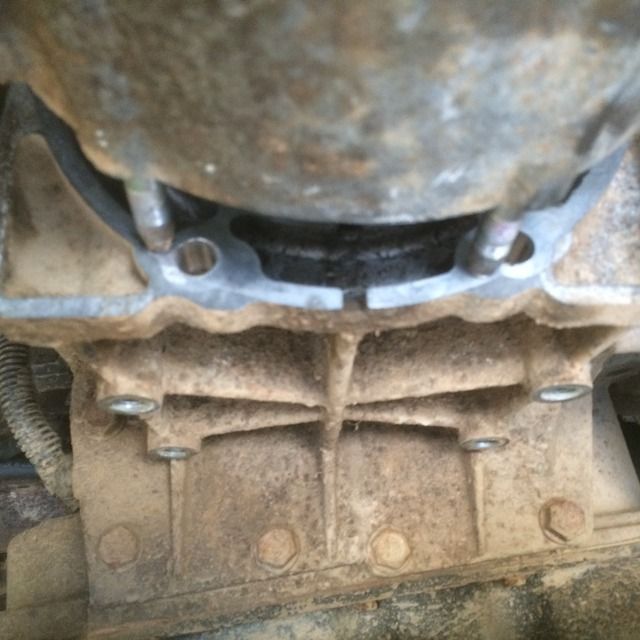 With the T/C clocked flat, the detent plug becomes the low point in the T/C, much lower than the actual drain plug, so I would use that for a drain. The T/C will also hold more fluid clocked flat. 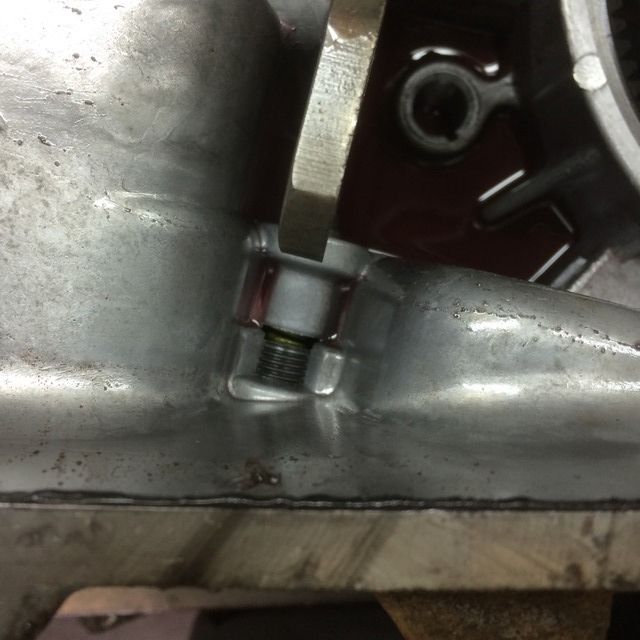 Centre punch marks and first two pilot holes drilled. I figured that with the holes so close together, the drill could walk out through the side of the hole into the factory holes. Pilot holes kept the drill on track. 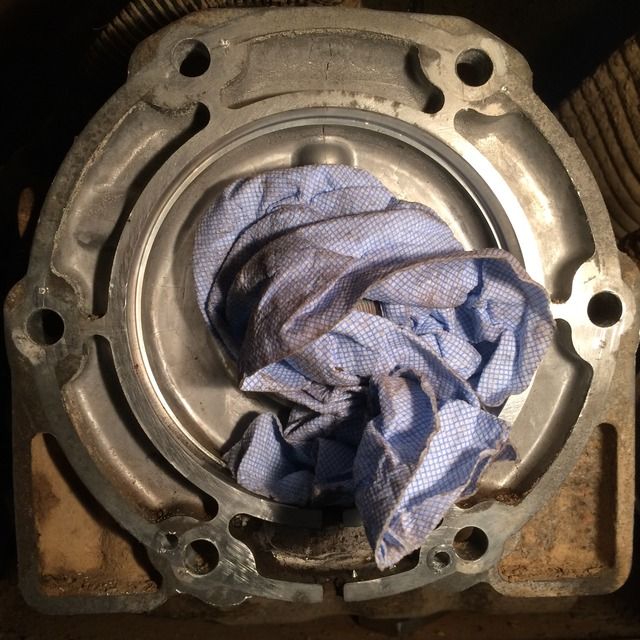 6 new holes. Some of them did break through but did not jump into the old holes. I did have to die grind a fair bit to get T/C to fit, but not too bad over all. I could have drilled bigger holes, but then I would have been right at the edge of the extra material. 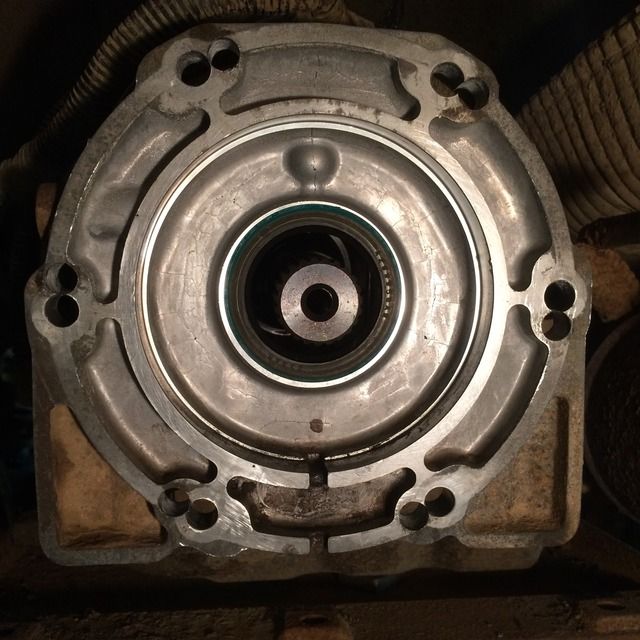 In place clocked flat. 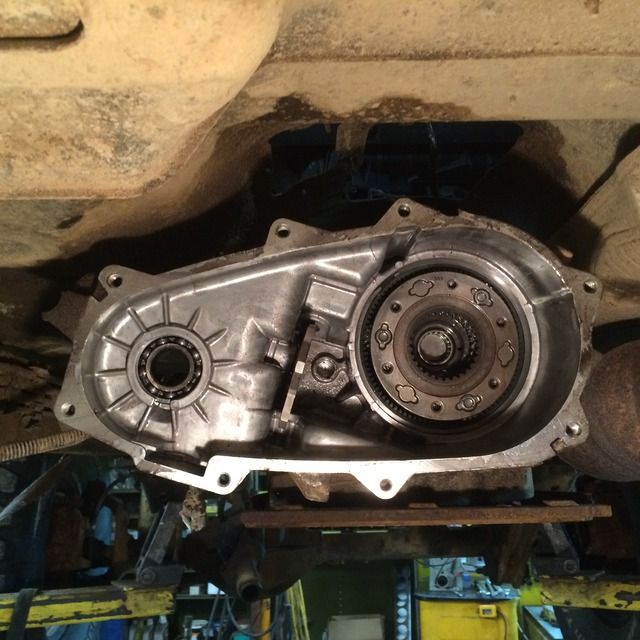 There is now 1 3/8" clearance 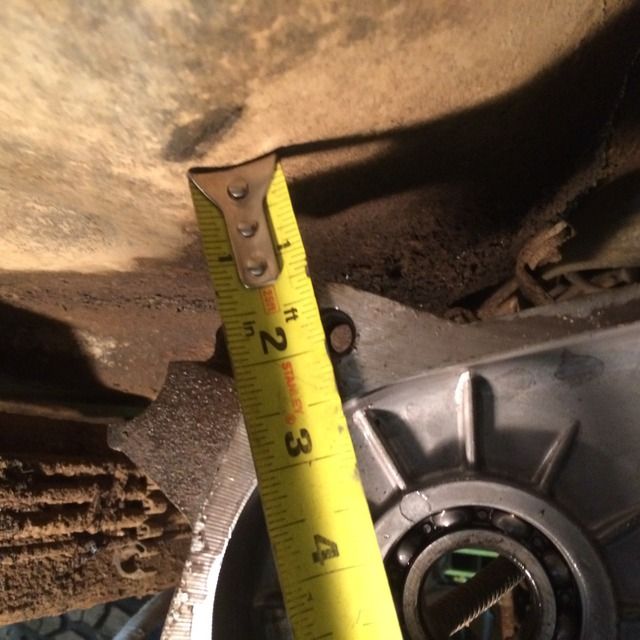 The stud on the left side of the case is the only one that is close, but I relieved it a bit with a die grinder and the nut should clear fine. 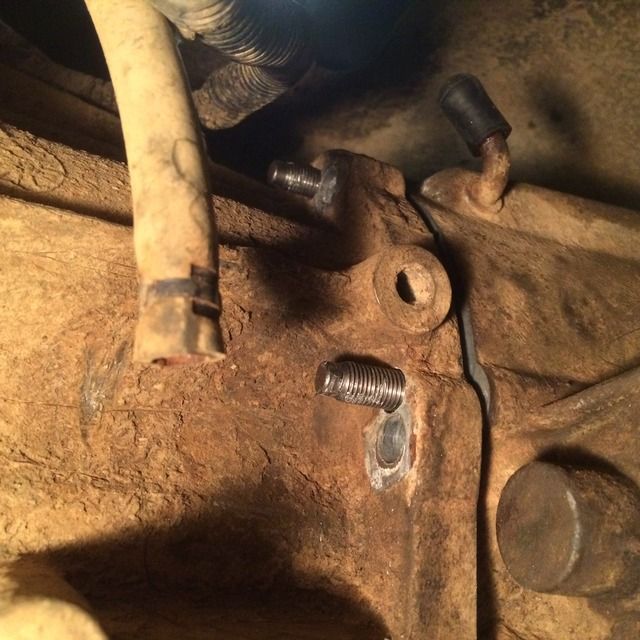 Bottom two are fine, as are the last 3 studs. Really hope this works out as I did it without any research at all. |
|
chevystroker
Jeeper
NEVER CONFUSE HAVING A CAREER WITH HAVING A LIFE ! ! ! ! ! !
Posts: 896
|
Post by chevystroker on May 16, 2016 22:12:49 GMT -4
A 1/2" socket head cap screw would have worked as well, IF I had one. Welded a nut at the top of the threads on a 1/2" bolt 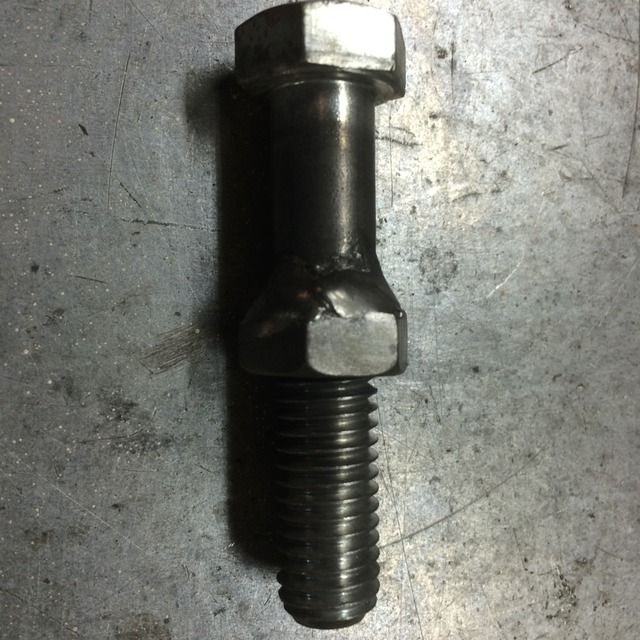 Finished detent extension cap with 5/16" hole drilled about 0.800 deep. About 0.100" to 0.150" too deep I figure. Will make a small shim. 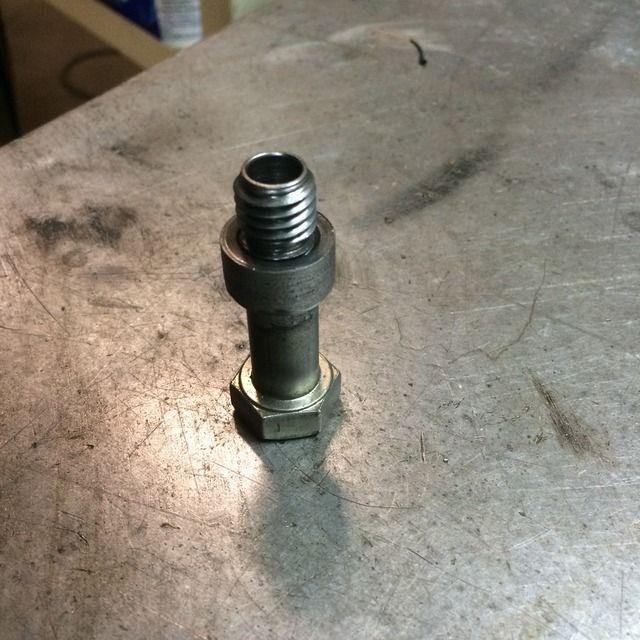 Small groove at top of threads for o-ring. 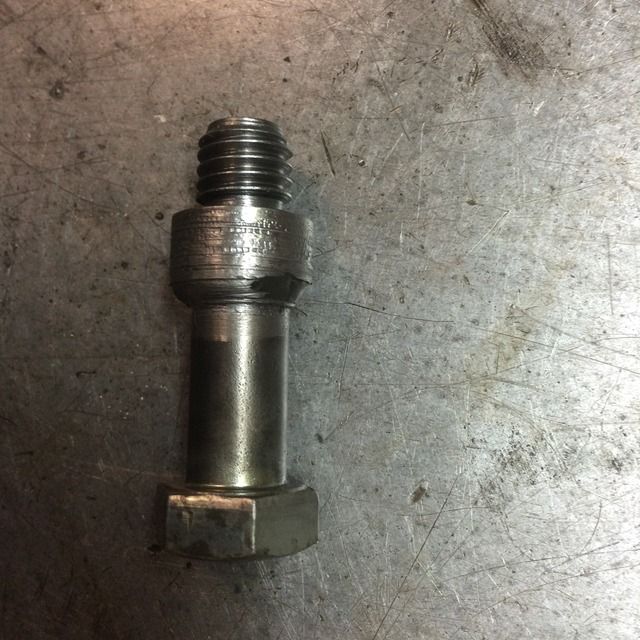 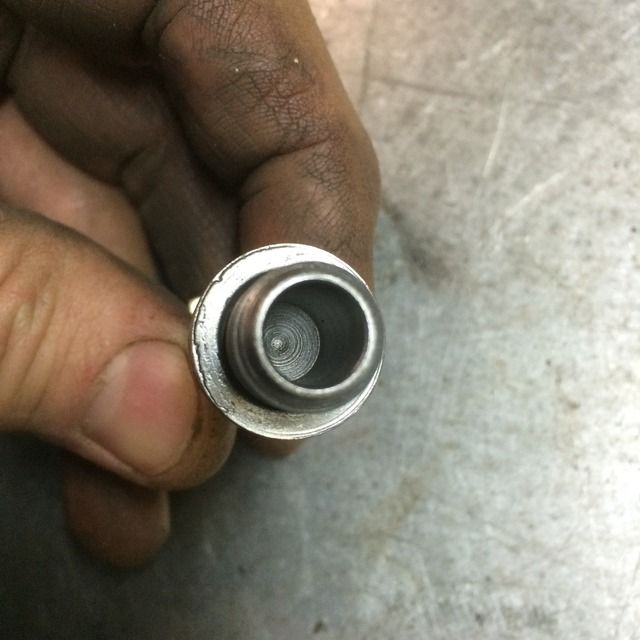 Threaded in with the detent stickout. 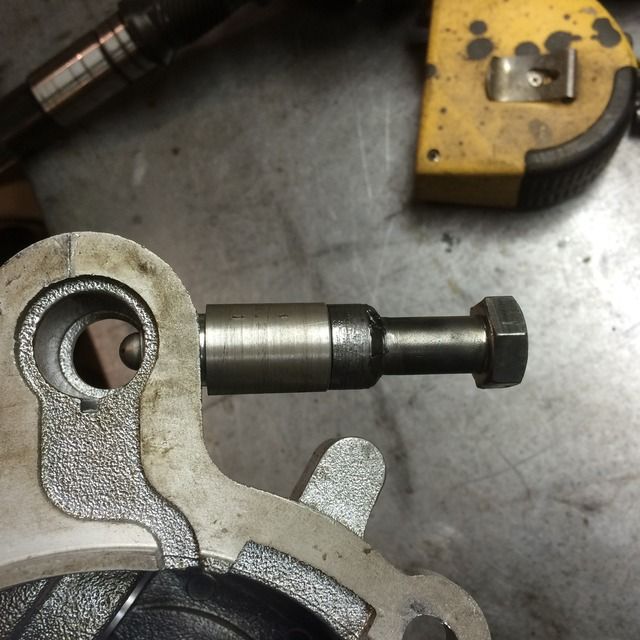 Mounted on case. Hex now clears case and I can tighten it up. 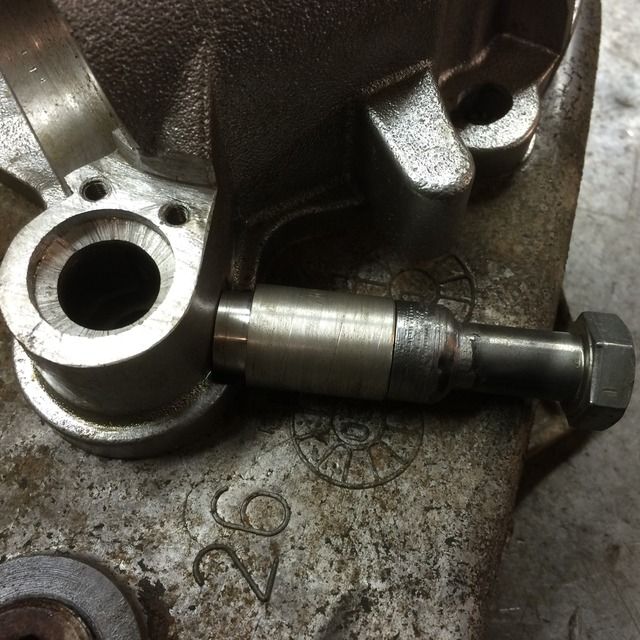 Next is assembling all of the case so I can mark the shaft in two spots for grinding a groove for the detent to drop into. |
|
chevystroker
Jeeper
NEVER CONFUSE HAVING A CAREER WITH HAVING A LIFE ! ! ! ! ! !
Posts: 896
|
Post by chevystroker on May 16, 2016 16:44:59 GMT -4
My 04 T/C does not have a synchronizer on the 4wd shift collar. With no axle disconnect, it would not need one unless the rear wheels were spinning when you tired to engage 4wd. Older spare T/C has a vacuum switch on it, so I assume it had a front axle disconnect, so it would need a synchronizer as the front shaft would not be spinning. I think I would like to transfer the synchronizer to my T/C. 04LJ shaft on left. Looks like it is machined to take a synchronizer. 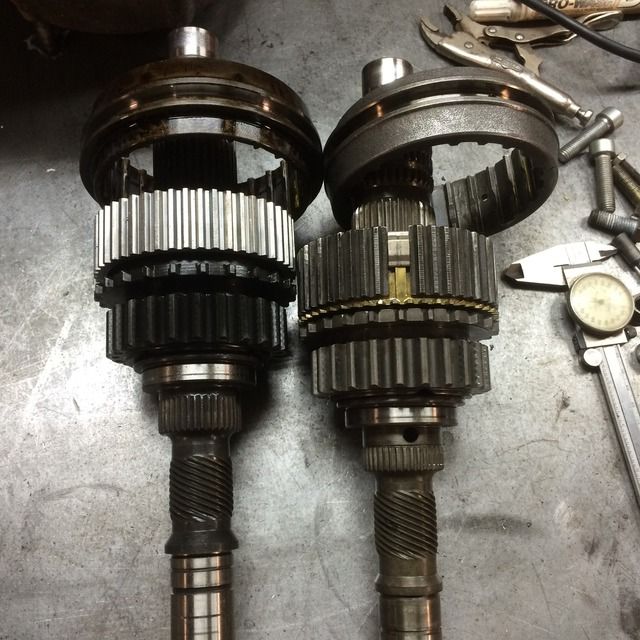 The older T/C has oil holes drilled in the groove for the plastic tabs. Should make them last longer. 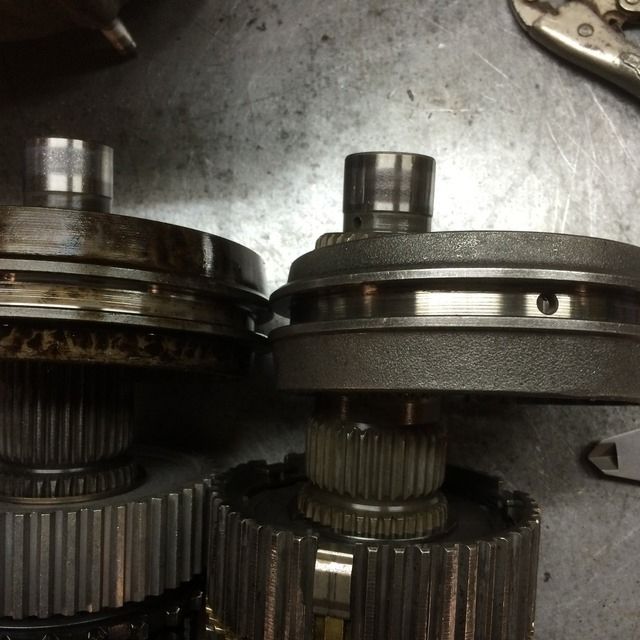 With the spring loaded tabs, I think the sliding shift collar would stay out of gear on its own, but I think it needs a detent to stay in gear.  Bottom detent is 04 LJ which I will reuse in same location. Top one is older T/C which I will use on the new shaft. I have to make sure the notches I put in the shaft do not travel into or past the oil seal. 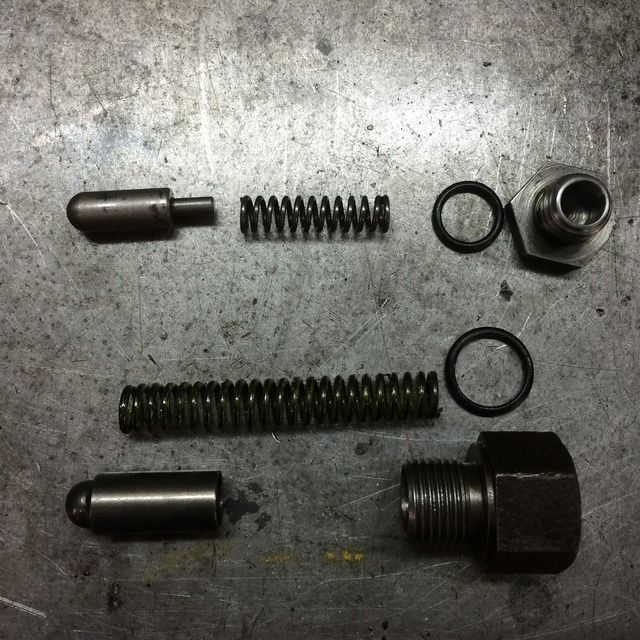 Here is the new detent holder I made to thread into the SYE housing. It is 1.5" overall length, 0.300" of male 1/2"UNF threads, and approx 0.6" of 1/2" UNC female threads to match to factory detent cap. The step in the housing above the male threads is to clear the flange on the SYE housing. 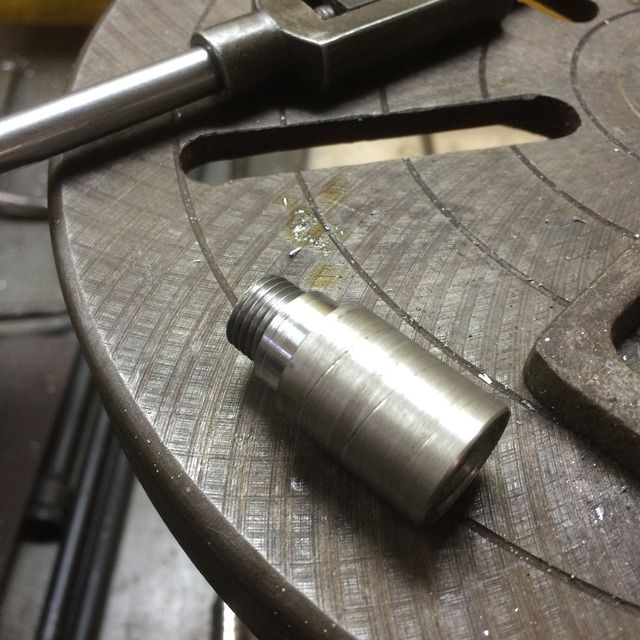 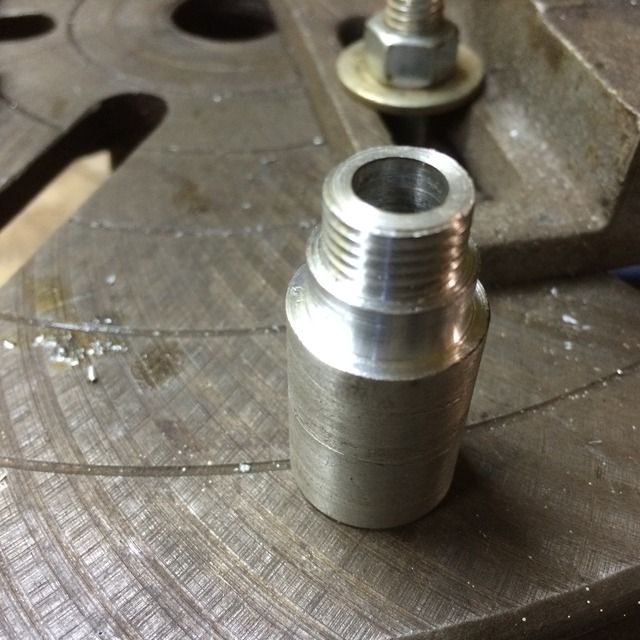 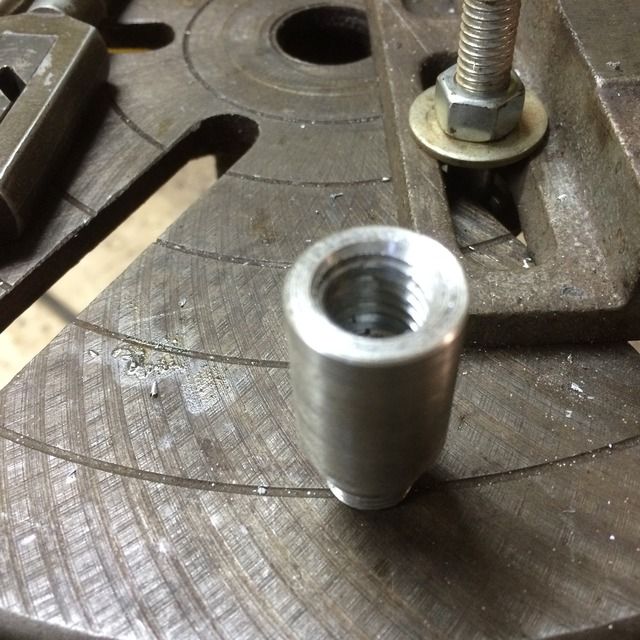 Most good quality drills have a small countersink in the top end to use a countersink or drill to make sure it is lined up with the hole. The lathe is off and out of gear. I slowly turn the tap while keeping slight pressure on the tap with the tail stock. Once it is in a few threads, the tail stock is no longer needed, it will stay straight.  The detent needs to be as close to bottom face of SYE housing as possible, so I improvised my drill press as a milling machine to mill out some of the flange. Very crude, and have to go very, very slow, but it works. 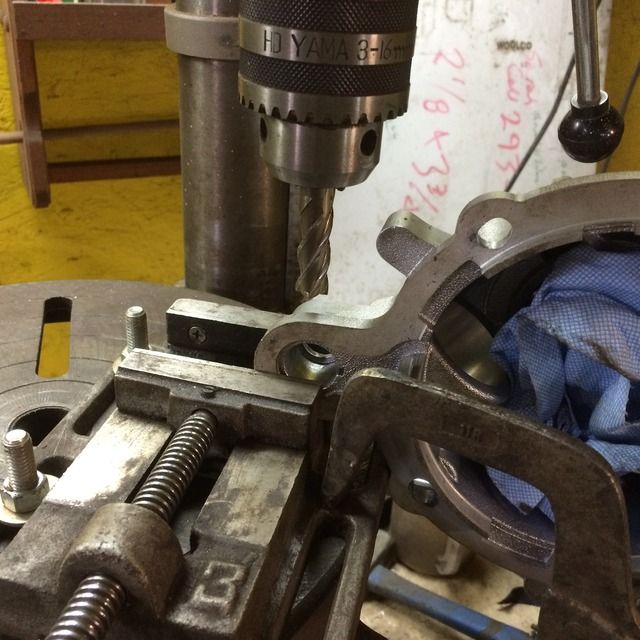 Drilled pilot hole, and used that drill to keep the hole lined up with the chuck for the bigger drill. 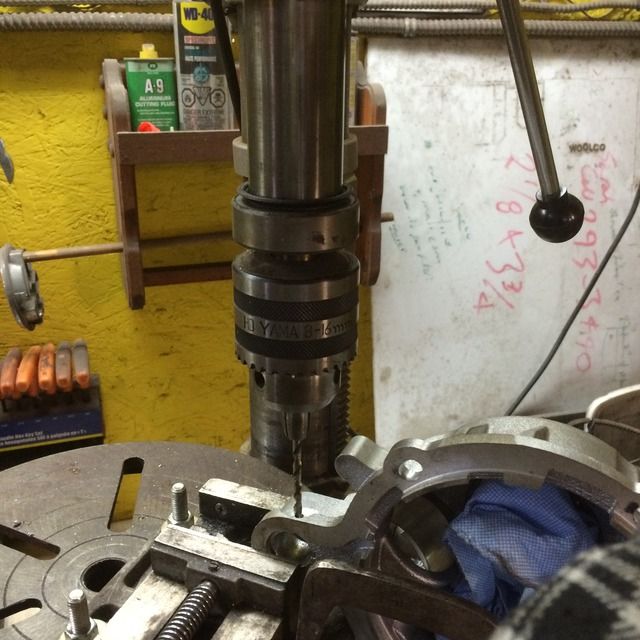 Drilled out 29/64th for 1/2 x 20 UNF tap. Used a counter sink to ensure tap stays vertical and centred in hole. Same process as in lathe, slowly turn tap in while keeping slight pressure on tap with drill press 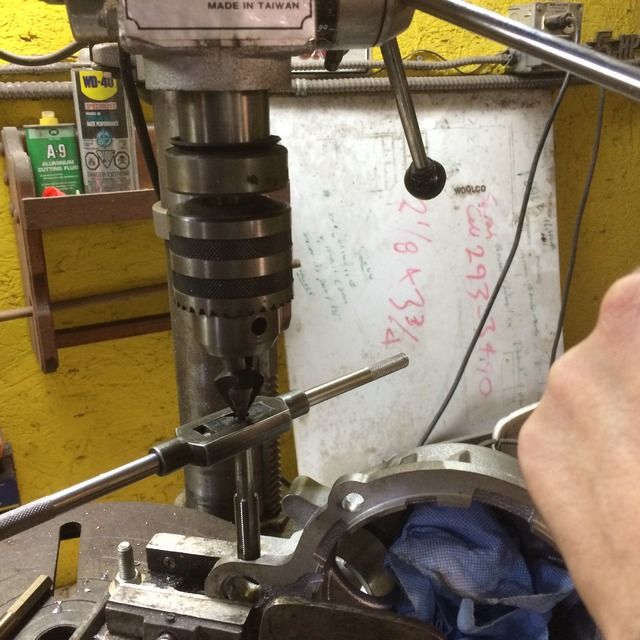 Finished hole with threads and relief. Touched it up with a die grinder in the corner. Did not want to push my luck with the milling/drill machine. 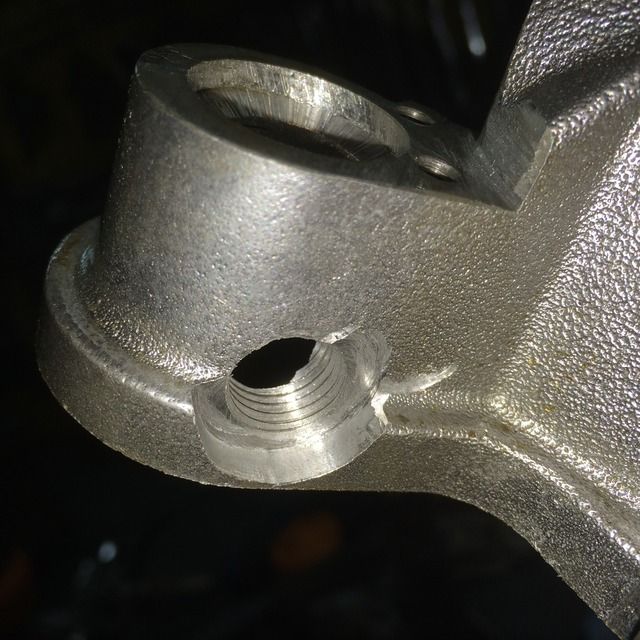 Detent housing in place. It will be loctited to seal it on assembly. 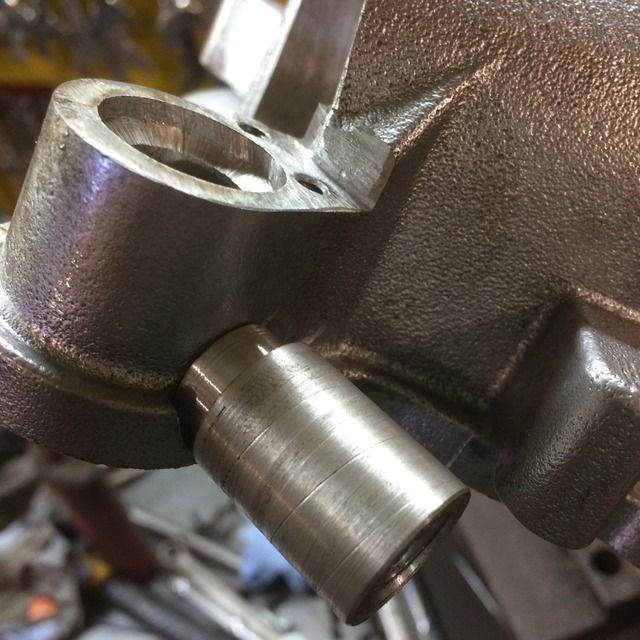 Different view with detent installed. 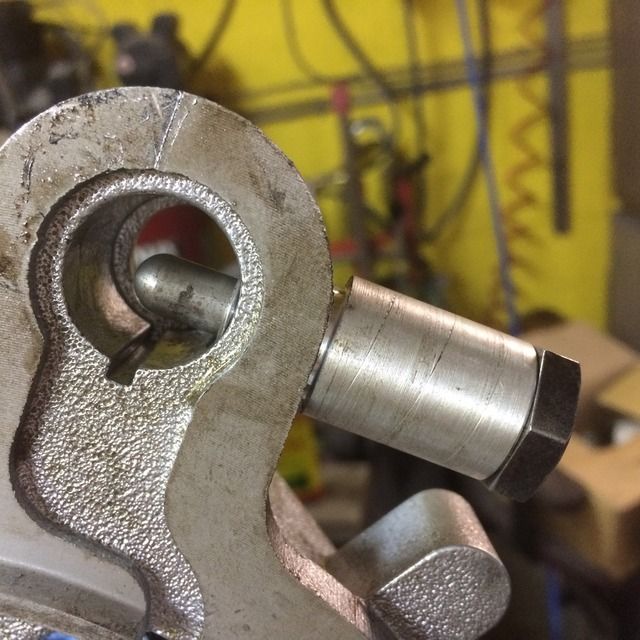 I was so focused on making the detent as far down as I could make it, I made it too close to the T/C housing to screw in the detent cap. So, now I have to make a longer one so the hex will clear the case and I can tighten it up. D'oh. I should have made the detent housing a bit longer than 1.5" as the detent sticks into the housing a bit too far. I can adjust that now with the longer detent cap that I have to make. If it is out too far after that, I can shim it. So much fun. |
|
chevystroker
Jeeper
NEVER CONFUSE HAVING A CAREER WITH HAVING A LIFE ! ! ! ! ! !
Posts: 896
|
Post by chevystroker on May 16, 2016 7:53:35 GMT -4
Original plan was to make a small bolt on seal retainer with an internal groove for an o-ring to seal on the shift rail. But when I was going through my box of old chainsaw screws to find some small 4 or 5 mm screws, I found a small seal that was 5/8 ID and just .005" over 7/8 OD. Since most drills drill a little bit oversize, I switched to using this seal. Below is the finished product. The 7/8 drill bit drilled right at 0.880", just right for the seal to have a light press fit, aided of course with locktite. The heads of the bolts would also overlap with the seal and help retain it. 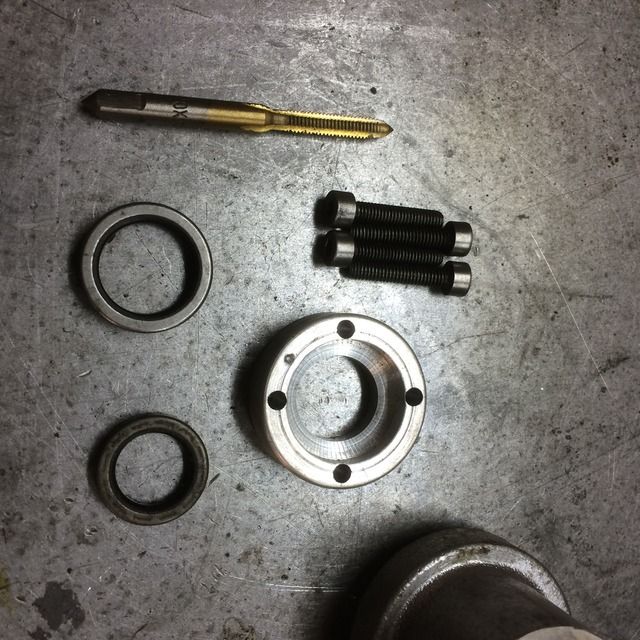 Test fit on shaft. 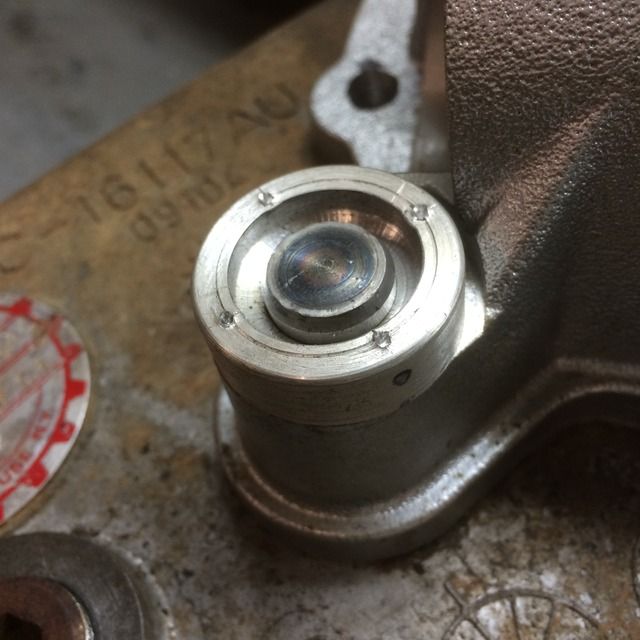 But I realized it was not going to work. Because the SYE boss was such a small diameter, the bolts had to be really close to the seal, and the holes I drilled were going to overlap with the seal bore, and interfere with the seal. Then the lightbulb went on. Why not just make a small counterbore in the SYE housing, and put the seal directly in the housing? Because it is great in theory, but with an old loose drill press that even on slowest speed it is too fast for a 7/8 drill, the bit chattered a lot and drilled way oversize. So, now I need a seal retainer bcause the bore is too big for even locktite to work. Starting to sound a bit like the old lady who swallowed the fly. If I am going to keep doing this silliness, I am going to need a milling machine, or at least a much better drill press. Shot of the housing "counterbored" with the drill, two small tapped hole, the washer drilled out for a seal retainer, the bolts and seal. 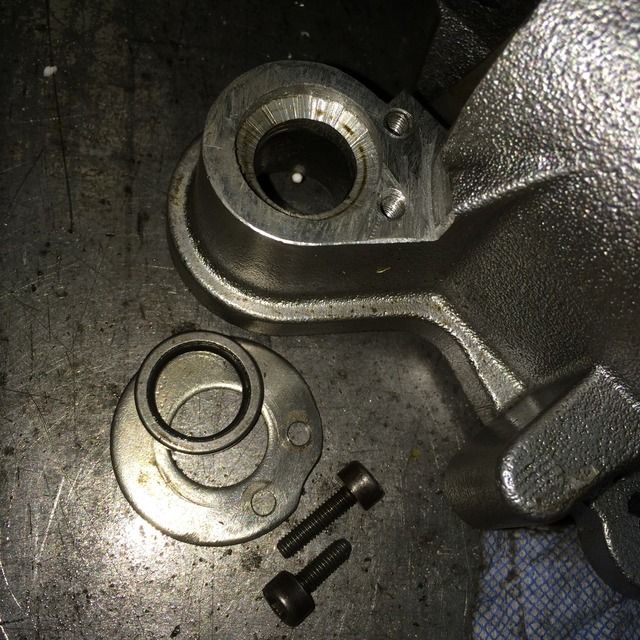 Two shots of it mocked up with the new shaft and seal retainer. The shaft was binding a tiny bit on the 5/8 bore in the housing, so had to file one side a tiny bit. It slides in and out nicely now. 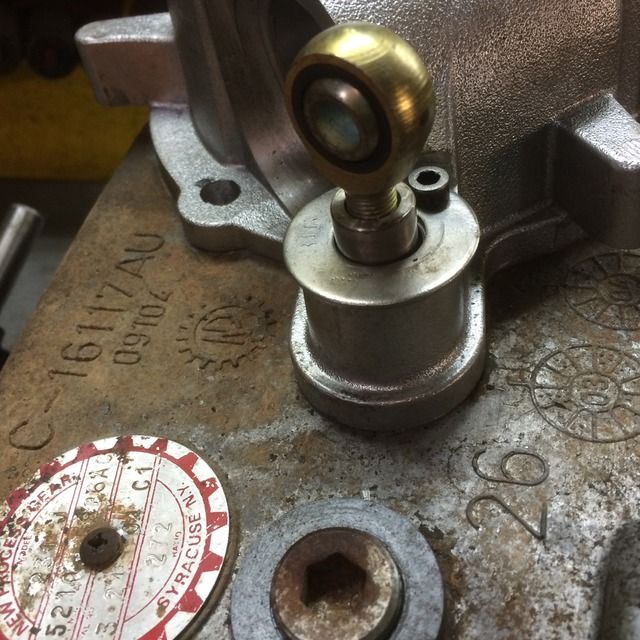 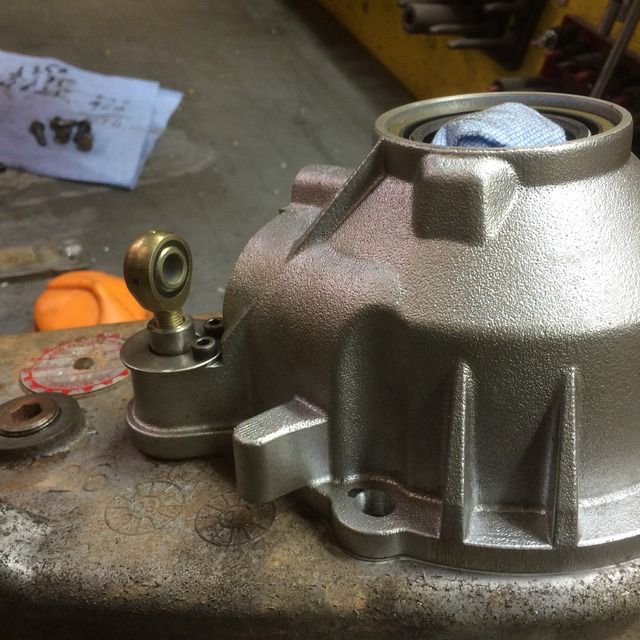 More later. |
|
chevystroker
Jeeper
NEVER CONFUSE HAVING A CAREER WITH HAVING A LIFE ! ! ! ! ! !
Posts: 896
|
Post by chevystroker on May 16, 2016 7:18:27 GMT -4
Just realized last night that I will have to add a detent to the shift rail, so will try to add one to the SYE housing. View of front of T/C on left side. The boss is where the rail slides. Might have been able to extend rail out the forward end of T/C, but it is really tight there, and would be difficult to make a seal there with the tools I have, at least without welding. 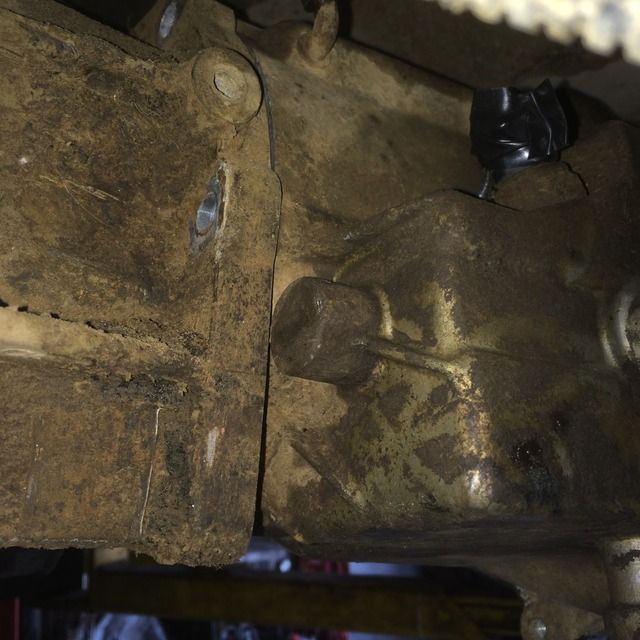 Shot if the shift cam, detent and shift lever. I need to flip the lever from down to up.  Shot of the shifter seal. Looks like an oring held in with a pressed in plastic retainer. The shifter is bigger diameter than rail so I can't use one of those to seal rail. 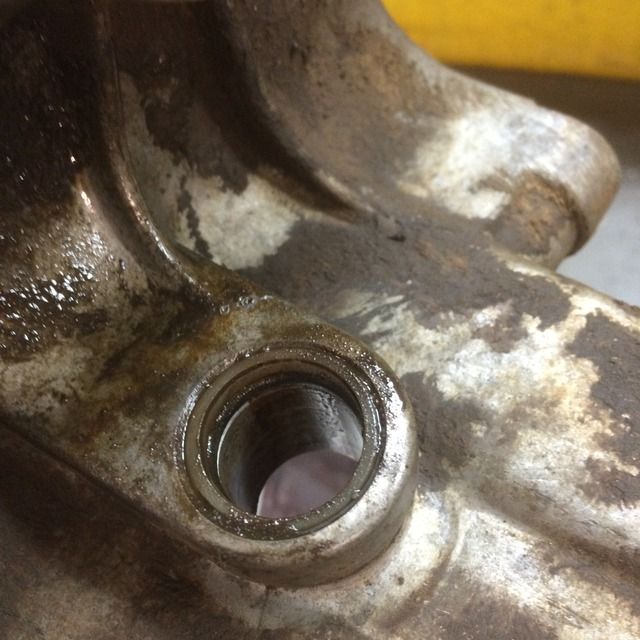 3 different shift levers: top one is my 04LJ, middle is from my unknown spare T/C and is the same, bottom one is from a YJ. YJ one should work. 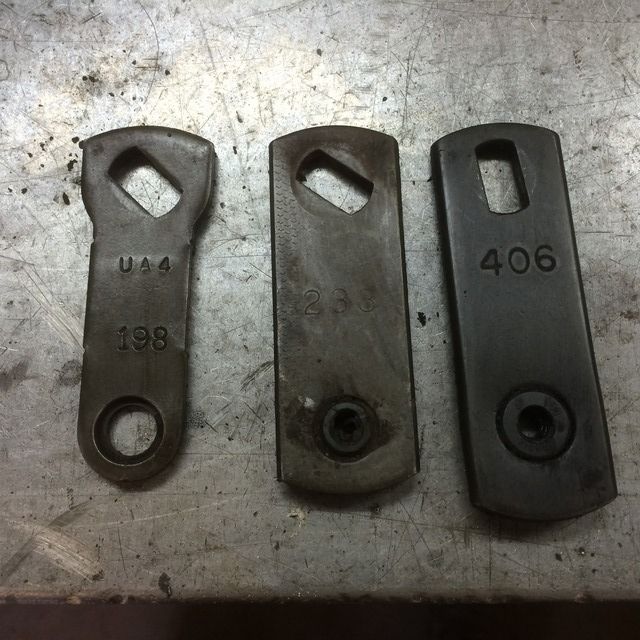 YJ lever in full aft position and in full forward position. I will be welding a short extension on it at an angle facing aft. 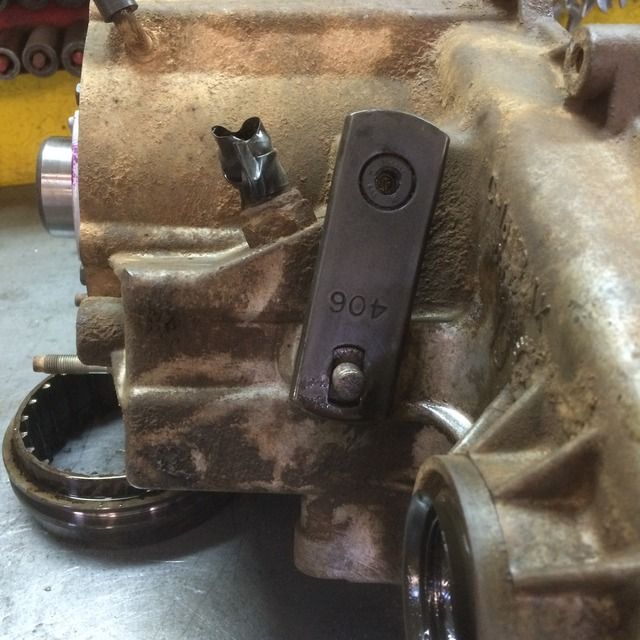 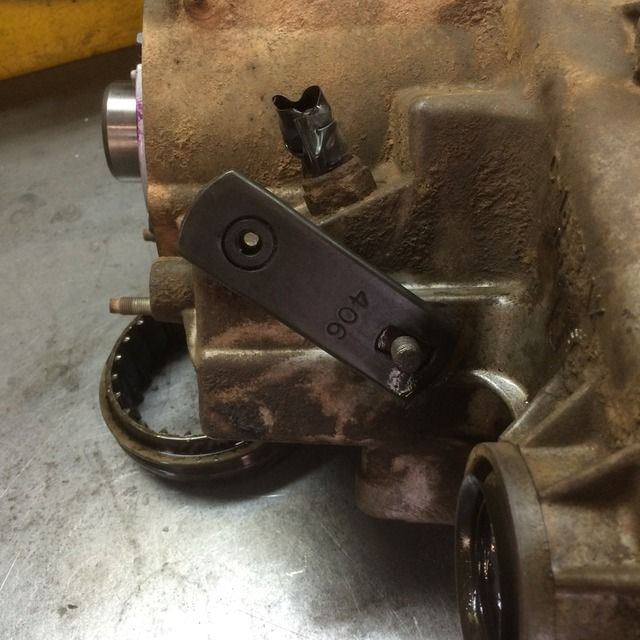 Needed the hole in the SYE housing to be centered over the shift rail, so had to slot the mounting holes. The mounting holes look like they were offset from the casting anyway.  Set up on drill press. 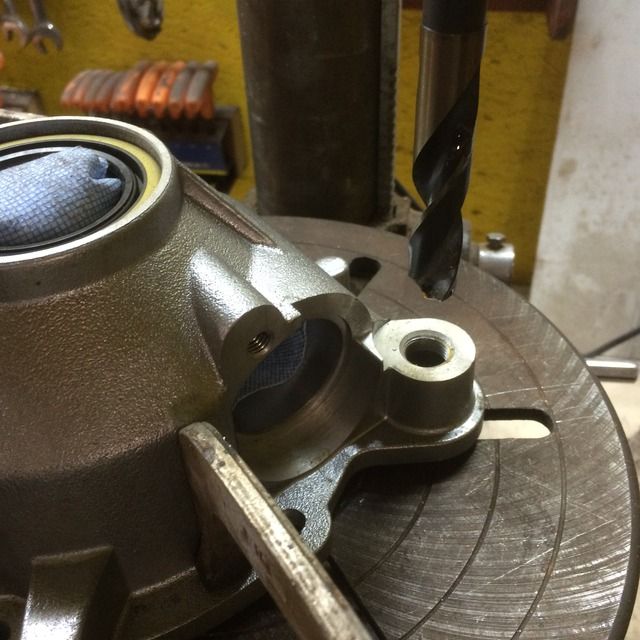 No turning back now. Drilled out to 5/8 diameter. 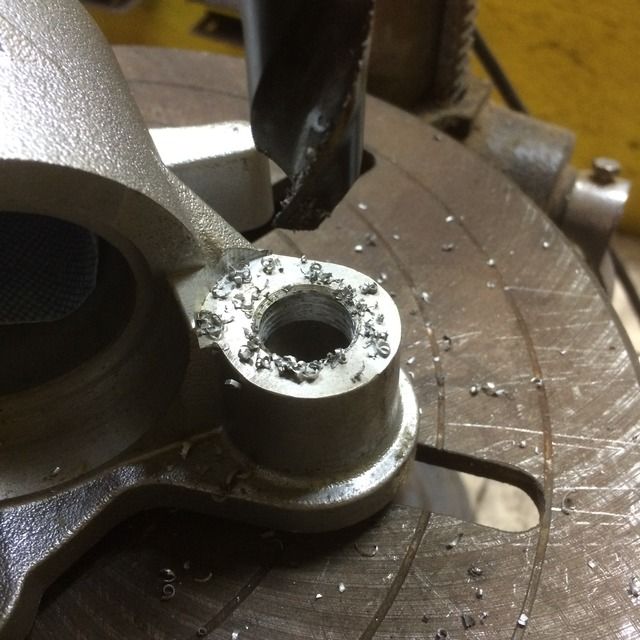 Test fit with stock shaft. 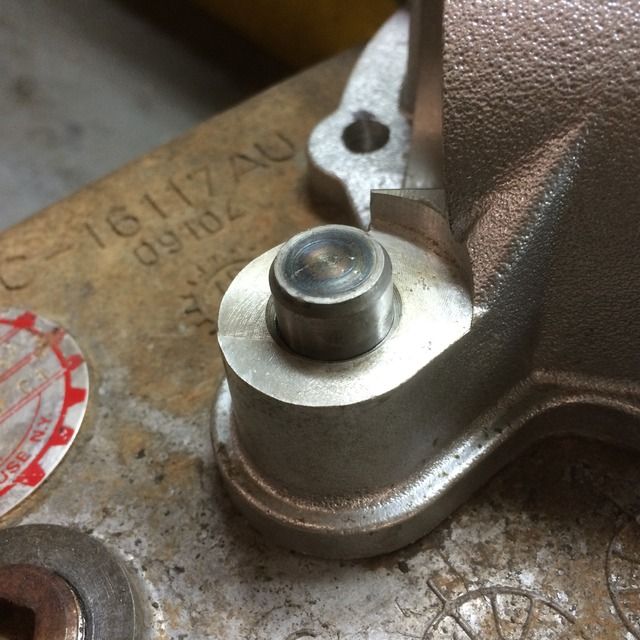 Photo fukit is such a Pain in the arse, I will have to break up the pics into smaller groups so I don't lose any work. I rotated a couple of pics, they show rotated in the photbucket, but when I load them, they show original rotation. |
|
chevystroker
Jeeper
NEVER CONFUSE HAVING A CAREER WITH HAVING A LIFE ! ! ! ! ! !
Posts: 896
|
Post by chevystroker on May 15, 2016 1:33:25 GMT -4
Didn't want to keep you waiting too long. I am at my Dad's with a slow internet connection so the pictures will have to be uploaded later.  This is something I thought of a few years ago, but only just found the time to try it now. Two shift forks in the T/C both running on a common shift rail: High-neutral-Low and the 2WD-4WD shift forks. Shift lever turns a cam inside T/C, cam has a slot for the High-neutral-Low fork and the 2WD-4WD fork is lifted with a hump on the cam and is spring return. High-neutral-Low fork is not attached to the shift rail and slides up and down on the shaft. 2WD-4WD fork is pinned to the shaft, so the shaft moves with the fork as the cam lifts it up. Plan is to make a longer shift rail and extend it out the aft end of the T/C. It will be threaded for a rod end and controlled by one lever through a linkage. This will control the 2WD-4WD fork which will still be pinned to the shaft, but will not have the protruding boss to ride on the cam. The 2WD-4WD fork will still be controlled by the slot in the cam but will have its own lever. New longer shaft with shift fork pinned, and no boss extended to ride on cam. 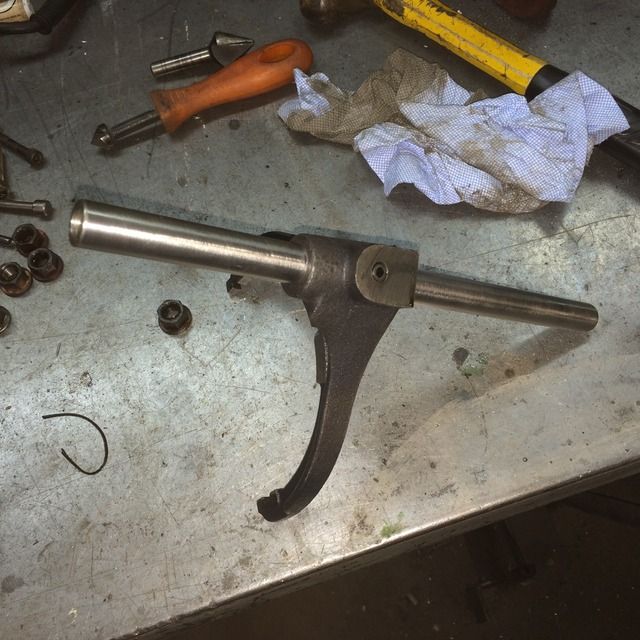 Test fit out end of SYE tail housing. Bolted on washer is a seal retainer. Hope that does for now. Hope to have the rest of the pics up Sunday night or on Monday. Oh, indexing the T/C up flat as well. Just had to drill 6 new holes. Too easy. |
|
chevystroker
Jeeper
NEVER CONFUSE HAVING A CAREER WITH HAVING A LIFE ! ! ! ! ! !
Posts: 896
|
Post by chevystroker on May 14, 2016 19:29:58 GMT -4
Disassembling shift rail and fork in preparation for twin sticking the T/C. OK. You got my attention. Just lost 30 mins of my life to np231 2wd low range reading... I still don't see how twin sticks fit into the equation. Adding a range box of some sort? LOL You will just have to wait until I post the rest of the pictures. And no, there is no range box or anything. |
|
chevystroker
Jeeper
NEVER CONFUSE HAVING A CAREER WITH HAVING A LIFE ! ! ! ! ! !
Posts: 896
|
Post by chevystroker on May 14, 2016 10:08:13 GMT -4
|
|
chevystroker
Jeeper
NEVER CONFUSE HAVING A CAREER WITH HAVING A LIFE ! ! ! ! ! !
Posts: 896
|
Post by chevystroker on May 14, 2016 9:45:00 GMT -4
Started on the T/C for the SYE last week, but have been to busy to post. Bee working on the loft for the garage at the same time. 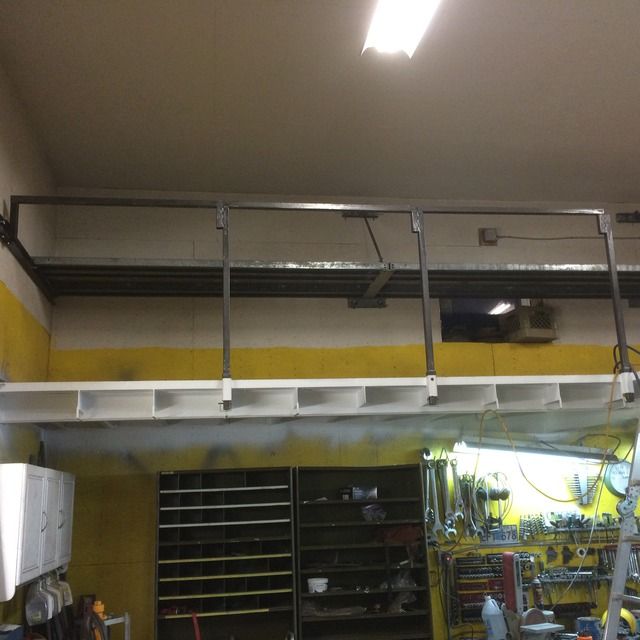 This is max droop on rear shaft. Be interesting to compare to the CV shaft when it is in. 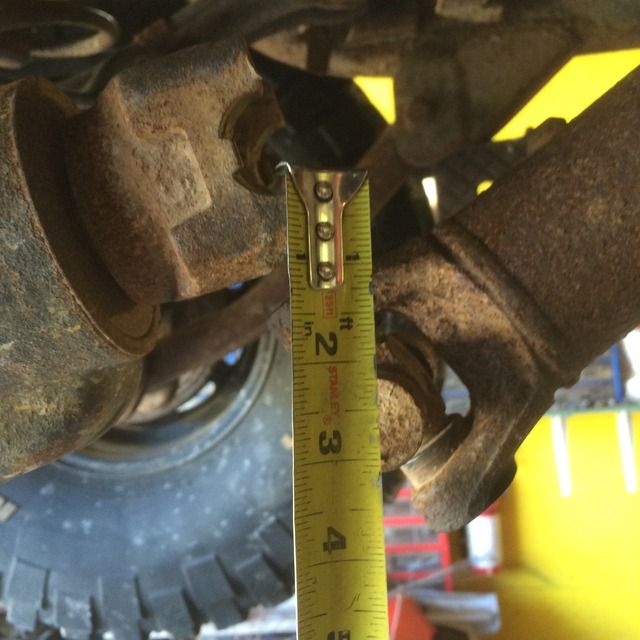 Cam buckle straps are great for lowering skidplates or gastanks. 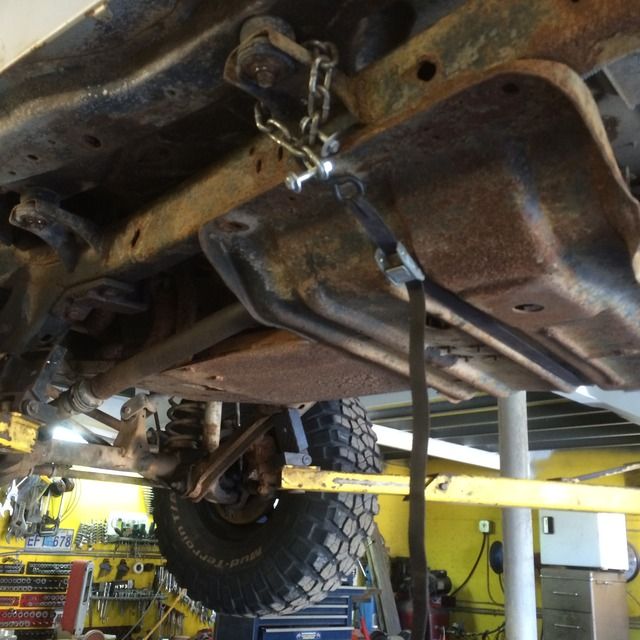 T/C shifter has nutserts in the tunnel, so had to cut the head off all of them. Will be replacing with the u-nuts. 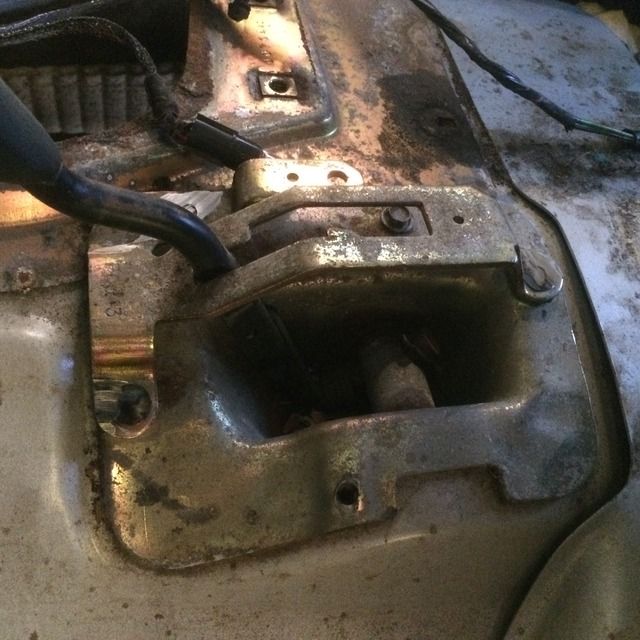 With the shifter removed, I can get at the top two bolts a lot easier. 4 out of 6 of the studs came out with the bolts. 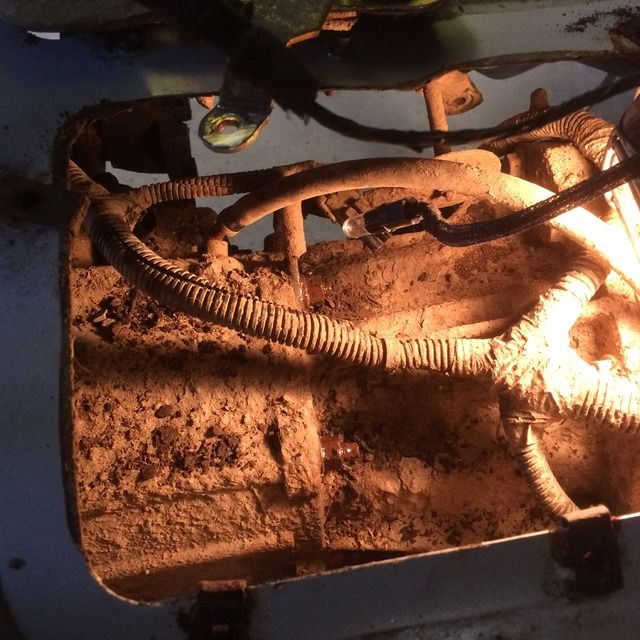 Needed a universal and long extension to get at the one on the passenger side.  A view of the T/C shifter linkage partially disassembled. I won't be needing this anymore. 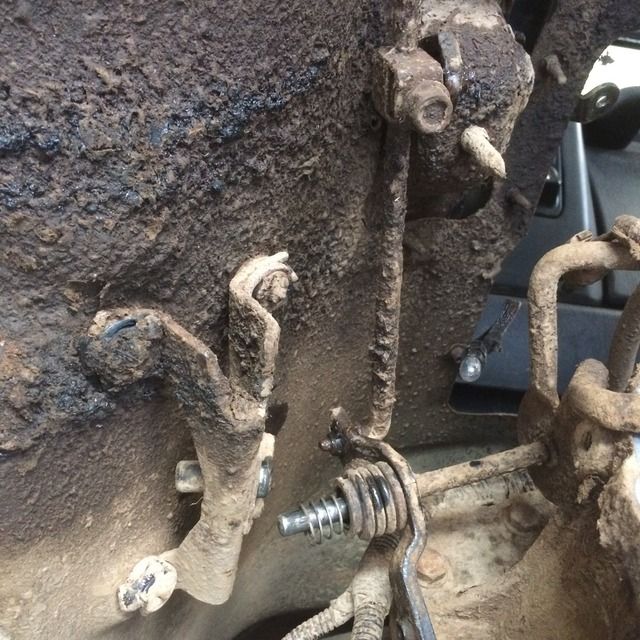 T/C part no and serial number 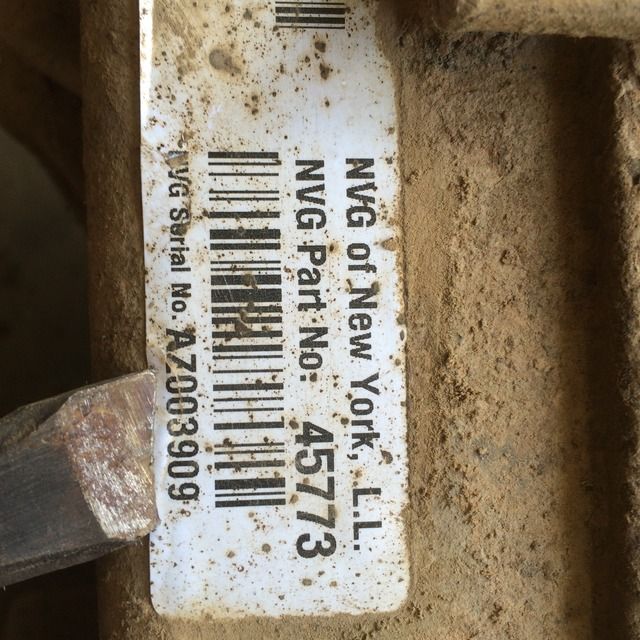 Freshly washed and ready for disassembly. 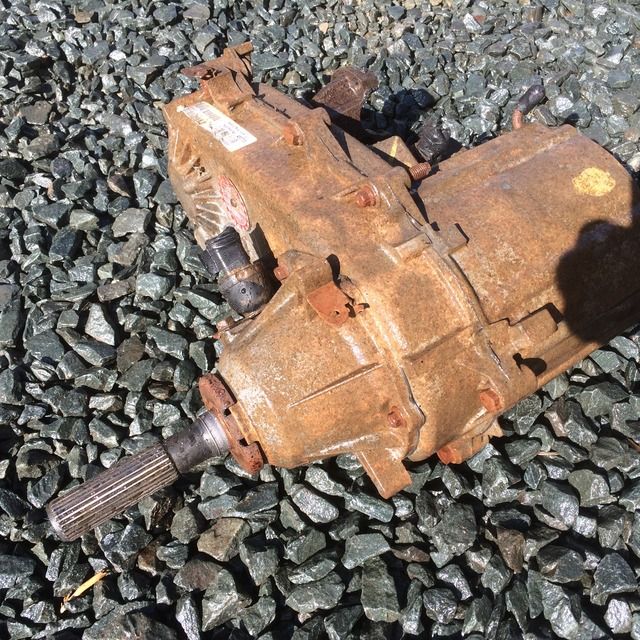 Manufactured 24 May 2004 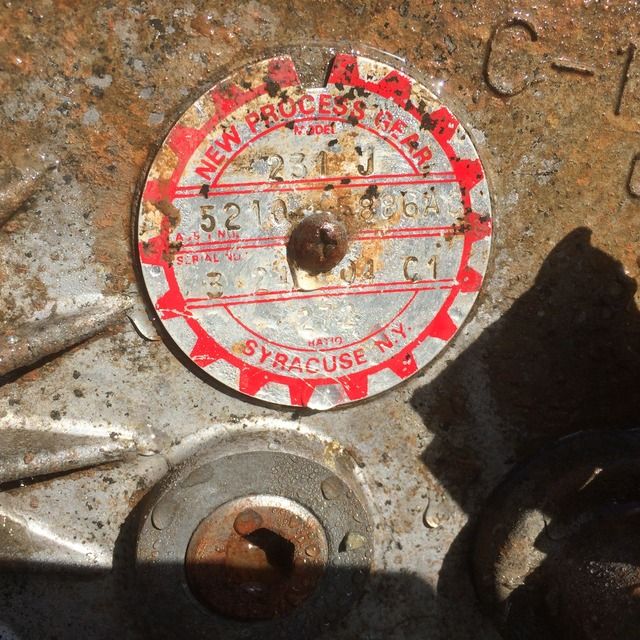 |
|
chevystroker
Jeeper
NEVER CONFUSE HAVING A CAREER WITH HAVING A LIFE ! ! ! ! ! !
Posts: 896
|
Post by chevystroker on May 14, 2016 9:28:48 GMT -4
Typical jeep; Fuel mileage has been steadily decreasing over the last few years, and had bottomed out at 13 to 14 mpg, down from a one time high of 17 mpg which was just after putting the electric fan on. Now, the last two tanks have been at 16 mpg, BEFORE I changed out the injectors. It must have known I was going to do work on it. Makes it hard to do a direct comparison when you make a change. May have had a plugged converter, and it finally blew out. Won't know until I get the exhaust pulled. It does have a bit more of a drone now. |
|
chevystroker
Jeeper
NEVER CONFUSE HAVING A CAREER WITH HAVING A LIFE ! ! ! ! ! !
Posts: 896
|
Parts
May 9, 2016 10:17:04 GMT -4
Post by chevystroker on May 9, 2016 10:17:04 GMT -4
Also got a soft top for the LJ Is this the factory soft top? |
|


 Remember, Spooning can lead to Forking.


 Will be modifying the TJ floor shifter.