Post by Creepy on May 9, 2012 3:06:23 GMT -4
Me and Devin are working on a nice roll bender design. I want it for cage stuff, Devin needs it for a '34 Ford to roll square stuff in the cab ,hotrod stuff.
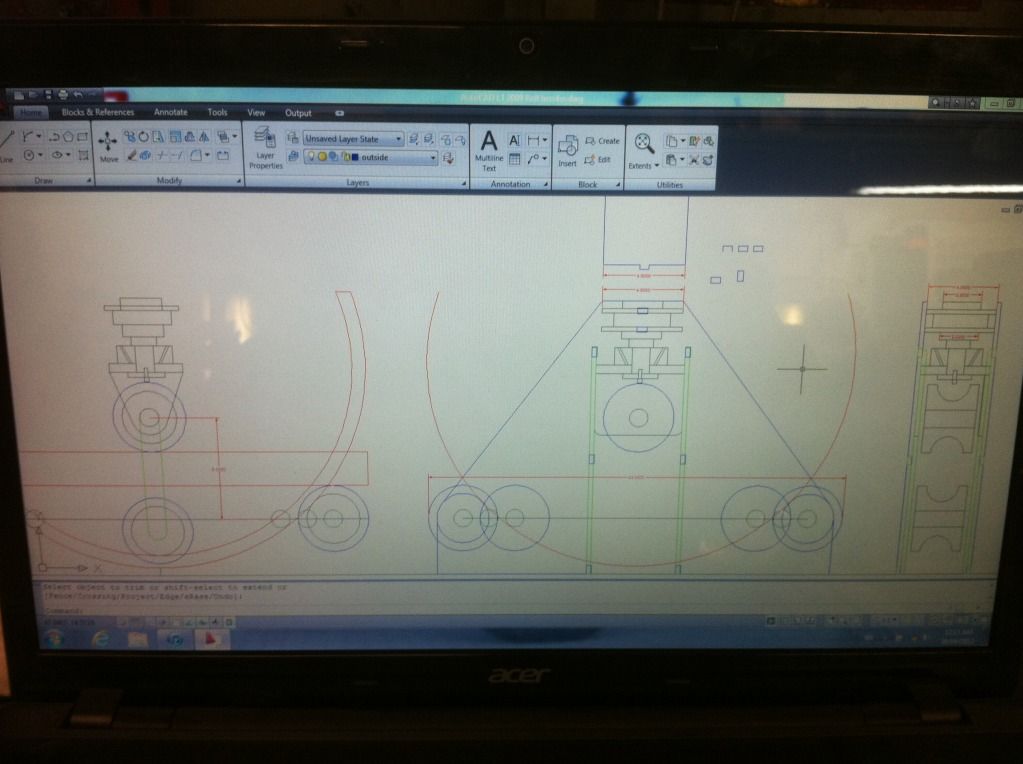
I'm doing the Cad work and plates, Devin is doing the lathe work for dies. He made a radius cutter for the dies too. I burned out 2 on the plasma table after we brainstormed some ideas with parts we had avail.
A lot of Cad work on this one. No guessing or winging it. Those little interlocking tabs are hateful to draw.
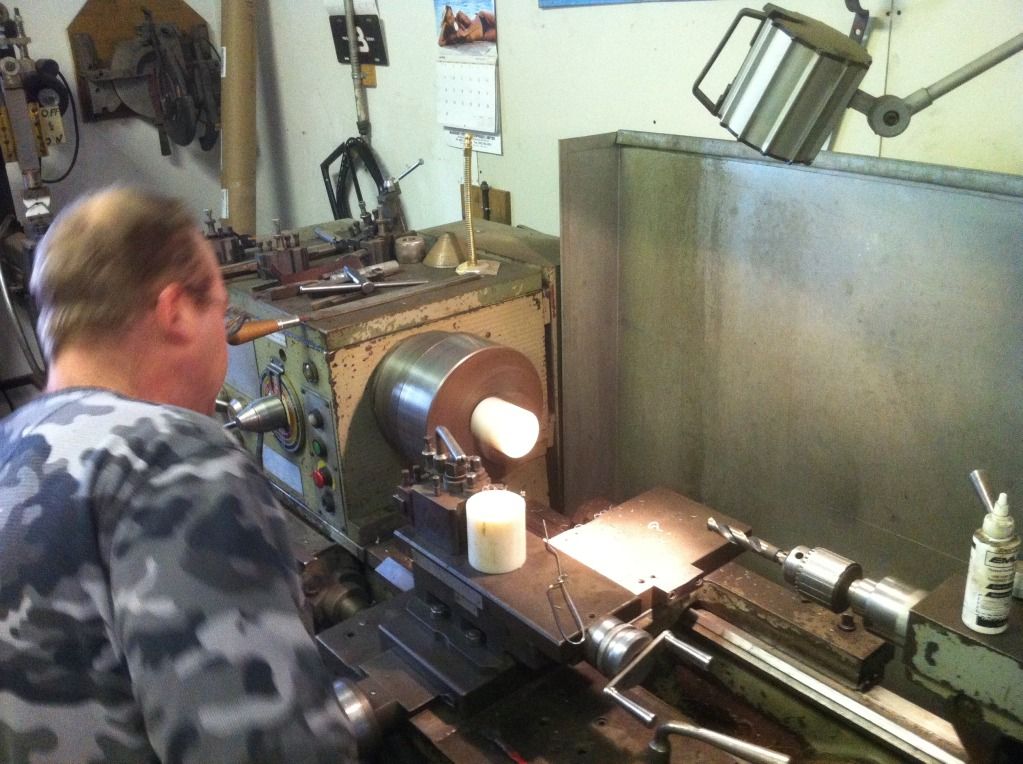
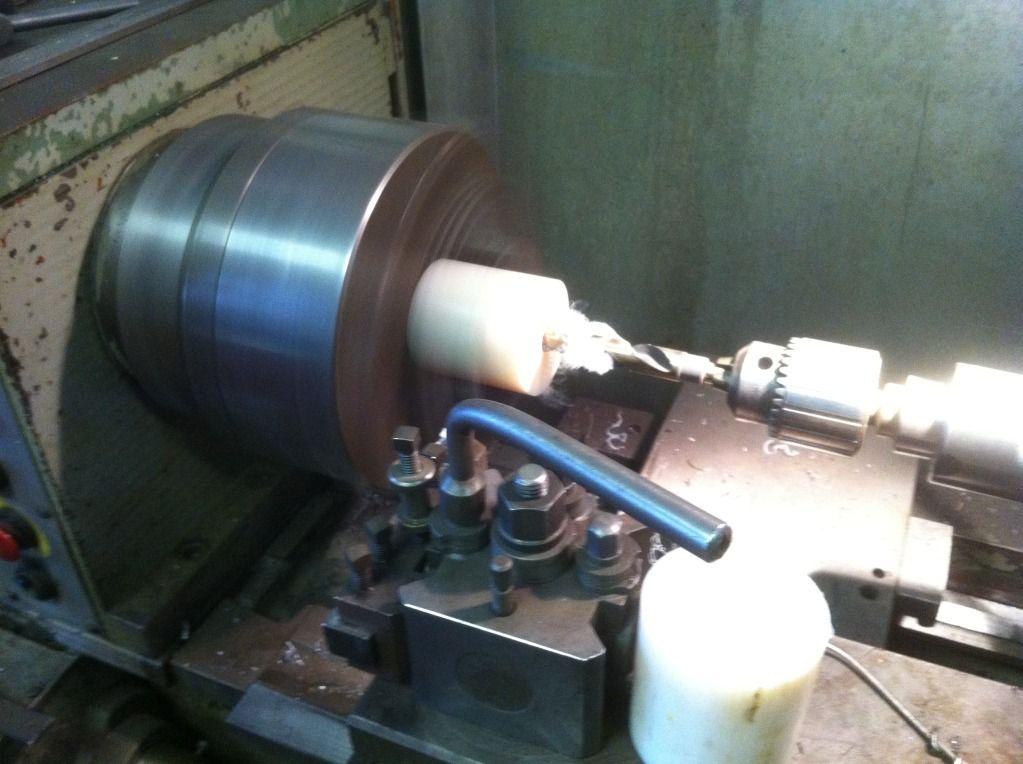
Devin running his lathe. Just some plastic in the pic.
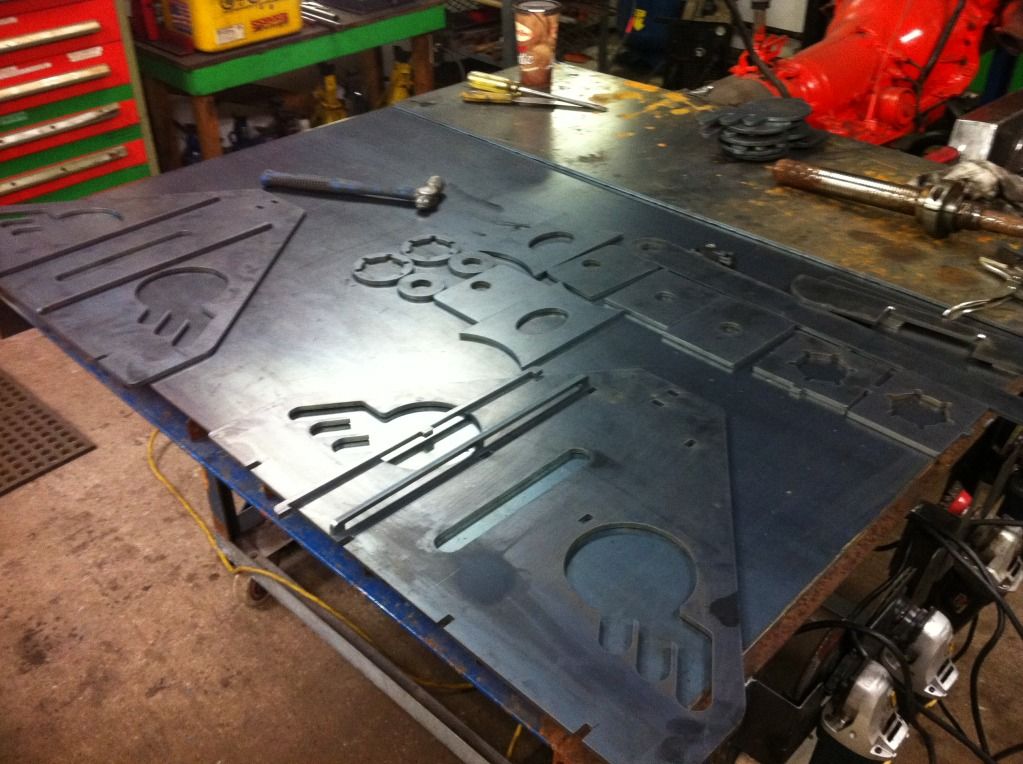
A big burn in 1/4". Program ran 45minutes. The table is working awesome too, no hiccups and great quality, near as good as it gets for plasma.
Bit of risk cutting two at once, no toolproving, just givin 'er. That's about $150 in material. One tiny mistake away from scrap....
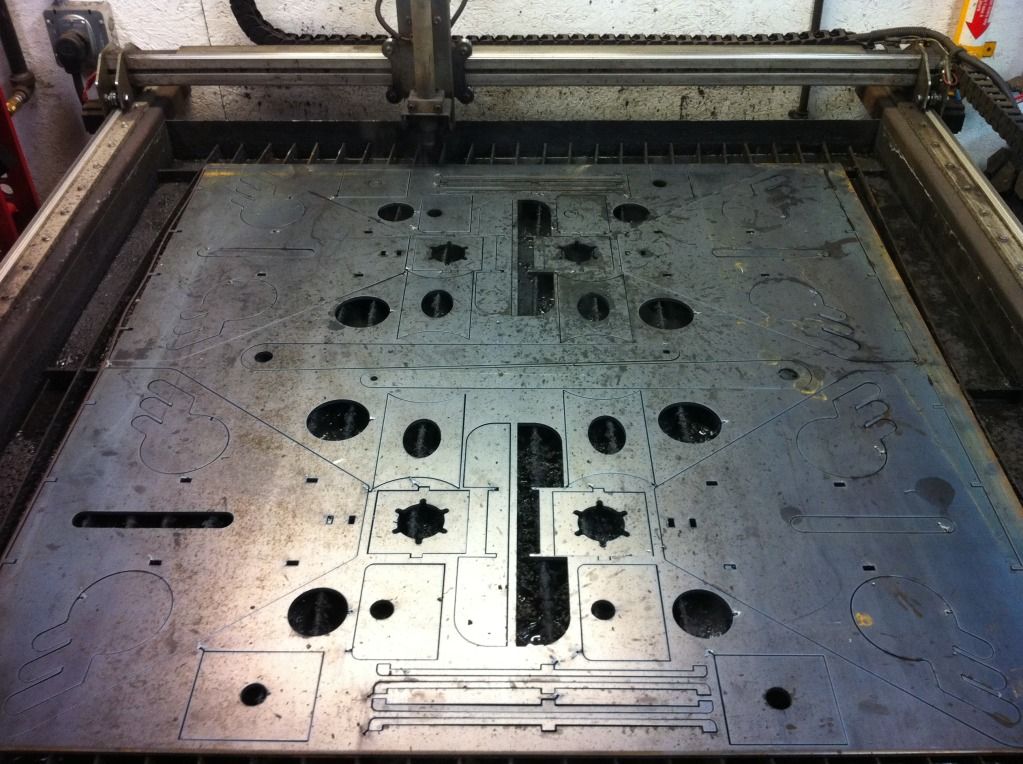
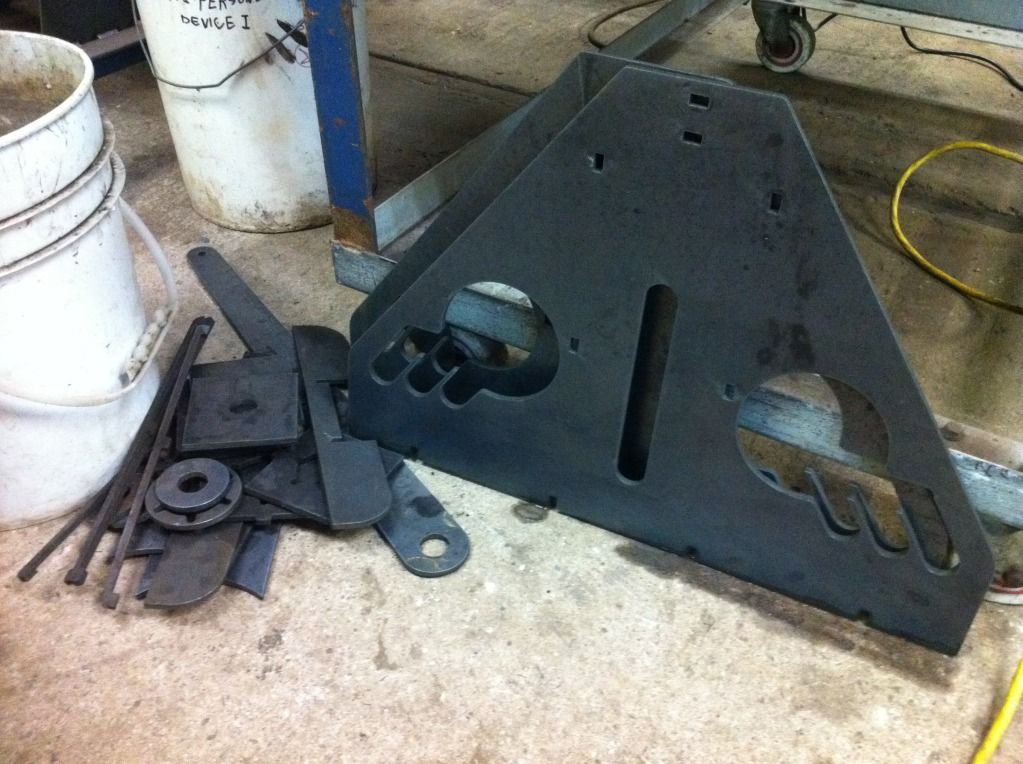
I ran with lower water than usual, it cut down on the steam, and the slag was a bit less....but the parts get dirty.
Had to bucket wash them all b4 any tack welds.
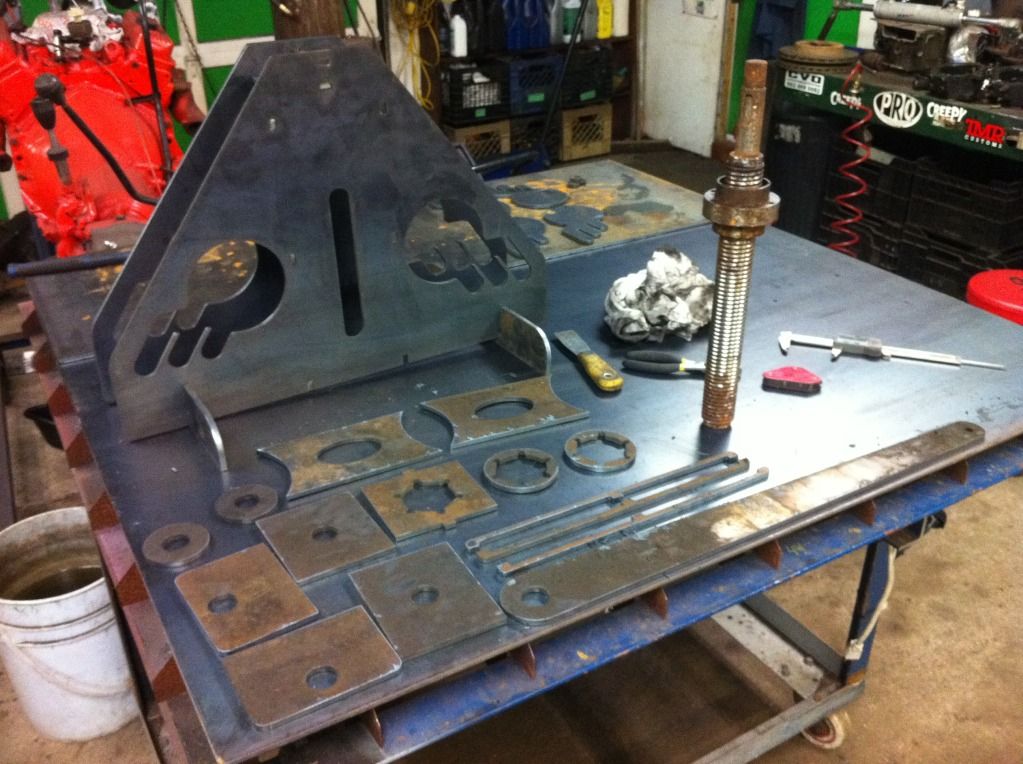
Laying it out and testing to see if I designed in anything dumb that won't assemble. Happens sometimes....
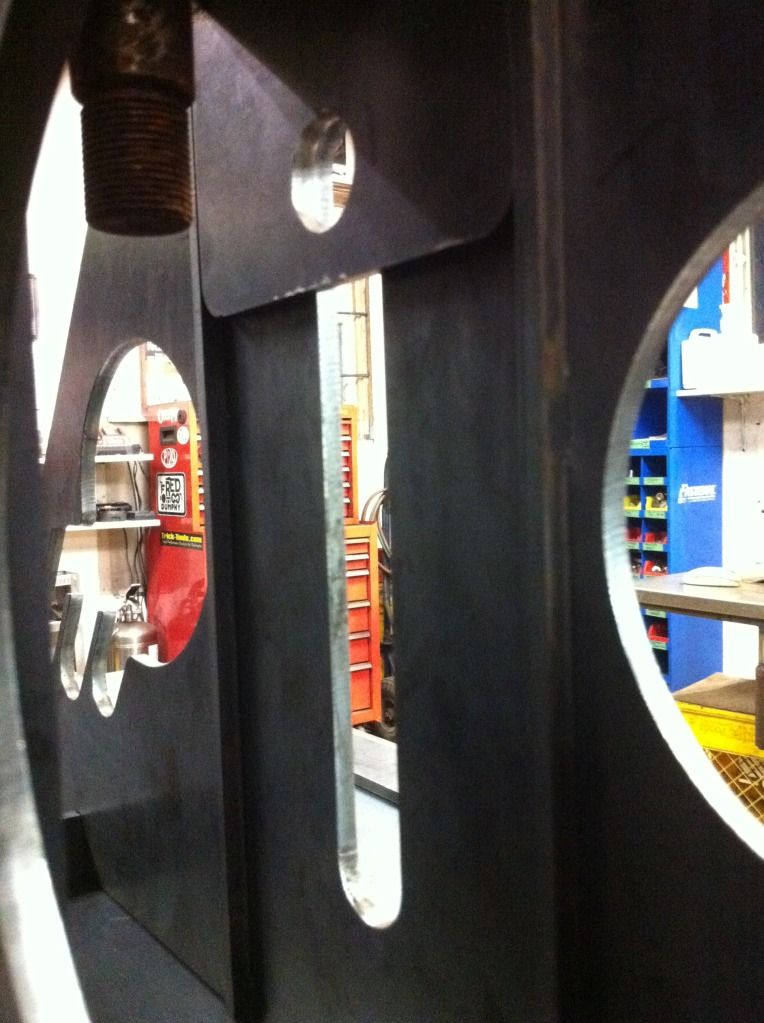
Looks like it will work. The funky windows make it easy to pop the dies in/out, and to tighten up the radius of bend once at the end of the stroke of the screw. Not totally neccessary, but Devin suggested it, and I made 'em all funky looking. The dies will just go thru the windows, have their own pin and collars. Just plop them in.
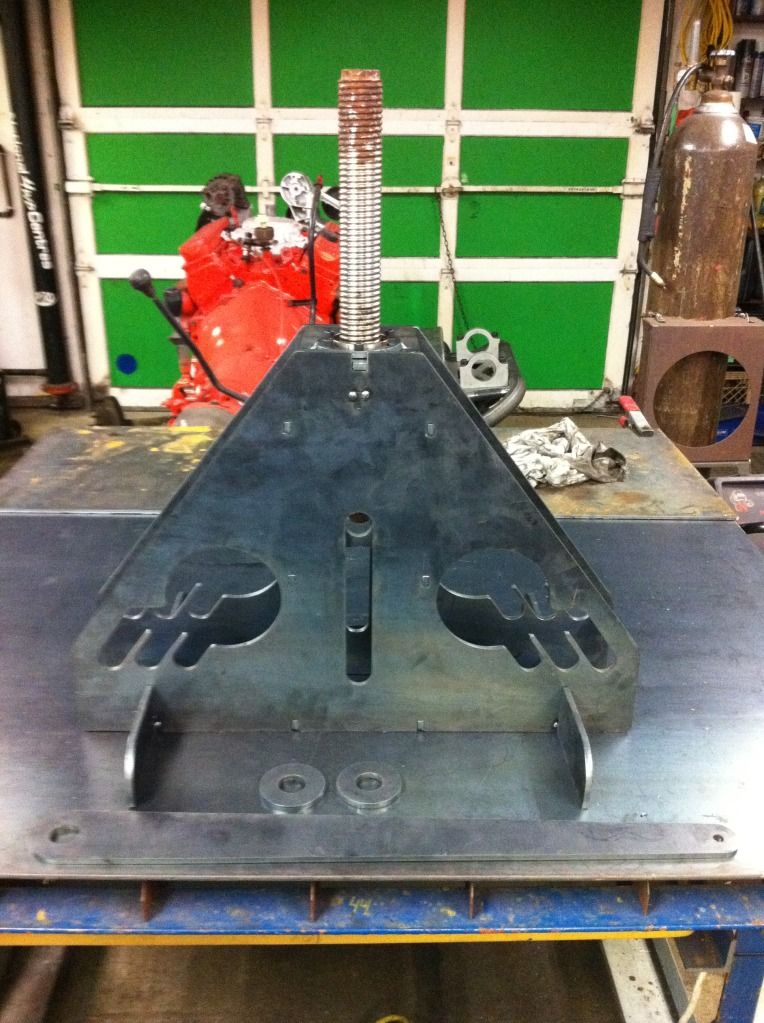
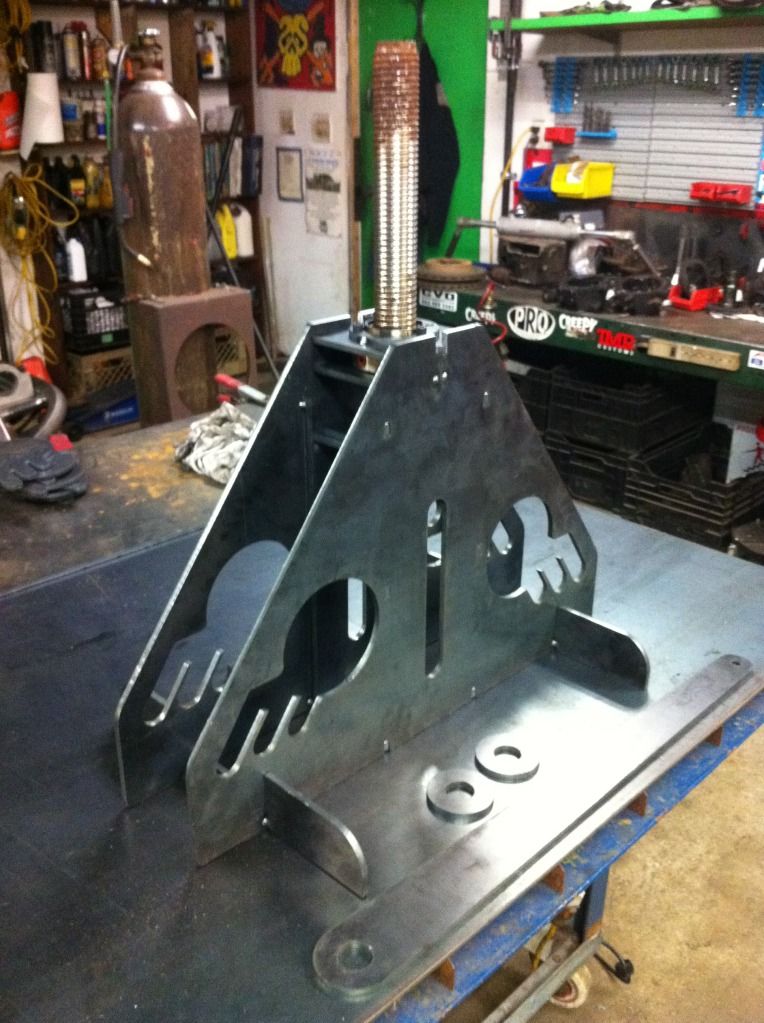
Ballscrew from CNC machine I salvaged from a junkpile. It probably has .00005" runout or something, its off a grinder. Its a little rusty now, but some weasel piss and usage it will be fine. These can take tremendous loads and maintain extremely tight tolerances. But I'm just using it for a jackscrew. Weld a steering wheel on the top maybe? ;D
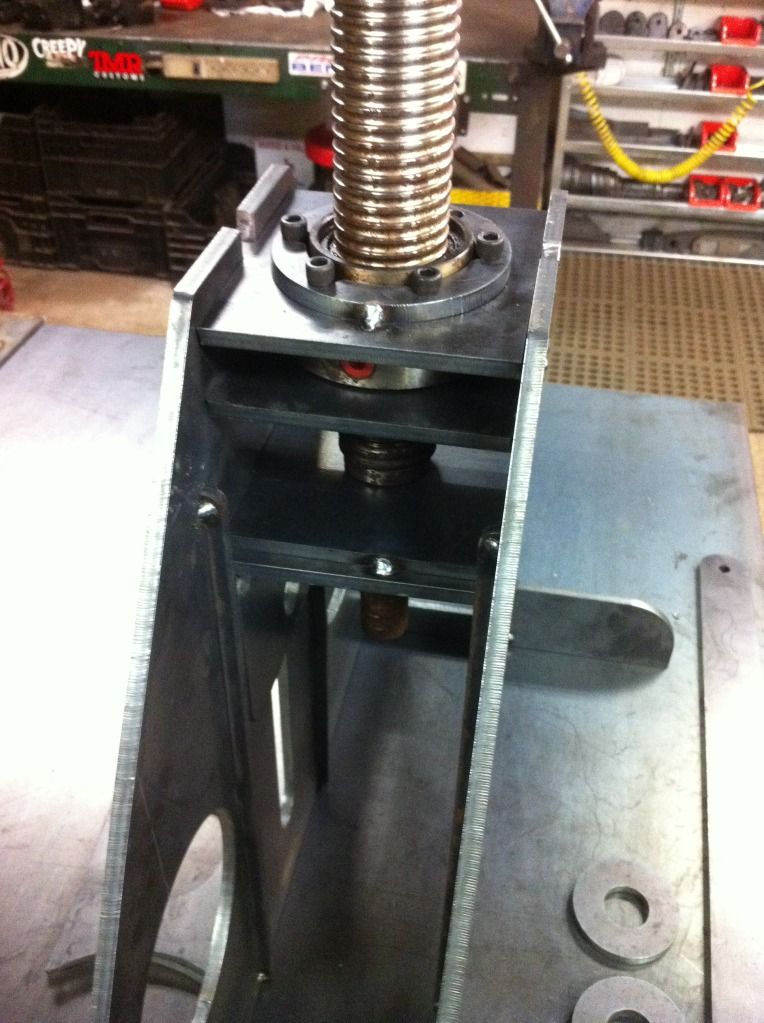
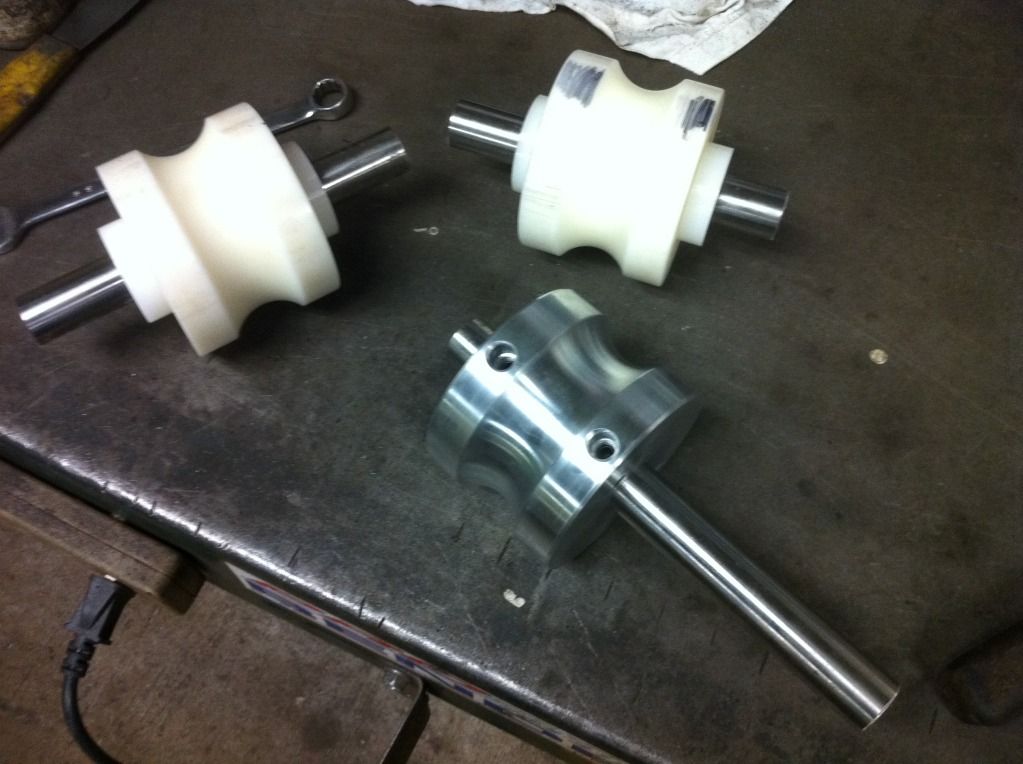
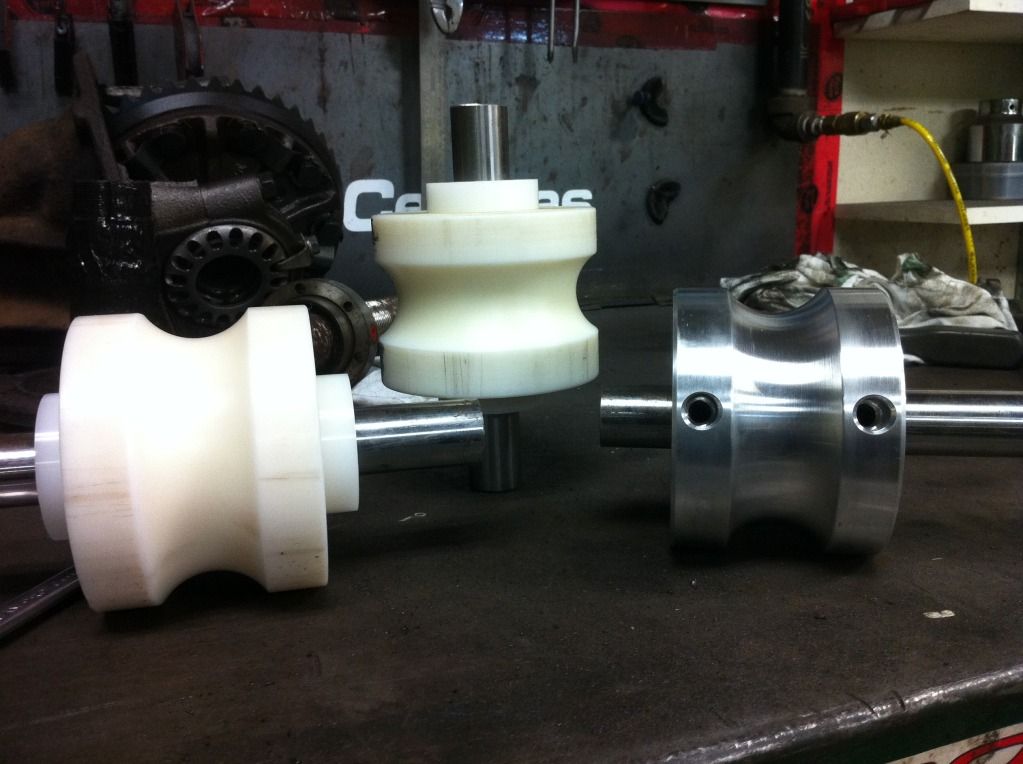
Sliding saddle to hold the top die. We are going to drive this die, the bottoms will be idlers. If the material slips, we'll double drive the bottom dies and idle the top.
See the saddle guides? Its kinda my favorite thing, because I wasn't going to put anything there, let the ballscrew keep the die straight. Devin talked me into it and ii was a bit of a challenge to figure out how to do it on the plasma table.
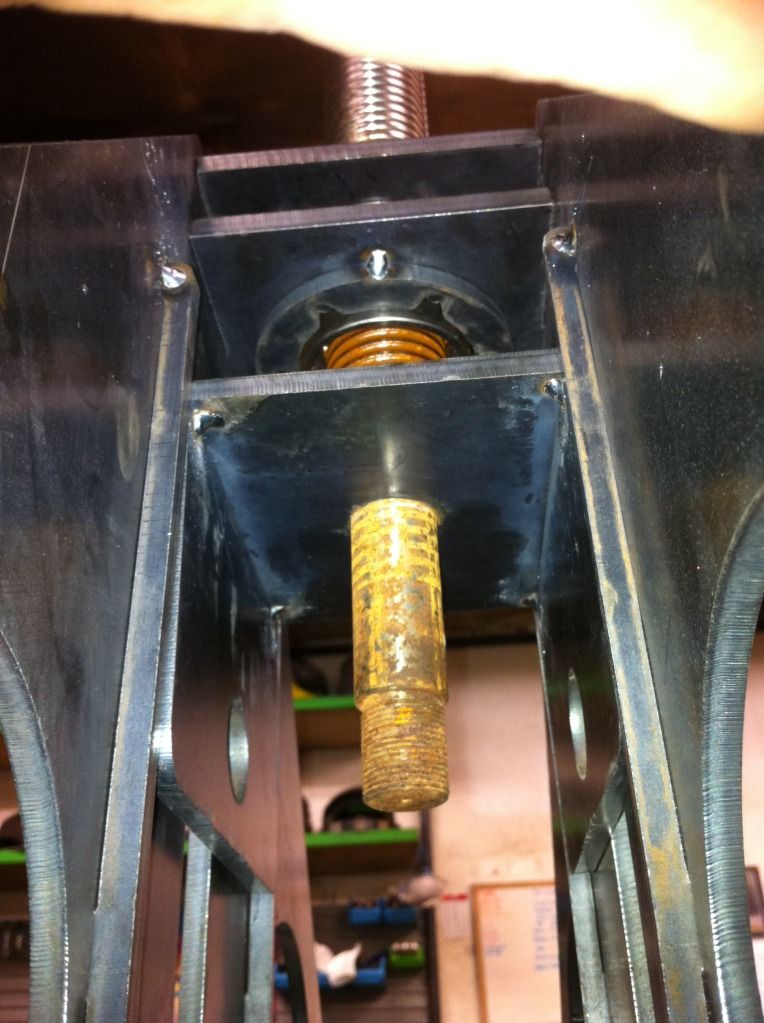
Looking up from underneath at the saddle for the top die. Going to 'hack and tap' the shaft like a t-case to get rid of that extra length. Need to tap the shaft and add a thick washer, so the saddle will retract when its unscrewed.
Devin is working on the dies, more pics later this week.
Oh.....capabilities: 2" OD material can be bent to a 16"ish rad, on the outside lower die positions. (Which is pretty damn tight!) By moving the dies to the inside slots I think the material will start hitting the screw mount before it runs out of travel.
We are going to make dies for small stock too, like 3/8" round. Even square stuff!
I love making tools, and this is coming along pretty good so far. ;D Will be able to make some really unique looking parts.
I'm doing the Cad work and plates, Devin is doing the lathe work for dies. He made a radius cutter for the dies too. I burned out 2 on the plasma table after we brainstormed some ideas with parts we had avail.
A lot of Cad work on this one. No guessing or winging it. Those little interlocking tabs are hateful to draw.
Devin running his lathe. Just some plastic in the pic.
A big burn in 1/4". Program ran 45minutes. The table is working awesome too, no hiccups and great quality, near as good as it gets for plasma.
Bit of risk cutting two at once, no toolproving, just givin 'er. That's about $150 in material. One tiny mistake away from scrap....

I ran with lower water than usual, it cut down on the steam, and the slag was a bit less....but the parts get dirty.
Had to bucket wash them all b4 any tack welds.
Laying it out and testing to see if I designed in anything dumb that won't assemble.
 Happens sometimes....
Looks like it will work. The funky windows make it easy to pop the dies in/out, and to tighten up the radius of bend once at the end of the stroke of the screw. Not totally neccessary, but Devin suggested it, and I made 'em all funky looking. The dies will just go thru the windows, have their own pin and collars. Just plop them in.
Ballscrew from CNC machine I salvaged from a junkpile. It probably has .00005" runout or something, its off a grinder.
 Its a little rusty now, but some weasel piss and usage it will be fine. These can take tremendous loads and maintain extremely tight tolerances. But I'm just using it for a jackscrew. Weld a steering wheel on the top maybe? ;D
Sliding saddle to hold the top die. We are going to drive this die, the bottoms will be idlers. If the material slips, we'll double drive the bottom dies and idle the top.
See the saddle guides? Its kinda my favorite thing, because I wasn't going to put anything there, let the ballscrew keep the die straight. Devin talked me into it and ii was a bit of a challenge to figure out how to do it on the plasma table.
Looking up from underneath at the saddle for the top die. Going to 'hack and tap' the shaft like a t-case to get rid of that extra length. Need to tap the shaft and add a thick washer, so the saddle will retract when its unscrewed.
Devin is working on the dies, more pics later this week.
Oh.....capabilities: 2" OD material can be bent to a 16"ish rad, on the outside lower die positions. (Which is pretty damn tight!) By moving the dies to the inside slots I think the material will start hitting the screw mount before it runs out of travel.
We are going to make dies for small stock too, like 3/8" round. Even square stuff!
I love making tools, and this is coming along pretty good so far. ;D Will be able to make some really unique looking parts.