|
|
Post by Cherokee Chief on Jan 7, 2012 19:30:54 GMT -4
make shure your metal is good and clean, grind all the black pits out of the frame. That way you will get good penetration without the rust spatter from the pits.
Good luck and if you need any help welding let me know.
Darren
|
|
Creepy
Administrator  Dartmouth
Posts: 18,718
|
Post by Creepy on Jan 7, 2012 19:35:54 GMT -4
fishmouth or angle the patches. don't have straight ends on the patches. some big holes in them to weld thru to the frame (like a plug weld) will help too.
You may want to make the bottom plates a little wider than the frame plates, so you can weld from above and catch the lip. Instead of being underneath welding overhead. Unless you are going to flip the frame on its side for welding.
Good luck, you have a lot of work ahead of you.
if you need a tip with a difficult spot, show us.
|
|
jmurphy
Jeeper
 Trail Master 2 - Valley
Posts: 994
|
Post by jmurphy on Jan 8, 2012 19:11:58 GMT -4
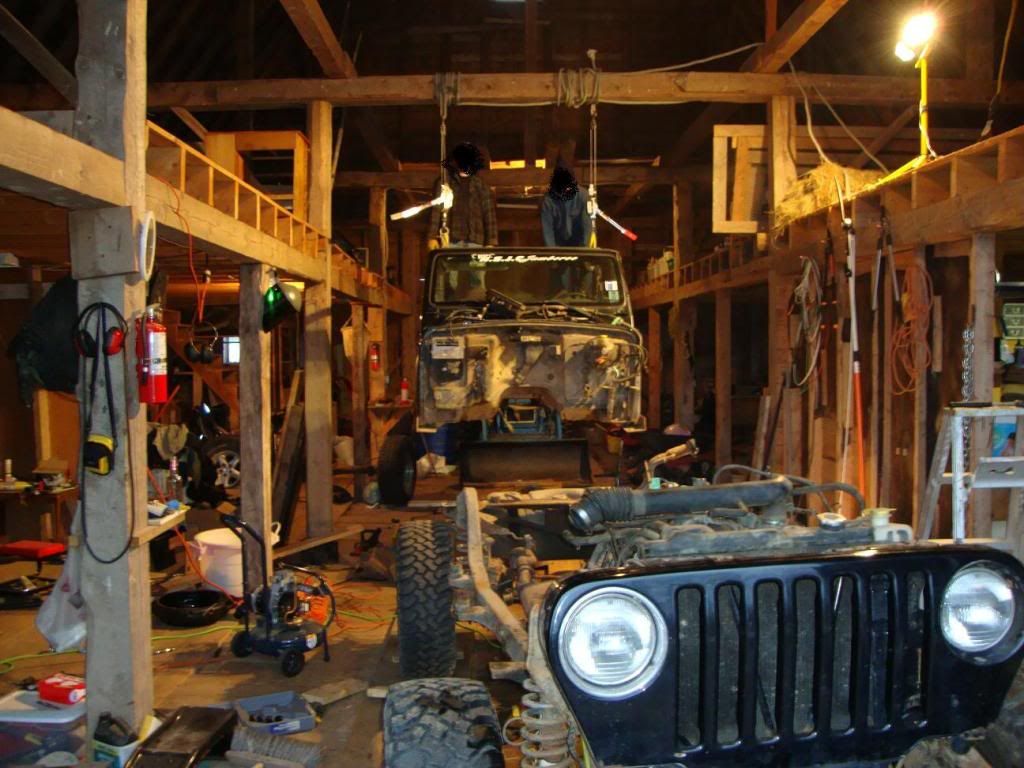
Thanks guys for the advice and offers to help. I got some stuff done today. I also learned I need more clamps than I have. I got one frame sleeve mostly tacked together, just need to cut out the pieces for the rear arch in the frame. I'm taking some "inspiration" from these guys: autorust.com/store/jeep?zenid=945ab0accc3546a353a66923372e417bI don't plan (at this point) to cut out the bottom of the frame like they recommend for their kits, there is still a lot of good metal in my frame that I can use for plugs welds etc. My plan is weld the main sleeve together on the bench, then install it and weld along it's perimeter and some holes for plugs. I will burn the "arches" (white template in photo) in place once the sleeve is permanently welded in. This avoids most overhead welding.   Here's a picture of a bead as I worked on the settings on my MIG. Polite, constructive feedback is appreciated...   Here's a piece of what I'll be working on once the frame is fixed up...  Weekends need to be longer... Jonathan |
|
Creepy
Administrator
Dartmouth
Posts: 18,718
|
Post by Creepy on Jan 8, 2012 23:49:42 GMT -4
That looks great. If the curve comes out and good as that it should be a fine repair job.
The weld looks fine for what you are doing. More heat and go slower or turn the wire down some and slow down. its sitting a bit high in the middle, and the bottom edge kinda turns under. Even out the bead.
Still plenty good enough for what you are doing. Half my stuff looks like that, but no pics. ;D Lots of practice ahead. ;D
|
|
dan
Jeeper
Membership Co-ord - Valley
Posts: 3,397
|
Post by dan on Jan 9, 2012 6:21:55 GMT -4
I also learned when doing my frame over that you can never have enough clamps....
Like Jan said, arches look great.it would be a really good idea anywhere where the frame is thin on the bottom to repalce it with fresh metal. that could be done fairly easily by cutting out the section for replacing part-way around the bend, and using a strap of plate a little wider than the frame. then you can tuck it up in place, and and be able to weld from the side, instead.
I would STRONGLY suggest replacing the metal along where your trans skid is bolted in. cut out that section, use the old metal as a template, and make a new piece with half-inch nuts welded in place, rather than the nutserts.
if memory serves me correct, you said you're welding with a 120V welder, turn it up to full heat, turn the wire down a hair, and burn. I never had mine off of full heat when welding 1/8" to my frame. weld for a few minutes, and then take a break to let the welder cool down.
|
|
|
|
Post by HardKorTJ on Jan 9, 2012 14:52:29 GMT -4
Weld threw primer is a good idea to use under your patch panel.
|
|
|
|
Post by HardKorTJ on Jan 9, 2012 14:55:52 GMT -4
and dont forget to drill some holes in it so u can plug weld it also
|
|
The Garagemahal
Moderator  Build Thread King
Resident Army Ranger , Navy Seal , Super-Warrior , Ninja !!
Build Thread King
Resident Army Ranger , Navy Seal , Super-Warrior , Ninja !!
Posts: 11,518
|
Post by The Garagemahal on Jan 9, 2012 19:20:29 GMT -4
Keep the pics coming , looking good
|
|
|
|
Post by Cherokee Chief on Jan 9, 2012 20:02:32 GMT -4
Looks good Jonathan.
your plan is weld the main sleeve together on the bench, Tack it in many spots and do a trial fit, also weld in different spots (stitch weld) and also test fit. from past experience the metal will squirm and distort with heat from welding and then will not fit so check often so you can fix it.
Keep it up Jam is comming. take off some time from work (cough cough sick days)
Darren
|
|
jmurphy
Jeeper
Trail Master 2 - Valley
Posts: 994
|
Post by jmurphy on Jan 16, 2012 22:10:24 GMT -4
I got a little more done this past weekend and tonight. I got the two pieces cut out to close in the arch for the rear wheel well.   I also got the rear control arm and sway bar brackets cut off the pass side and mostly ground down. Things would go faster except my "helpers" are still a little small to hold a grinder. My daughter is two and a half and my son is six months.  High hopes for this weekend to get the pass side totally cut out and at least tacked together. Forecast looks good too, hard to work when it's -13. Jonathan |
|
dan
Jeeper
Membership Co-ord - Valley
Posts: 3,397
|
Post by dan on Jan 17, 2012 6:20:57 GMT -4
it's easier than you think! lol
it's coming along nice. really good looking plates. looks like it will be some purrdy when you're done.
|
|
jmurphy
Jeeper
Trail Master 2 - Valley
Posts: 994
|
Post by jmurphy on Jan 21, 2012 20:12:23 GMT -4
Drivers side is all done except for final prep and welding. Working on the pass side now. Got all the stock bracketry removed and the 5 pounds of scale chipped off. The side pieces are cut out and next up is the curved pieces for the arch. I'm investigating options to stretch the wheelbase at rear. Once I get the final position of the transfer case output figured out I can mock the rear axle in place and see what the drive shaft length and angle looks like. I'd like to raise / relocate the gas tank but I also want to keep the rear seat... Fuel cells are more affordable than I expected...  Jonathan |
|
jmurphy
Jeeper
Trail Master 2 - Valley
Posts: 994
|
Post by jmurphy on Jan 21, 2012 20:16:56 GMT -4
it would be a really good idea anywhere where the frame is thin on the bottom to repalce it with fresh metal. . Good suggestion! You can't really see it in the pics but I am replacing the bottom of the frame along the whole length I am repairing. Using two pieces of 2 5/8" wide x 60" long. Jonathan |
|
dan
Jeeper
Membership Co-ord - Valley
Posts: 3,397
|
Post by dan on Jan 21, 2012 22:19:16 GMT -4
that's good. that should make things much more solid in the back.
doing a mild stretch is a great modification. look up the "YJ plastic tank stretch modification" on Pirate4x4 and all across the web. they use a heat gun, and remold the front portion of the gas tank and push it in, giving room for the differential. makes enough room for like a 3-4" stretch.
|
|
jmurphy
Jeeper
Trail Master 2 - Valley
Posts: 994
|
Post by jmurphy on Jan 30, 2012 22:34:21 GMT -4
Some progress this past weekend. Got the passenger side sleeve installed and 90% welded. Also found another soft spot near the front... another opportunity to practice frame patching.  Using a welder with a 20% duty cycle makes for slow work. I ran out of wire on Saturday and put in a new spool of Prax-air's house brand. Felt a big difference in puddle control after the change. Just seemed to burn better, less spatter or something? Frame shots:   Also picked up some rims that in a past life were rigging on Jeff's Pirate Ship. Ordered my tires too. Went with 37x12.5R17 BFG Krawlers. Sample shot of hub in rim:  |
|